Integrate external e-mail accounts
Integrating External Mail Accounts in mailbox Office
In mailbox Office, you can integrate external mail accounts from other providers such as gmx, web.de, or mail.de. Google has blocked access via mailbox Office since the end of April 2022. If you are a Gmail customer, you can completely migrate to mailbox.
Benefits of Integrating External Accounts
- The integration of external accounts offers you several advantages:
- You can read the mails of the integrated accounts directly in the web client.
- You can send mails with the sender address of the integrated account directly from the web client.
- You have the option to manage all your mail accounts centrally and in one place via the mailbox web client.
- With the Unified Mail function, you can even use shared folders for multiple mail accounts, such as a central inbox or a shared folder for sent messages.
Settings with the External Provider
For some providers, it is necessary to make certain settings to enable the integration. The provider must allow access via IMAP or POP3 as well as SMTP (for sending mails).
Please consult the documentation or support of your respective provider.
Different Types of Integrating an External Mailbox
Mail Client Function
mailbox Office functions as a mail client and displays the messages of the external provider separately.
You have an additional, separate mailbox under the mailbox-inbox.
When composing a new mail, the external mailbox will be available for selection in the From field. Sent messages and the inbox are, by default, only displayed in this mailbox, not in the primary mailbox-inbox.
Both external and mailbox-mailboxes can be integrated here, which can be used by multiple people simultaneously. Business customers, for example, can conveniently integrate team mailboxes such as marketing@own-domain.de.
For most users, this option is the best choice.
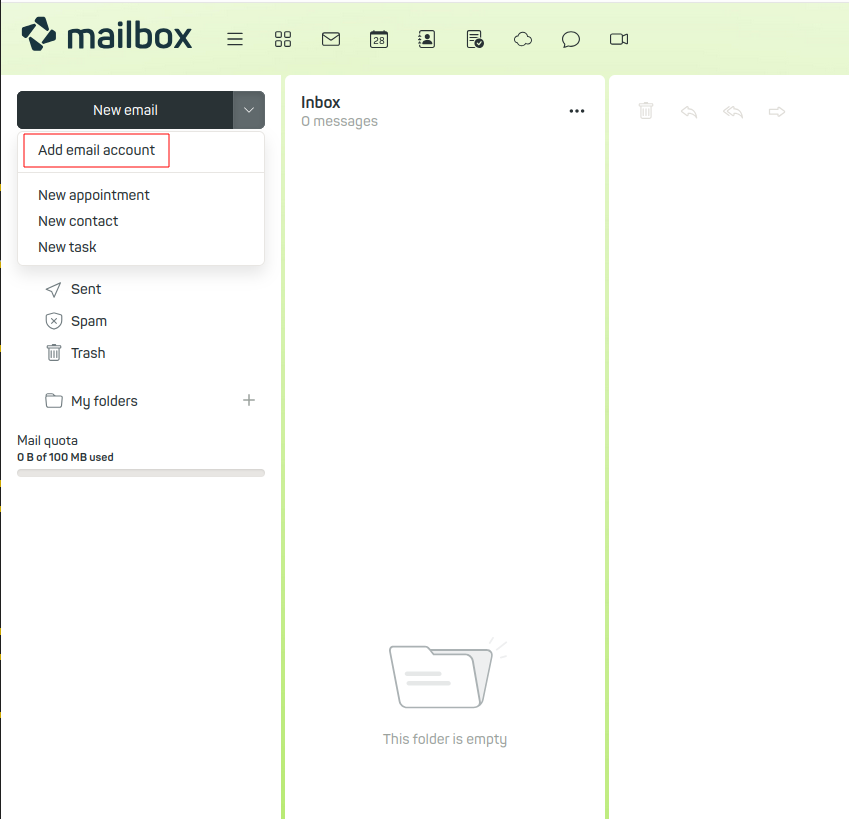
Please click on the drop-down menu in the New mail field and select Add mail account.

Figure 1: Adding an external mail account.
Removing an Integrated Mailbox
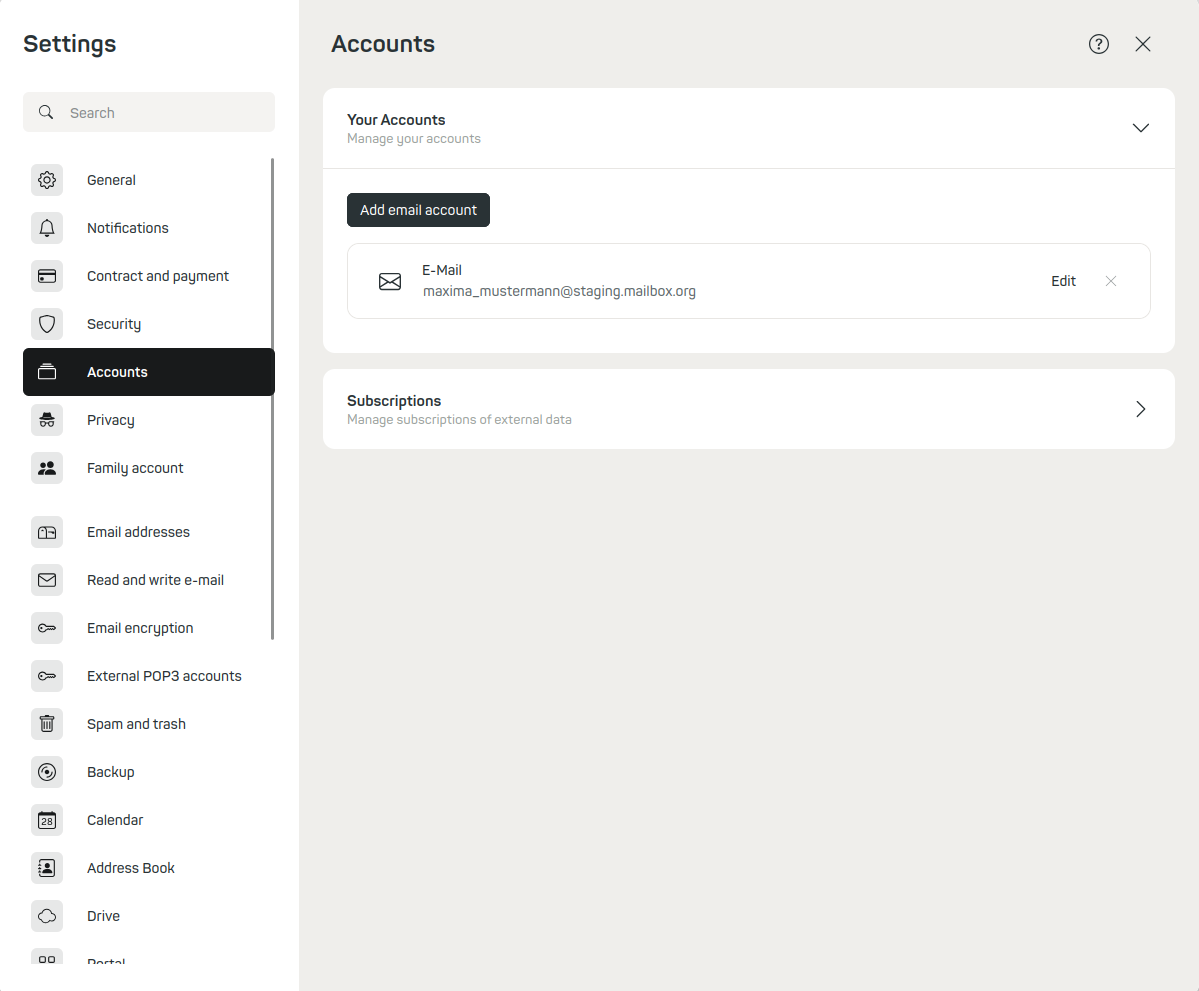
To remove a mailbox added in this way, proceed as follows: All settings | Accounts | Delete (x)

Figure 2: Removing an external mail account integrated as a mail client. Under Edit, the Unified Mailbox can be activated, more on this below.
POP3 Mailbox (Fetch Only)
If you use the POP3 function, all mails are fetched from the external provider and, by default, deleted there. The mails are then only stored in your mailbox-inbox. Here you can also apply Sieve rules and use mailbox encryption. Sending with the address of the external mailbox is not possible. Mail retrieval takes place approximately every 30 minutes but may, due to load balancing, take longer in individual cases.
Setup
Proceed as follows for the setup: All settings | Retrieve external POP3 mail accounts | Enter the login details of your external provider
Example:
markus.mustermann@extern.de
Removing a POP3 Mailbox
To remove a mailbox added in this way, proceed as follows:
Locate the corresponding mailbox under Configured tasks and click Delete. Already retrieved messages will, of course, remain available to you.
Mail Relay Function (Full Integration)
With this option, you integrate an external mailbox via IMAP and SMTP. This allows you to select the external mailbox in the From field when composing a new mail.
When setting up, you will receive a confirmation mail in the external mailbox. By confirming, you prove that you actually have access to this mailbox. Afterwards, you can send mails with the address of the external mailbox via the mailbox-servers (Mail Relay).
Receiving mails of the external address in the mailbox-inbox is not possible this way. Sent messages of the external address end up exclusively in the Sent Objects folder of the mailbox-inbox.
This option is only recommended if you do not intend to send to professional mail providers or business addresses.
Setup Alternative senders
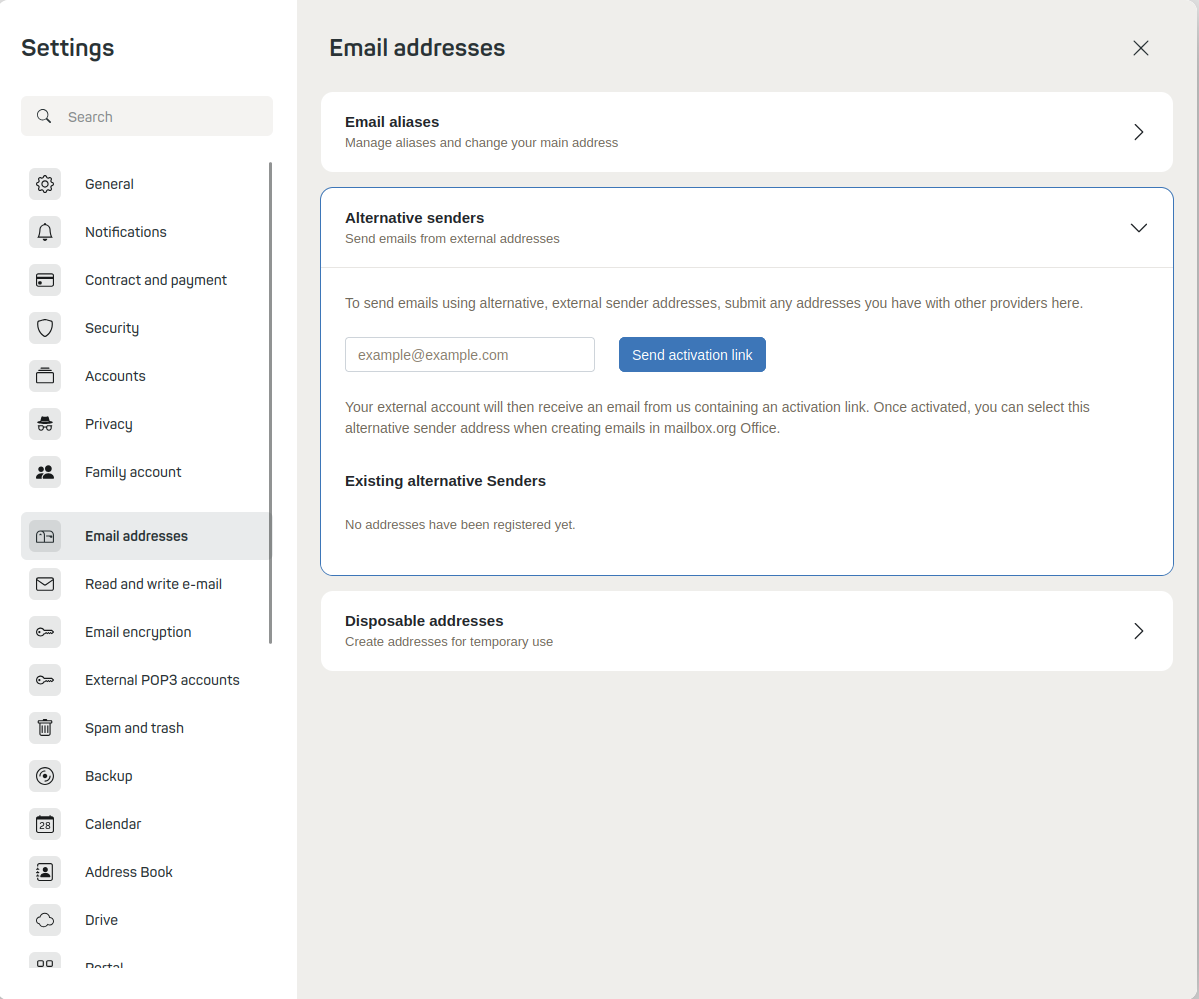
Proceed as follows for the setup: All settings | Mail addresses | Alternative senders | Enter the mail address of your external provider | Send activation link

Figure 3: Adding an alternative sender and deleting an already added alternative sender.
Removing a Mail Relay Mailbox
To remove a mailbox added in this way, proceed as follows:
Locate the corresponding mailbox under Existing alternative senders and click Delete (x). Already sent messages will remain available.
Notes on Mail Relay
With Mail Relay, mails sent with the address of the external mailbox may regularly be rejected. The reason is that the domain of the address and the sending server do not match (DKIM error).
As more and more large mail providers check this information for plausibility, you must expect undeliverable messages when using this method.
Unified Mail
The Unified Mail function offers you the advantage that, when integrating multiple mailboxes via the Mail Client method, the Sent Objects and Inbox folders of all mailboxes are combined. This keeps your mailbox Office clear and organized.
Setup steps
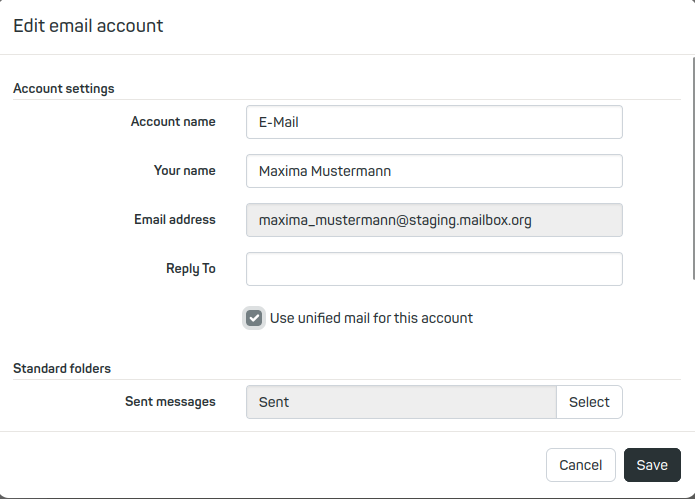
Proceed as follows for the setup: All settings | Accounts | Edit
Check the box Use Unified Mail for this account. This is required for each external mailbox as well as for your mailbox-mailbox. To ensure consistent standard folder names, you can adjust them in the lower section. Then click Save.

Figure 4: Setting up Unified Mail – a shared folder structure for multiple integrated mailboxes.
Important Note on Integrating Outlook Webmailer
Please note that Outlook Webmailer currently cannot be integrated into the mailbox webmailer. The mailbox-webmailer is the platform where you log in at https://login.mailbox.org/.
The reason is that Microsoft uses the OAuth2/Modern Auth method for the authentication of Outlook Webmailer, which is not yet supported by mailbox.
This restriction only applies to integrating Outlook Webmailer into the mailbox-webmailer. The use of Outlook as a standalone mail client, for example on your PC, is still fully possible.
