ActiveSync on Android Devices
Once you have enabled two-factor authentication, external applications such as Outlook, Thunderbird, DAVx⁵, or mobile calendar and contact apps can no longer access mailbox using your regular password.
To do so, you need to create an application password. Without enabled two-factor authentication (2FA), the use of application passwords is optional.
Address book and calendar can be synchronized with your mobile device either via ActiveSync or via CalDAV and CardDAV. This article describes synchronization with Exchange ActiveSync.
Note: Currently, only German screenshots are available. English versions will follow up shortly.
Note on Exchange ActiveSync
Since Exchange ActiveSync (EAS) was developed by Microsoft, it works reliably on most Microsoft devices with Microsoft software.
On other devices (Android, iOS, Linux), support — for example, for multiple calendars — depends on the respective implementation of EAS and cannot be influenced on our side. Therefore, we recommend using the open standards IMAP as well as CalDAV and CardDAV for synchronization.
Open-source alternative
The EAS protocol is developed, patented, and licensed by Microsoft. mailbox recommends that all customers who prefer to use open-source software should opt for CalDAV and CardDAV clients.
Requirements
To use ActiveSync on Android, the standard Mail app or the Gmail app must be active on your device. Only then will the account type Microsoft Exchange or Corporate Sync be available. In the settings of the new Exchange account, you can specify how far back mails from the past should be synchronized. Please choose a maximum of 18 months.
If you want to have older mails available on your mobile device, please use IMAP instead of ActiveSync.
Synchronization of calendar and address book
On your Android device, add a new account of the type Microsoft Exchange or Corporate Sync. In the setup dialog, enter the credentials of your main mailbox account.
Android from version 6 (including current versions such as Android 14)
Setup is very simple here. Just enter your full main mail address and your mailbox password. The rest will be detected automatically.
If you are using your own domain, you may need to manually set the server to login.mailbox.org.
After selecting your desired synchronization settings, your mailbox account is set up via ActiveSync.
Android 4 (Jelly Bean / KitKat / Wear) and 5 (Lollipop)
For setting up ActiveSync on Android versions 4.1 to 5.1.1, please use the following data:
- Domain: mailbox.org
- Username: Local part of your main mail address (everything before the @)
- Server name: login.mailbox.org
Note: If you use your main address with your own domain, please enter this instead of mailbox.org.
Older Android versions
On very old Android devices (up to kernel version 4.1), additional calendars are not transferred via ActiveSync. In this case, please use CalDAV.
Synchronization of tasks
To synchronize tasks, you need an additional app. One example is Tasks & Notes from the Google Play Store. Setup is as follows:
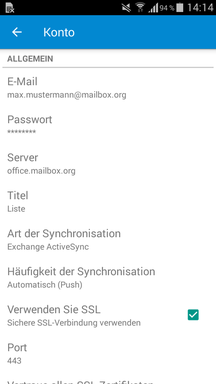
Figure 1: To synchronize tasks with your Android device, you need an additional app, such as Tasks & Notes from the Google Play Store.
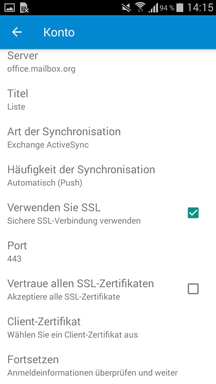
Figure 2: To synchronize tasks with your Android device, you need an additional app, such as Tasks & Notes from the Google Play Store.
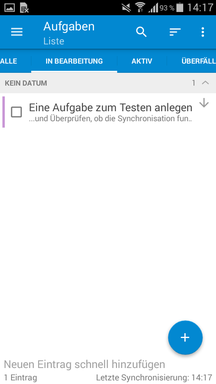
Figure 3: To synchronize tasks with your Android device, you need an additional app, such as Tasks & Notes from the Google Play Store.
Caution: Using Privacy Guard from CyanogenMod may result in duplicate calendars and incorrectly synchronized appointments.
Visual step-by-step guide
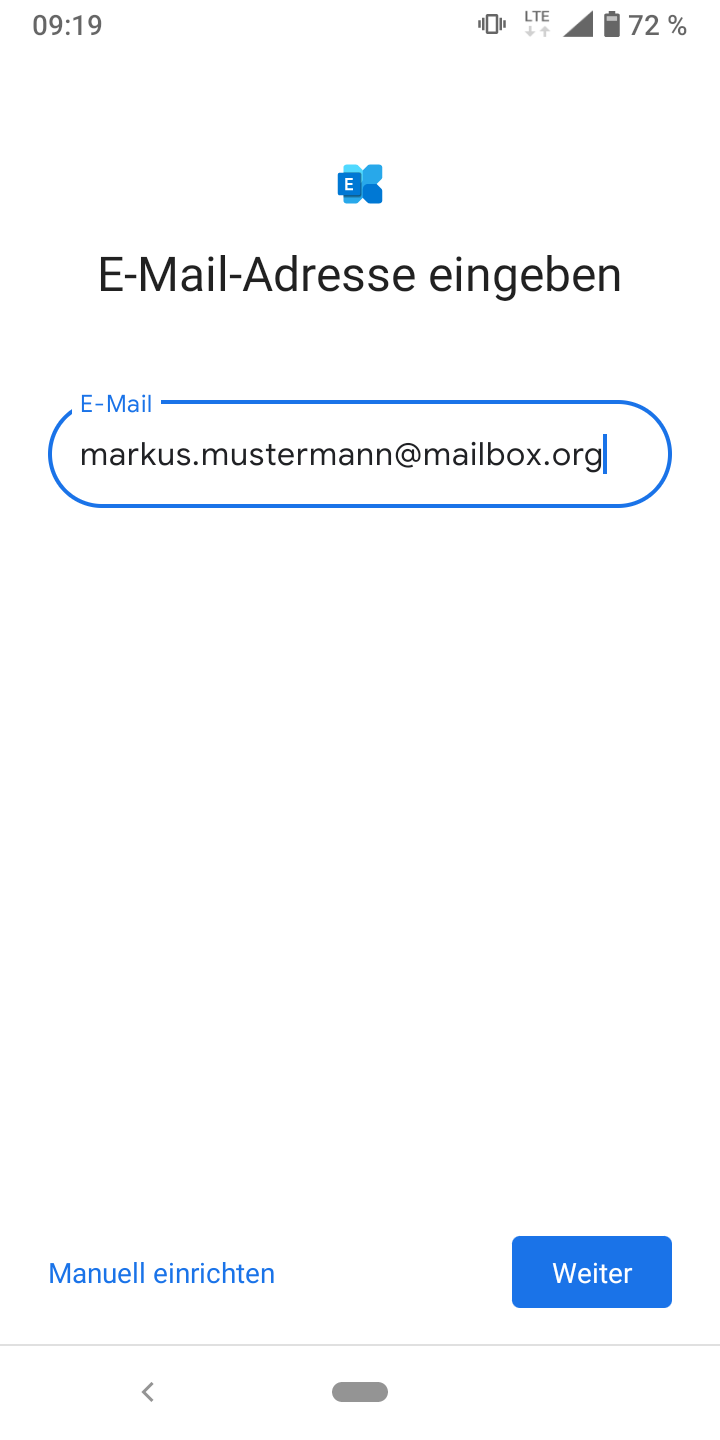
Figure 4: Android can automatically detect parts of the login data.
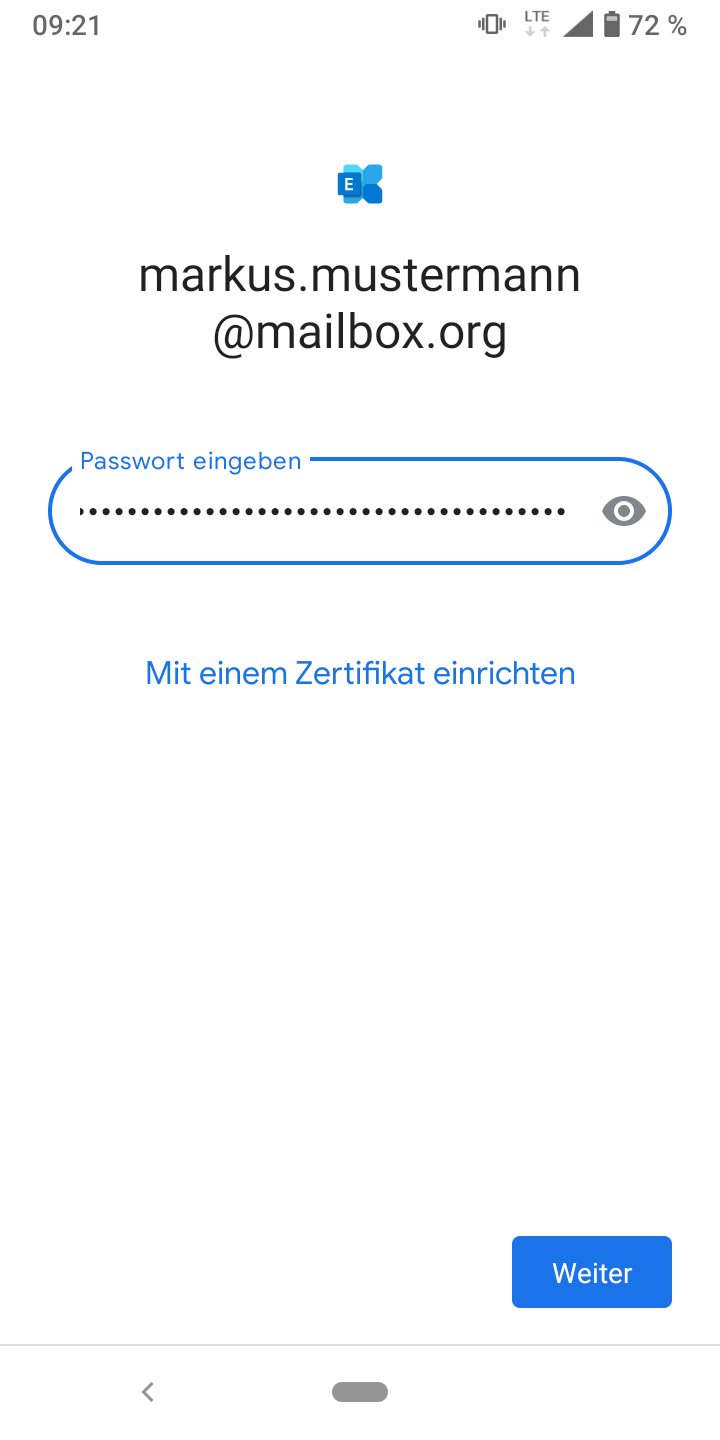
Figure 5: Android can automatically detect parts of the login data.
If you use your own domain, you may need to change the server to login.mailbox.org.
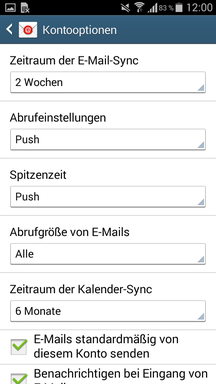
Figure 6: In the settings details you define time ranges and default behavior.
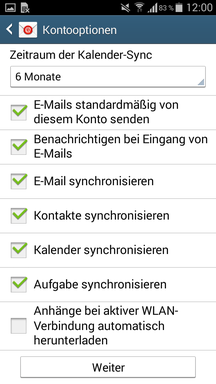
Figure 7: In the settings details you define time ranges and default behavior.
After selecting your synchronization settings, your mailbox account is set up via ActiveSync on your device:
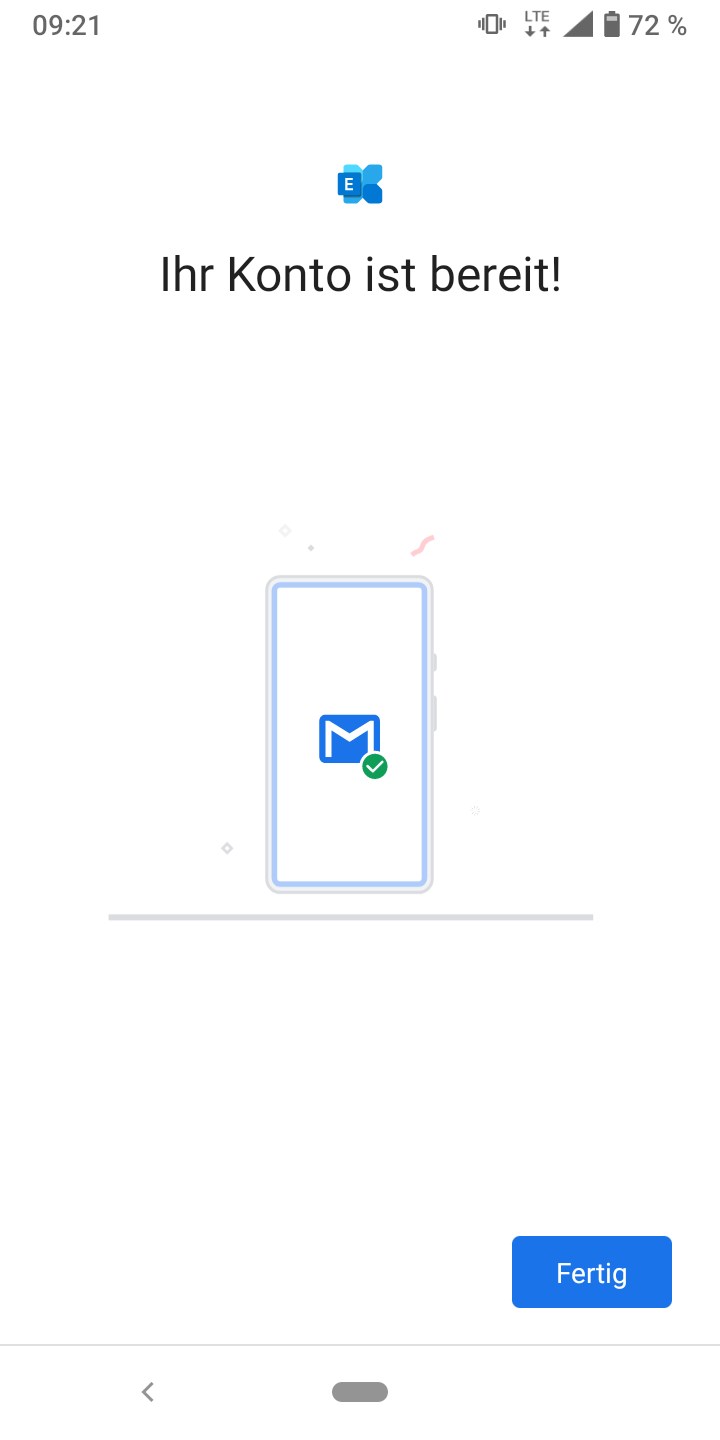
Figure 8: Your account is set up and the first mail is on its way.
Exchange ActiveSync on iOS
You can automatically configure your iPhone or iPad for ActiveSync if you log in to mailbox from a computer and select the menu item All settings | Connect your devices. In the following dialog, choose iPhone or iPad as the platform and Exchange ActiveSync as the application.
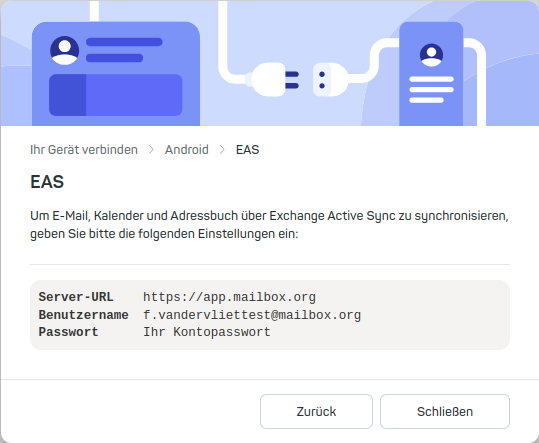
Figure 9: Sync the credentials with your iOS device to load the configuration data.
Exchange ActiveSync on iOS – manual setup
ActiveSync can also be configured manually:
-
Navigate to the corresponding menu and add a new account of the type Microsoft Exchange.
- For iOS 18: Settings | Apps | Mail | Mail accounts | Add account
- For iOS 17 and earlier: Settings | Mail | Accounts | Add account
- For macOS: Mail | Add account
-
Enter your main mail address at mailbox as well as a description and click Next.
-
In the next dialog, select Sign in and enter your mailbox password. Confirm again with Next and select which data iOS should synchronize.
Entering credentials
During the setup process, please enter the following data:
- Mail address: Your main mail address at mailbox
- Domain: mailbox.org
- Username: Your main mail address at mailbox
- Server name: login.mailbox.org

Figure 10: Entering credentials.
If the setup was successful, choose which data iOS should synchronize.
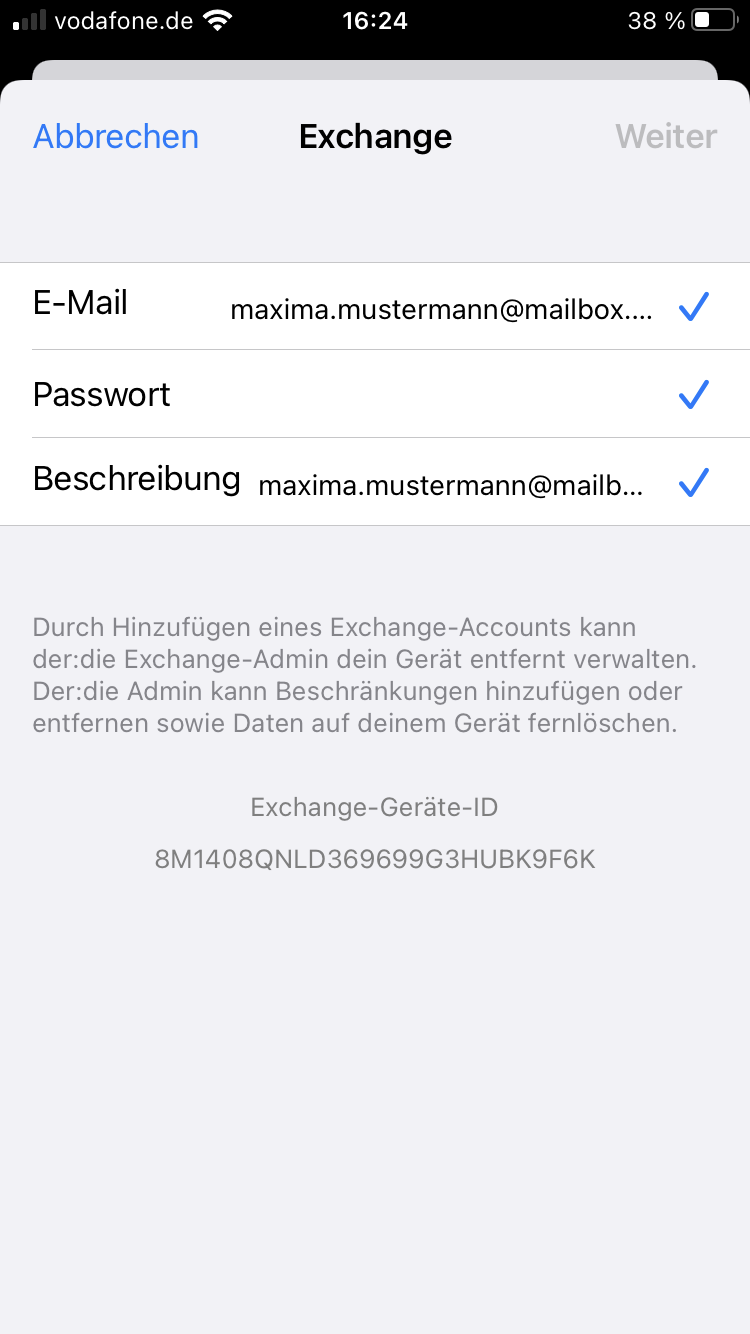
Figure 11: Selecting the data to synchronize.
Done – setup is complete and synchronization starts automatically.
