How to plan a new Meeting in OpenTalk
OpenTalk offers you the possibility to schedule meetings in advance. This allows you to create recurring meetings or prepare individual appointments.
-
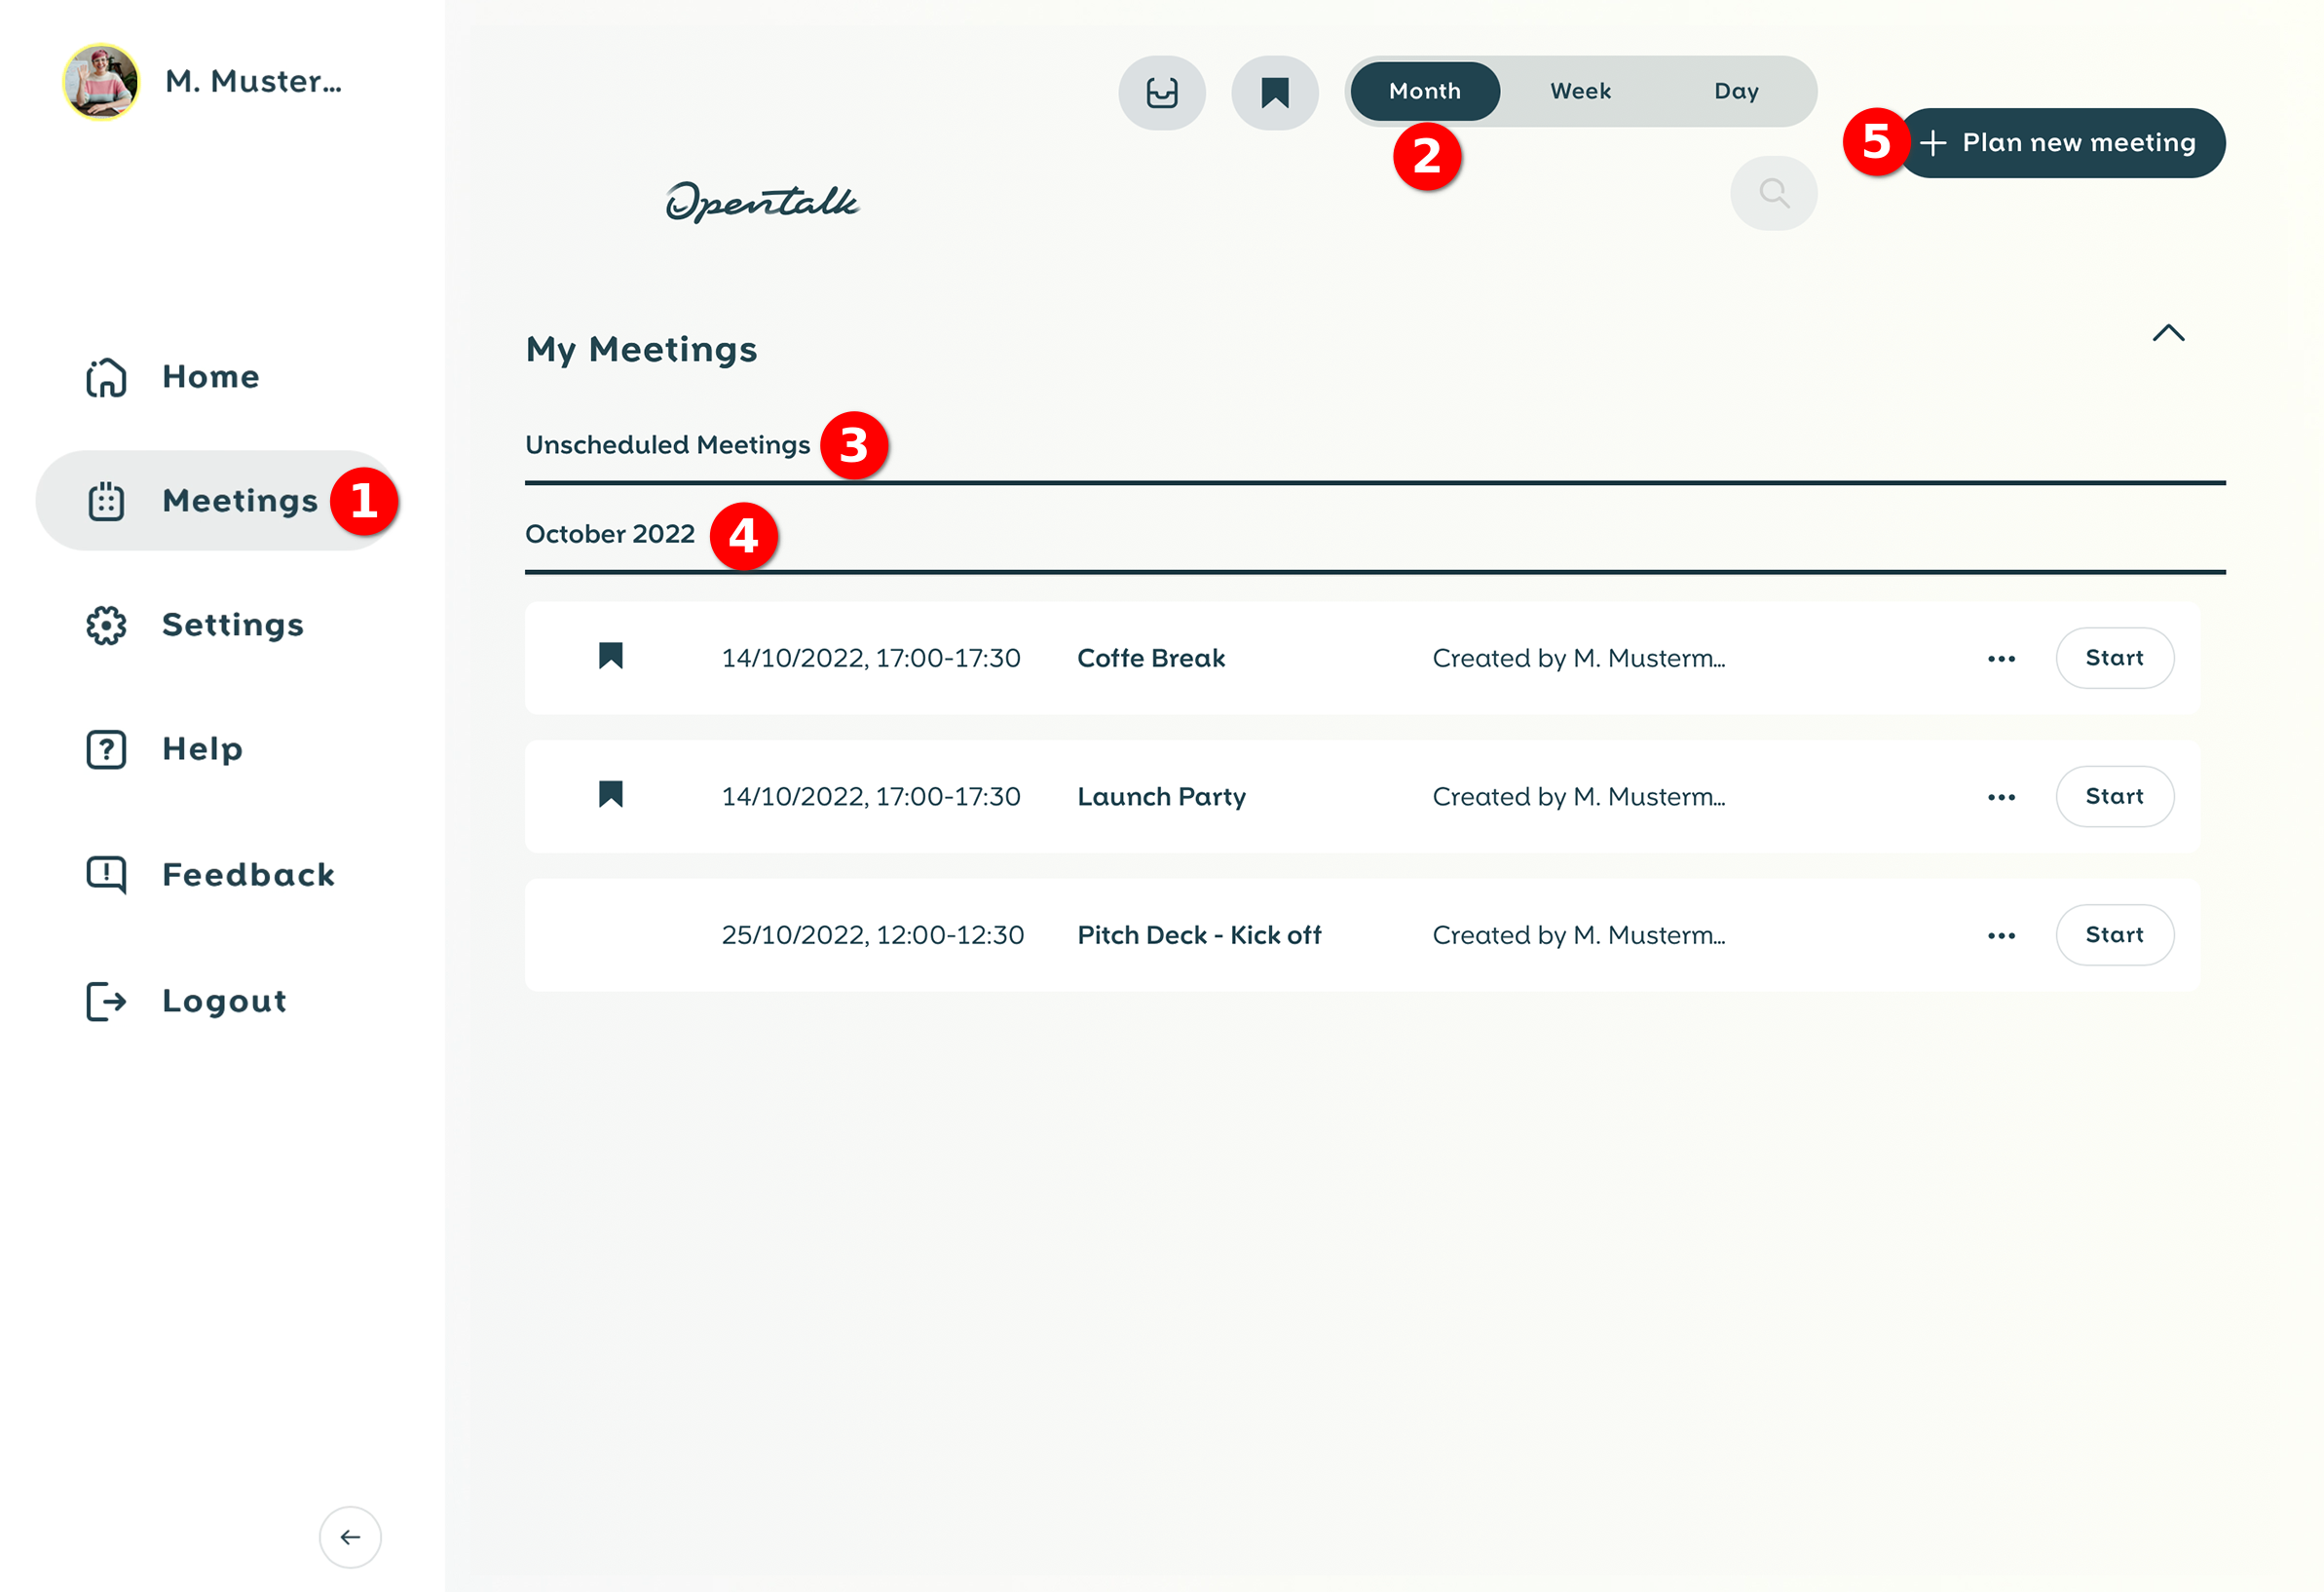
Please click on "Meetings" (1) on the left.
-
You will now be taken to the overview page. If you have already created meetings or have been invited to OpenTalk meetings, you will see them in the overview.
-
You can conveniently sort the view by month, week or day (2).
-
Here you can see "unscheduled Meetings" (3) and Meetings with a fixed time (4).
-
If you want to create a new scheduled meeting, please select "Plan new meeting" (5).
_
Figure 1: "Meetings" overview page
Schedule a Meeting
-
Please assign a meaningful "Title" (6) for the scheduled meeting.
-
You can also enter "Details" (7) about the meeting, which is optional.
-
To increase the security and confidentiality of the meeting, we recommend to assign a "Password for participation" (8).
-
Now you can decide if the meeting room should only be available at a certain time with "Scheduled meeting" (9).
-
Next, you can specify the date and duration of the meeting (10) and whether it should be repeated regularly (11).
-
Optionally you can set up a "Waiting Room" (12) for the participants.
-
Finally, click on "Save" (13). The meeting has now been created and is ready.
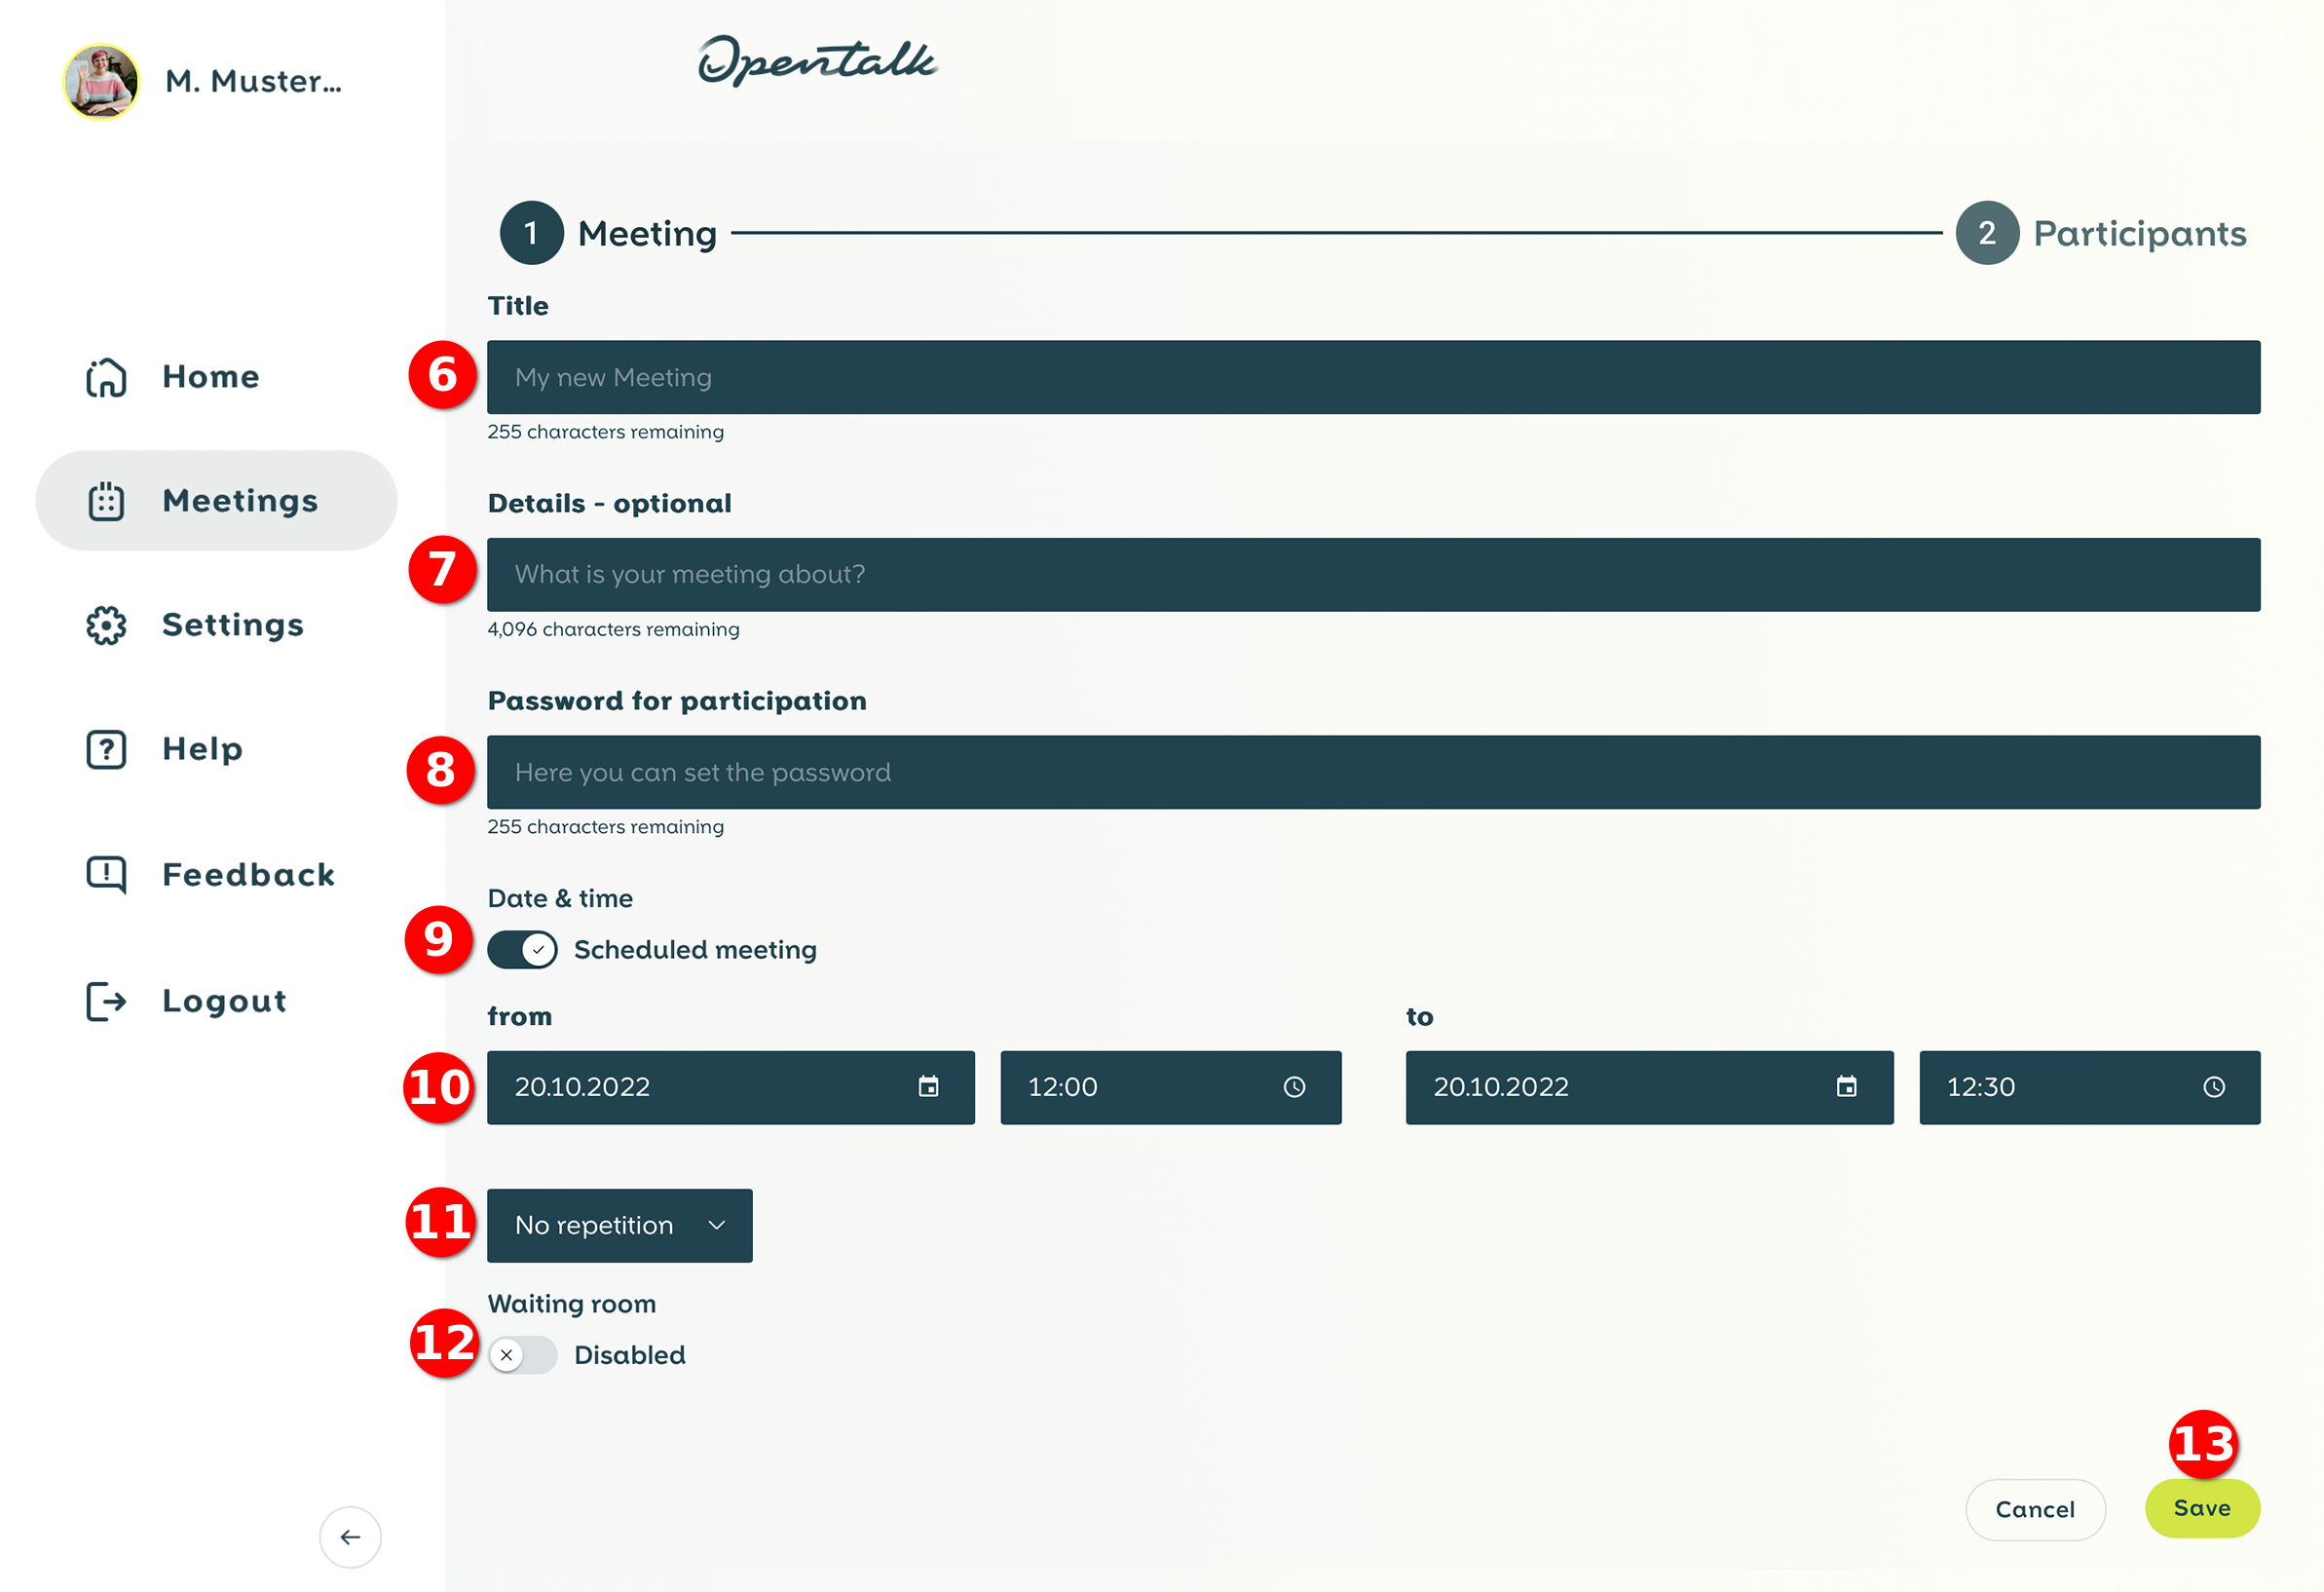
Figure 2: Set details of a meeting
Share the Credentials
Now you have several options to distribute the link to the meeting.
-
You can now simply copy the "Meeting-Link" (14) and thenshare it with participants with OpenTalk accounts.
-
If your meeting also allows a telephone dial-in (depending on the selected tariff), you can share the dial-in number provided under **"**Phone Dial-In" (15).
-
You can invite guests without OpenTalk accounts with a "Guest-Link" (16). These guests can't participate in voting or polls.
-
In case you previously set up a password you can share it via **"**Password" (17).
-
If you would like to join the meeting immediately, you can do so via the button "Open Video Room" (18) (Fig. 3).
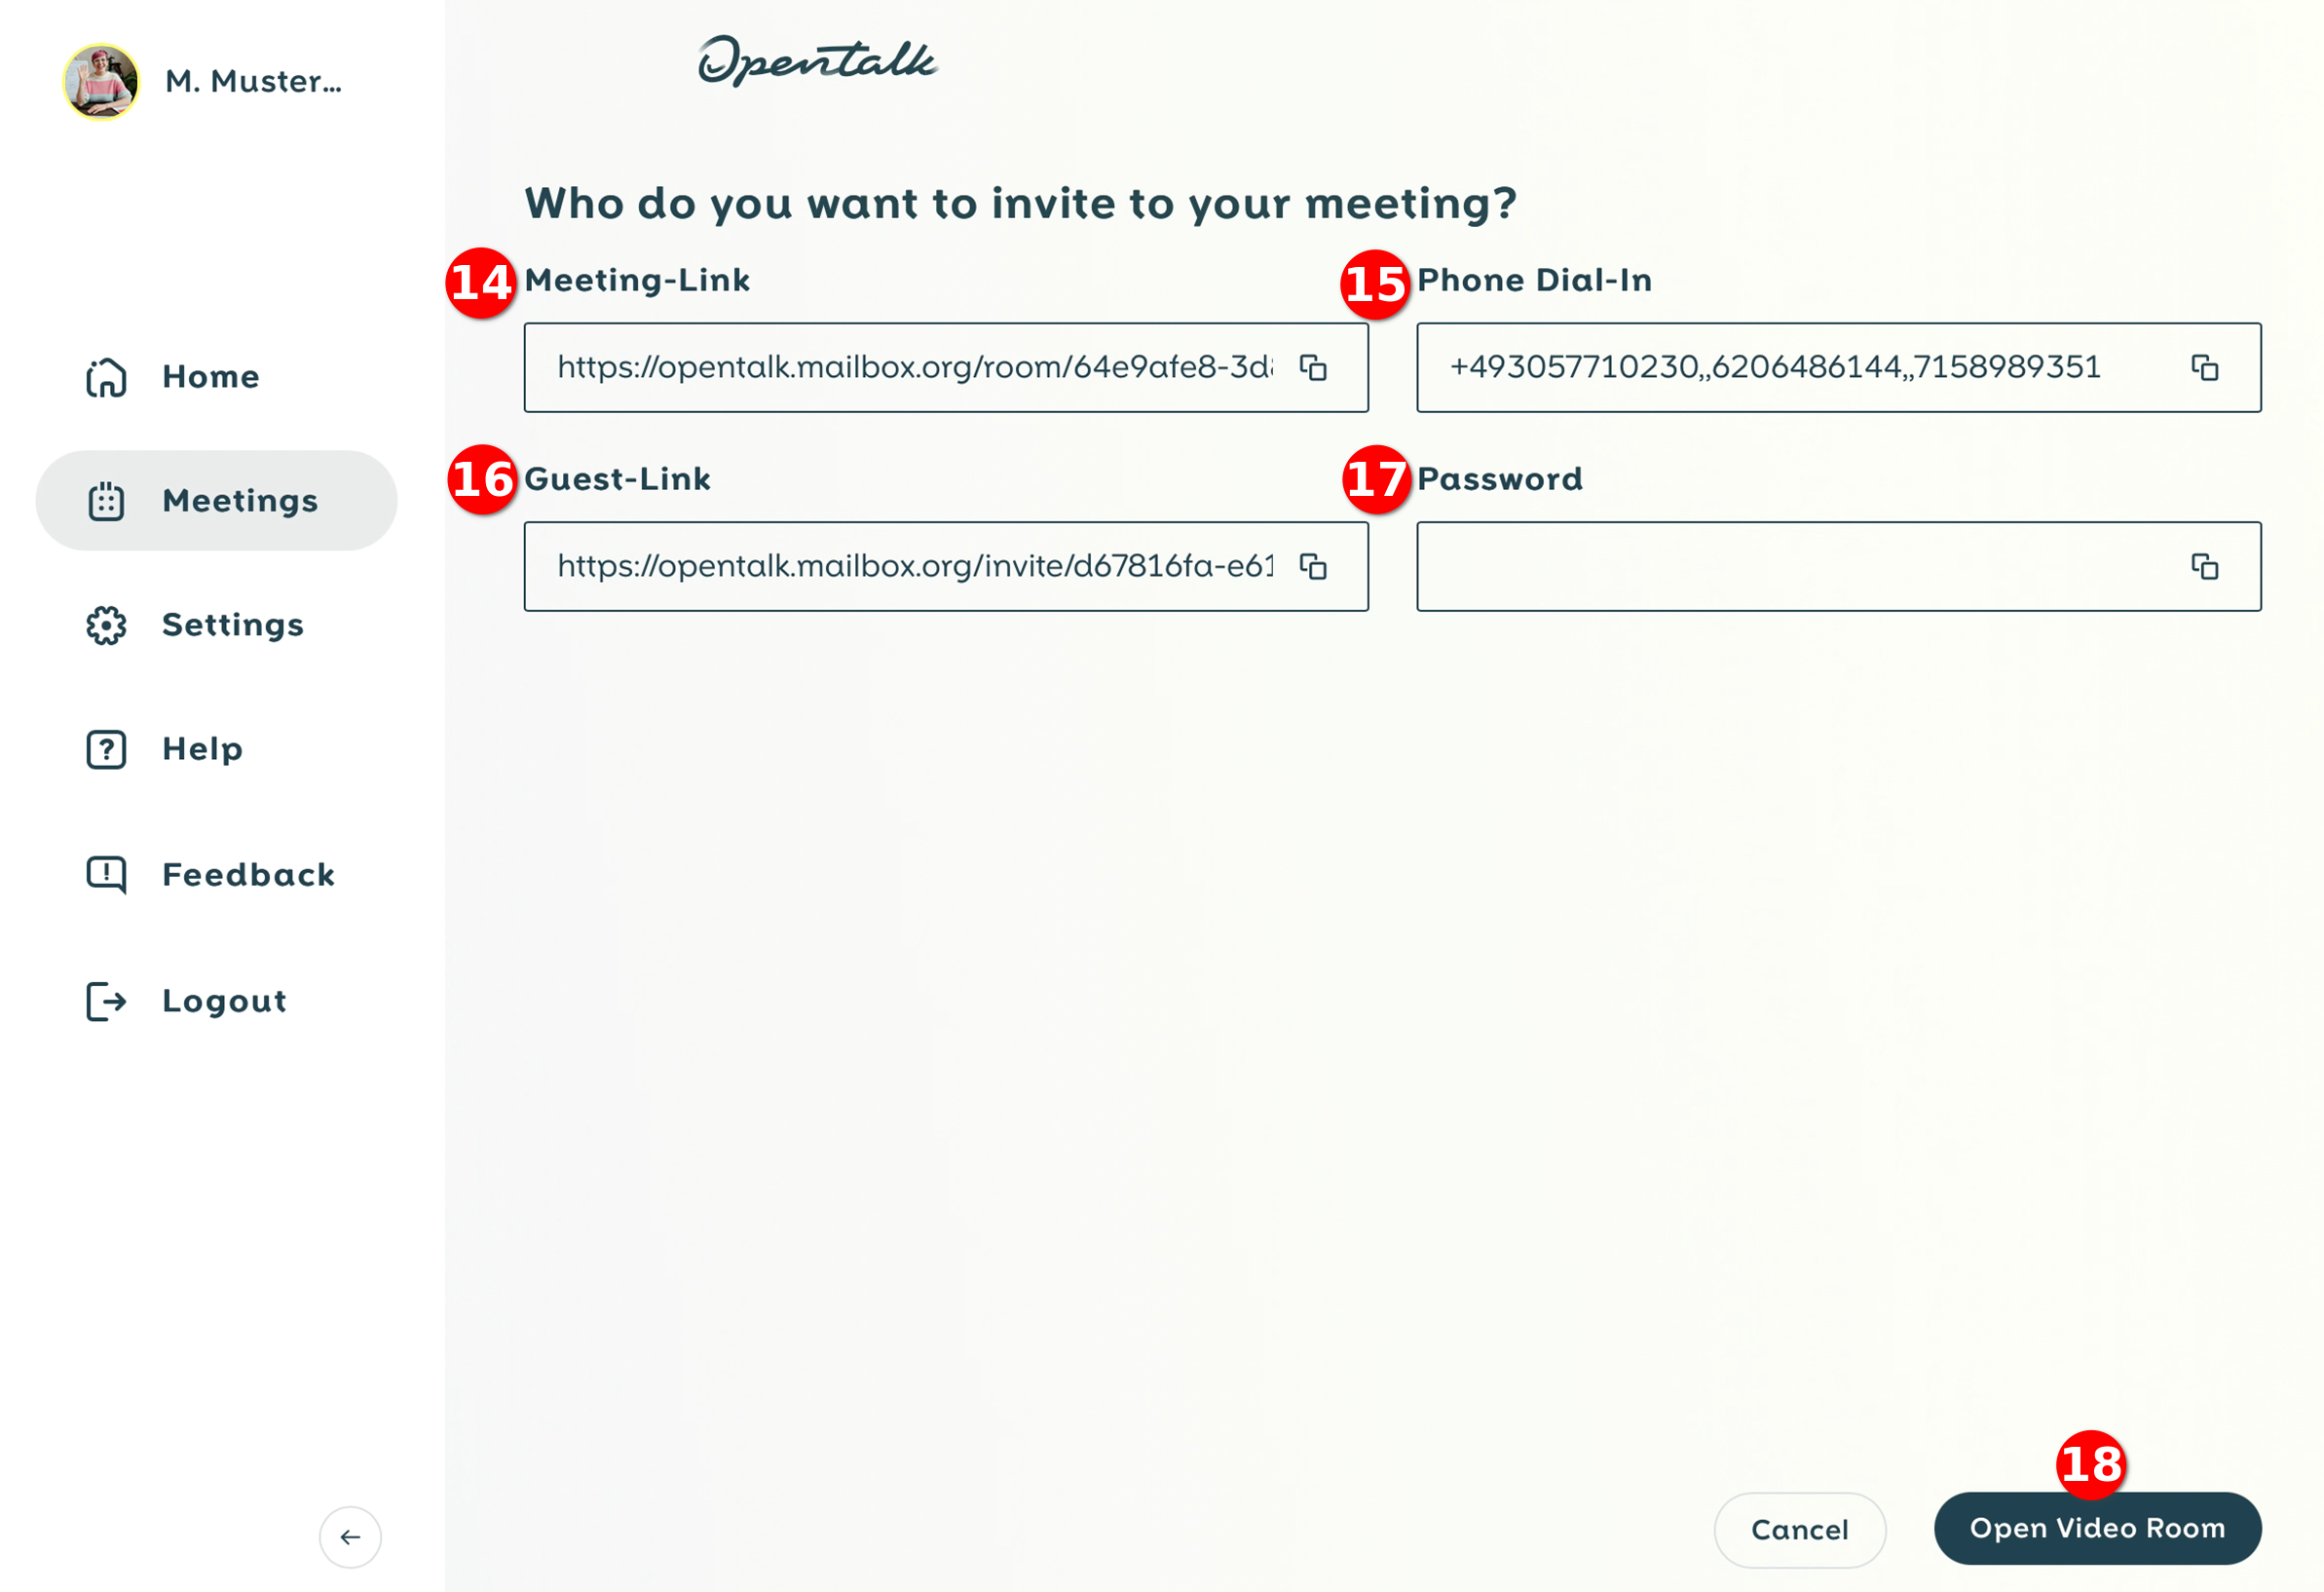
Figure 3: Sharing the access data .