Creating a Family Account
Each additional Family Account incurs additional costs. New family members are created with the Standard plan by default. The regular charges for the Standard plan apply. The administrator of the Family Account can choose whether the costs are paid centrally or individually by each family member.
Creating a Family Account
This feature is only available in the Standard and Premium plans.
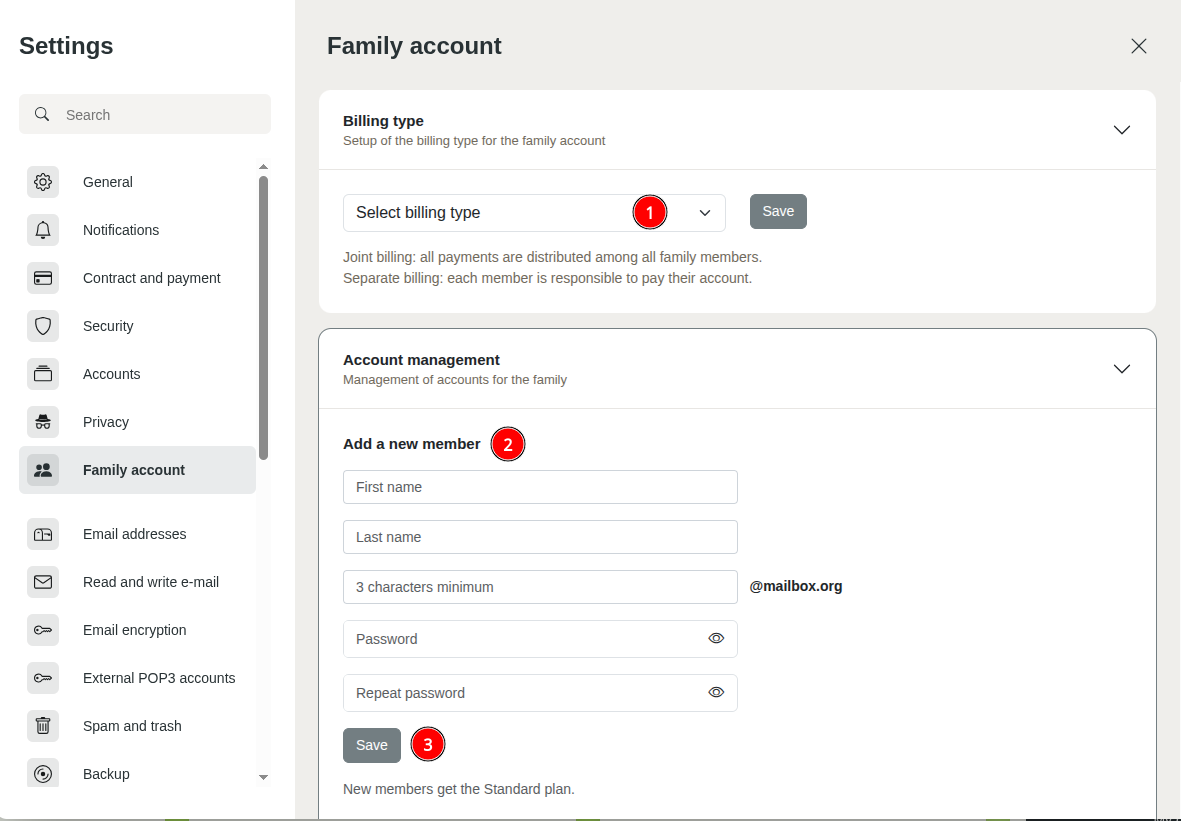
You can create a family under All settings > Family Account, where you can add additional user accounts. These accounts for family members must be created from scratch, as merging existing accounts is not possible. The article on merging accounts explains how to transfer the data from existing accounts.

Figure 1: Add a Family Account.
Create accounts for family members
Enter the name of the new family member and specify a mailbox email address where the new family member can be reached.
New accounts will always be assigned the Standard plan by default (exception: the admin account is still using an old plan). This can then be changed after login under All settings > Contract and payment.
Billing options
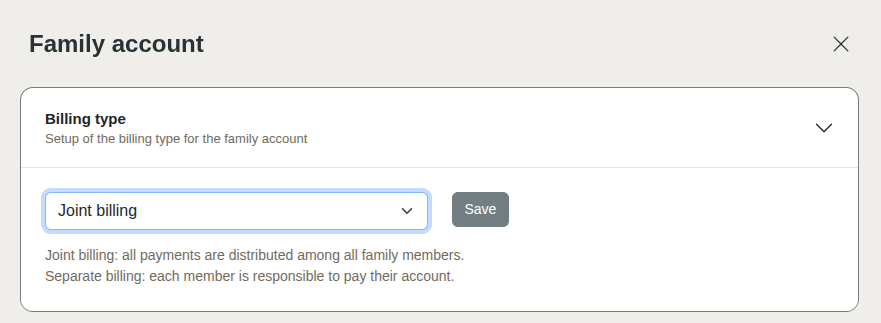
Define the billing method for your family under the following path: All settings > Billing method. You can choose whether the individual accounts are billed together or separately. You can change the billing method at any time.

Figure 2: Define billing method.
With separate billing, each member of the Family Account pays only for themselves and receives their own invoices. As the administrator, you cannot see who is a member of your Family Account. Each member can add additional members and manage their own credit balance.
With joint billing, both the administrator of the Family Account and all members can make payments. As the admin, you can manage family members centrally.
Change password immediately
After creating the account, provide the family member with the information they need to log in. The initial password you assigned should be changed immediately – the family member can define a new password independently.
Initially, only the administrator of the Family Account can reset the family members' passwords. Inform new family members about the methods for password reset, as explained in the article Forgot your password. Inform the members that you as administrator of the Family Account may be able to access the data of family members if they have not set up a password reset method.
