
Synchronising calendar and address book with DAVx⁵ for Android
This article explains how to set up your mailbox account in the DAVx⁵ app on an Android device. DAVx⁵ can help you synchronise your contacts, calendars and tasks between your mailbox account and your Android device. We cover both automatic and manual configuration.
Prerequisites
Before starting the setup, ensure you meet the following requirements:
- You have an active mailbox account.
- You have installed the DAVx⁵ app on your Android device. You can download and purchase it from the Google Play Store to support future development, or install it via F-Droid (free of charge).
1. Automatic account setup
Automatic setup in DAVx⁵ is the fastest way to configure your mailbox account. The app automatically applies all necessary server settings for you.
- Open DAVx⁵ on your Android device.
- Tap + to add a new account.
- Choose Login with email address and then select Continue.
- Enter your email address and password.
If you have enabled two-factor authentication, DAVx⁵ cannot access mailbox using your normal password. To do so, you will need to use an application password.
If you are still using an older authentication method (e.g. YubiKey), enter your username using the following format: UID@ContextID
- Tap Login to start the automatic configuration process.
- Select Groups are per-contact categories to minimise problems.
- Select the items you wish to synchronise.
If you are using your custom domain with your mailbox account (e.g. mail@customdomain.com) or the automatic setup fails, you can manually set up DAVx⁵. To do this, use the URL dav.mailbox.org, as described in the steps below.
2. Manual setup
-
In DAVx⁵, tap + to add a new account.
-
Choose Login with URL and username and then select Continue.
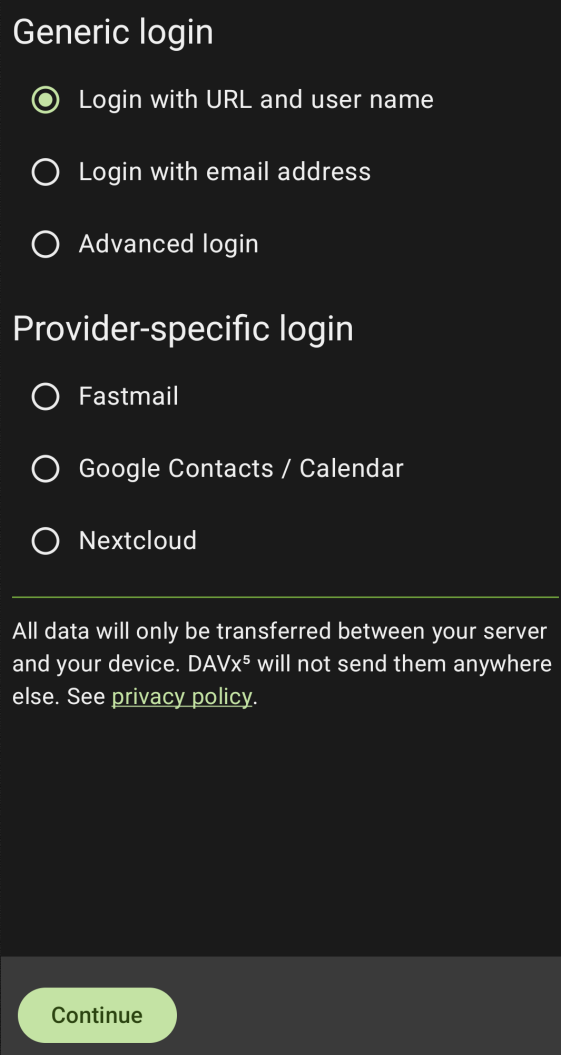
Choose `Login with URL and username`
- Enter the URL
dav.mailbox.organd your email address and password.
If you have enabled two-factor authentication, DAVx⁵ cannot access mailbox using your normal password. To do so, you will need to use an application password.
If you are still using an older authentication method (e.g. YubiKey), enter your username using the following format: UID@ContextID
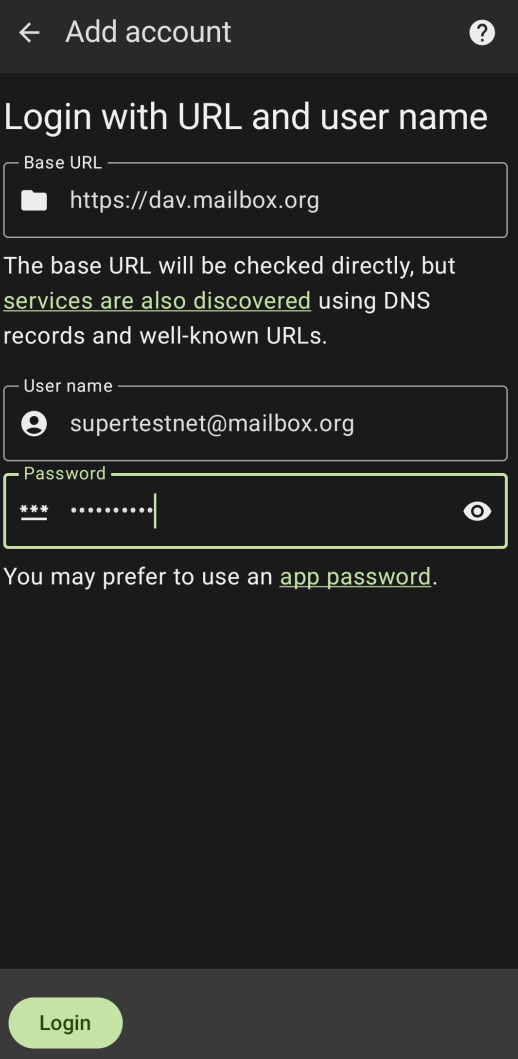
Enter the URL “dav.mailbox.org”
-
Tap Login to start the configuration process.
-
Choose Groups are per-contact categories to minimise problems.
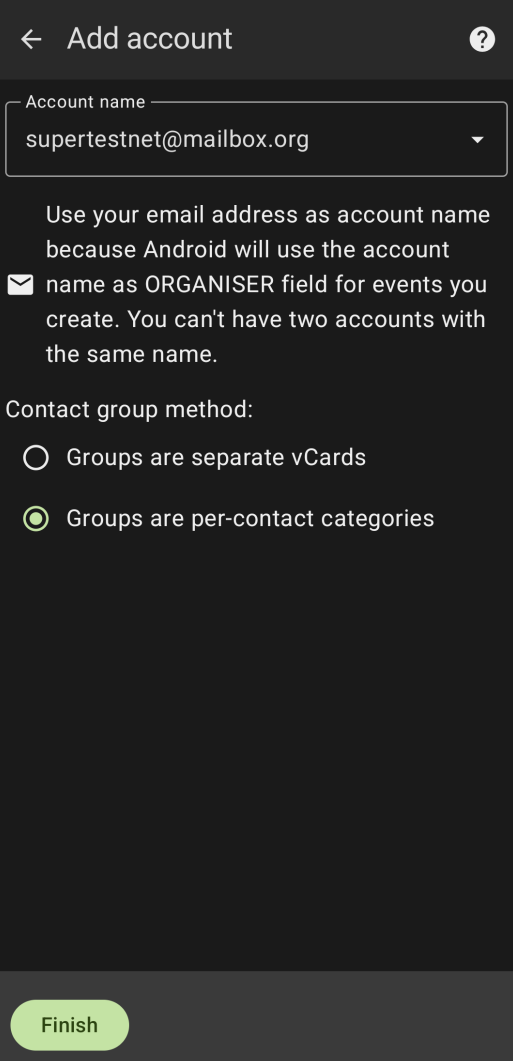
Choose “Groups are per-contact categories”
- Choose what to synchronise.
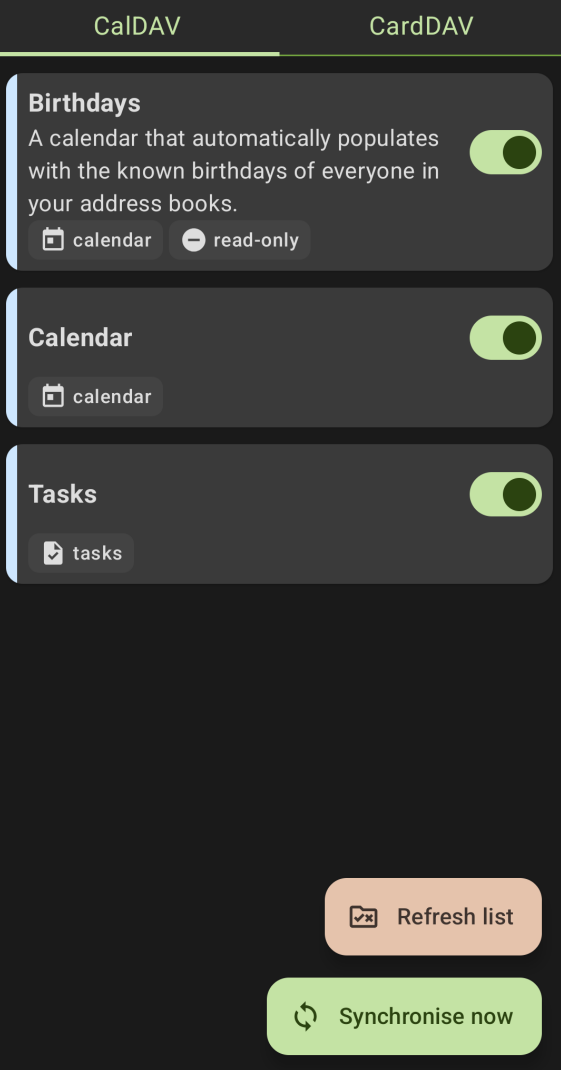
Choose what to synchronise
- Tap Synchronise now.
DAVx⁵ needs access to your calendar and contacts to synchronise with your email account.


