
Synchronising calendar and address book with Outlook
Once you have enabled two-factor authentication, external applications such as Outlook, Thunderbird, DAVx⁵, or mobile calendar and contact apps can no longer access mailbox using your regular password.
To do so, you need to create an application password. Without enabled two-factor authentication (2FA), the use of application passwords is optional.
Outlook: CalDAV Synchronizer
In addition to ActiveSync, you can also use the free Outlook plug-in CalDAV Synchronizer to connect Outlook with mailbox.
You can download it here: https://caldavsynchronizer.org/de/download/
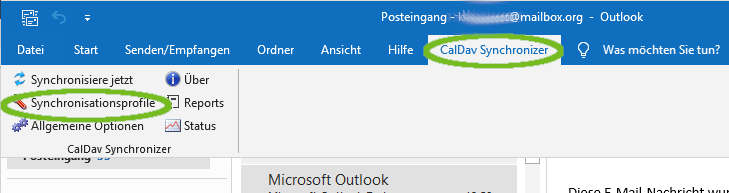
CalDav Synchronizer for Outlook
After installation, you will find a new tab in Outlook called CalDAV Synchronizer.
From there, select Synchronization Profiles to create the required profiles for calendars, task lists, and address books.
Once the menu opens, click the plus icon in the upper left corner to add a new profile.
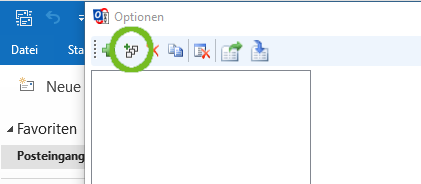
Click on to add a new profile.
From the list of available providers, select mailbox and confirm by clicking OK.
The mailbox configuration is already included as a preset option in CalDAV Synchronizer.
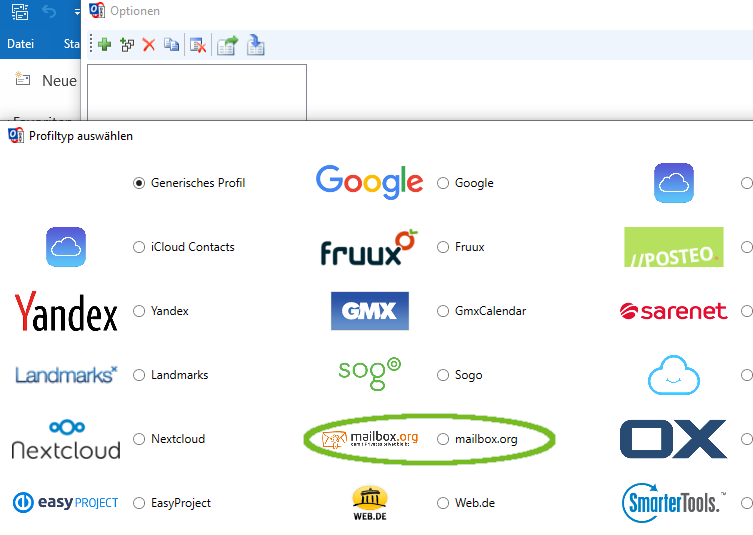
mailbox is preconfigured and part of the standard selection
Adding resources
- Enter your primary mailbox address as the username.
- Enter your password (or an application password, if applicable).
- Click Load IMAP/POP3 account settings to automatically detect basic connection parameters.
Then, select Search for resources and assign Outlook folders.
This allows you to link the mailbox resources (calendars, contacts, and tasks) to specific folders in Outlook.
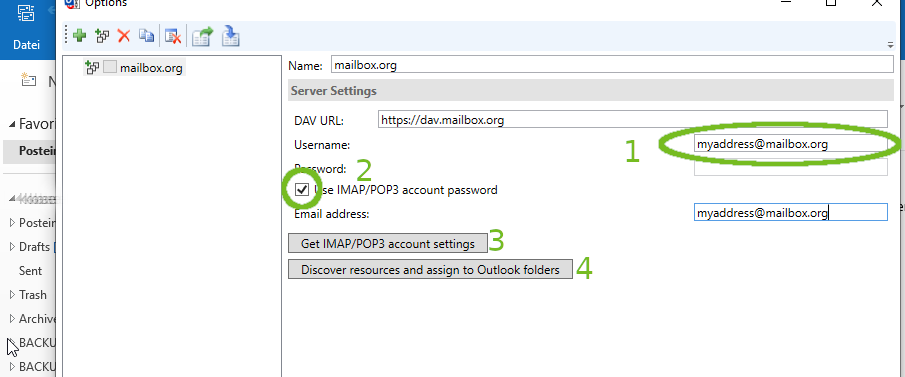
Enter mailbox credentials and link to Outlook folders
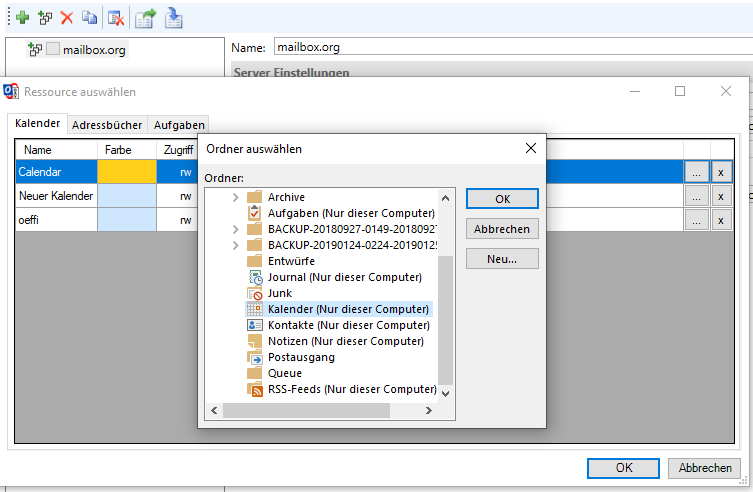
Use this menu to assign permissions to the imported folders.
For each tab — Calendars, Address Books, and Tasks — go through the following steps:
- Click the icon with three dots next to the resource entry.
- In the dialog window, assign the resource to an appropriate Outlook folder or create a new one.
- Check your configuration and confirm with OK.
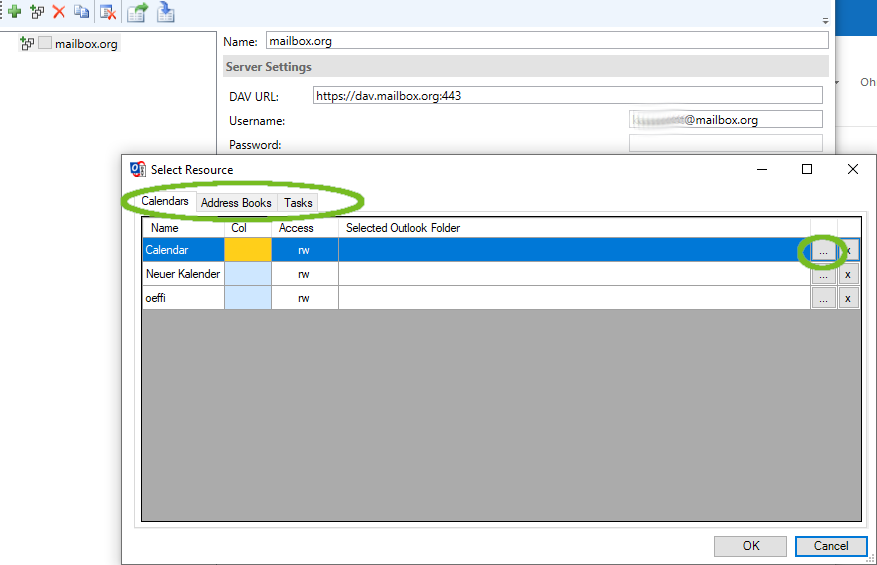
Select a folder for imported data
Summary of configuration steps
- Installation: Download and install CalDAV Synchronizer from the official website.
- Profile creation: Open Outlook → CalDAV Synchronizer tab → Synchronization Profiles → Add new profile.
- Account connection: Choose mailbox from the predefined list and enter your login credentials.
- Resource mapping: Assign each mailbox resource (calendar, contacts, tasks) to the corresponding Outlook folder.
- Synchronisation: Save your settings and start synchronisation; all data will be kept up to date automatically.
Once the setup is complete, Outlook will synchronise your mailbox calendars, contacts, and tasks securely via CalDAV and CardDAV.


