Move away from Gmail to mailbox – step-by-step
Do you want to move completely from Gmail to mailbox?
We will show you how to proceed in just a few steps and what you should keep in mind.
The process at a glance
- Export your data from Gmail.
- Set up a forwarding rule for all emails from Gmail to mailbox and optionally create an automated reply in Gmail with a note about your new address.
- Import your data into mailbox.
- Inform your contacts about your new address.
- Reply to forwarded messages only with your mailbox address.
- Replace your Gmail address in online accounts with an alias at mailbox.
- Delete your data at Google in compliance with GDPR after a safety period.
- Pay attention to specifics of Google’s two-factor authentication.
Export your data from Gmail
Calendar
Log in to Gmail and open the Calendar app. Click the gear icon in the top right corner and select Settings.

Figure 1: Gmail Calendar.
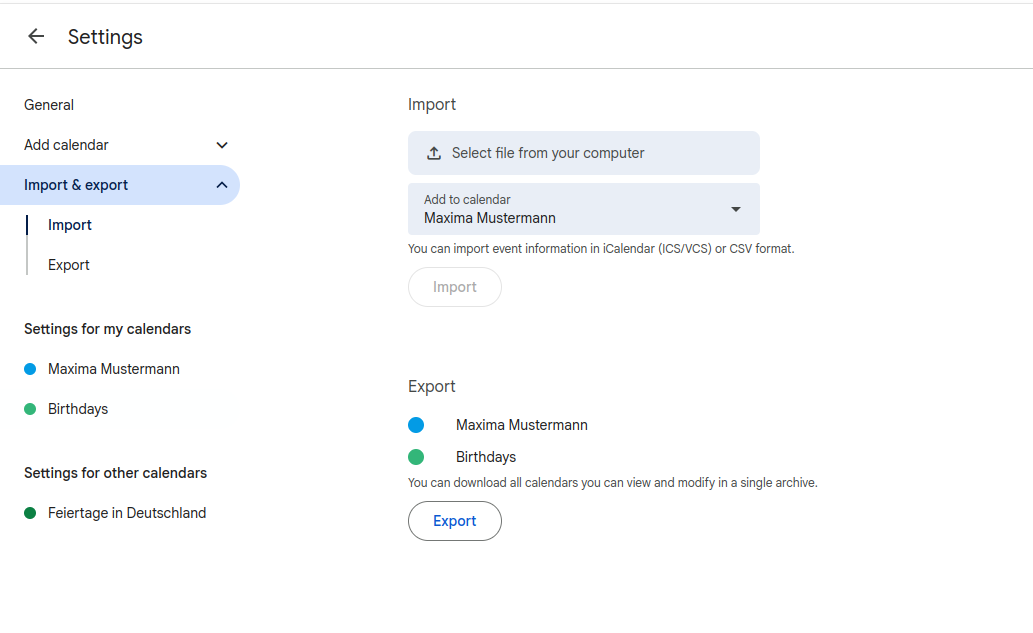
Figure 2: Please click Export.
In the menu on the left, click Import & Export. In the main area, select Export. Your browser will now prompt you to download the file. Confirm this. By default, the file will be saved in the Downloads folder.
Contacts

Figure 3: Contact section from Gmail
Log in to Gmail and open the Contacts app. At the bottom right, click the Export symbol to start the process. Select all contacts and choose vCard (for Android or iOS Contacts) under Export as.
Click Export to download the file.
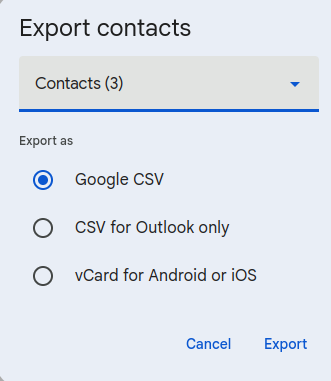
Figure 4: Gmail Contacts.
Again, your browser will prompt you to download the file. Confirm this. The file will be saved by default in the Downloads folder.
Set up forwarding in Gmail
Log in to Gmail and click the gear icon. Select Settings and then the Forwarding & POP/IMAP tab.
Click Add a forwarding address and enter your mailbox address.
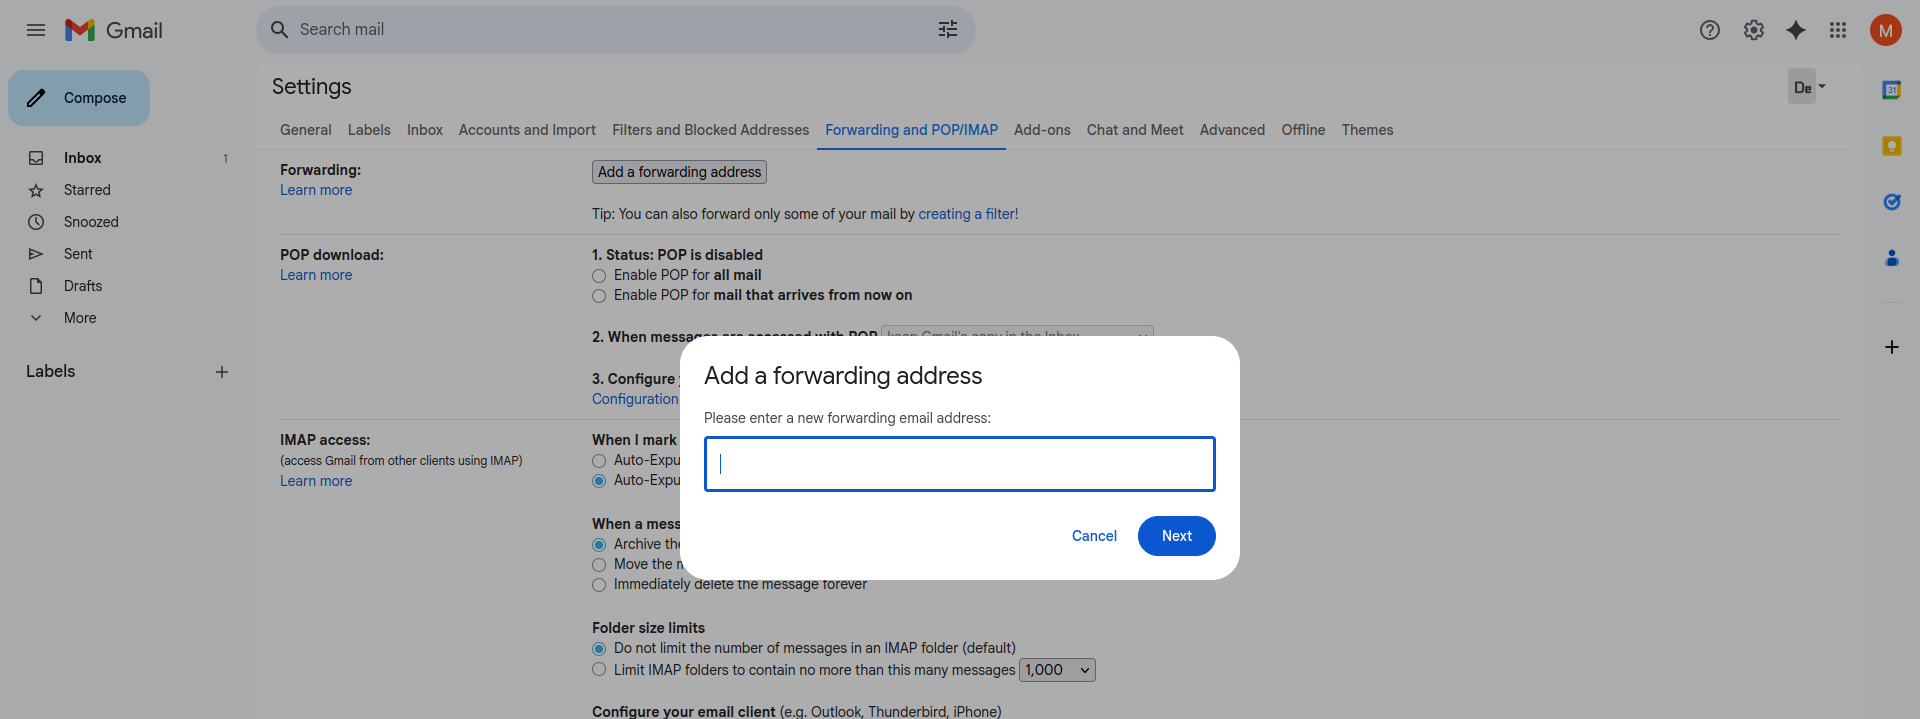
Figure 5: Set up forwarding in Gmail.
A pop-up will appear – verify the address and then click Proceed.

Figure 6: Set up forwarding in Gmail.
Now log in to your mailbox account and click the link to confirm. You will be redirected to a webpage where you must click Confirm again.
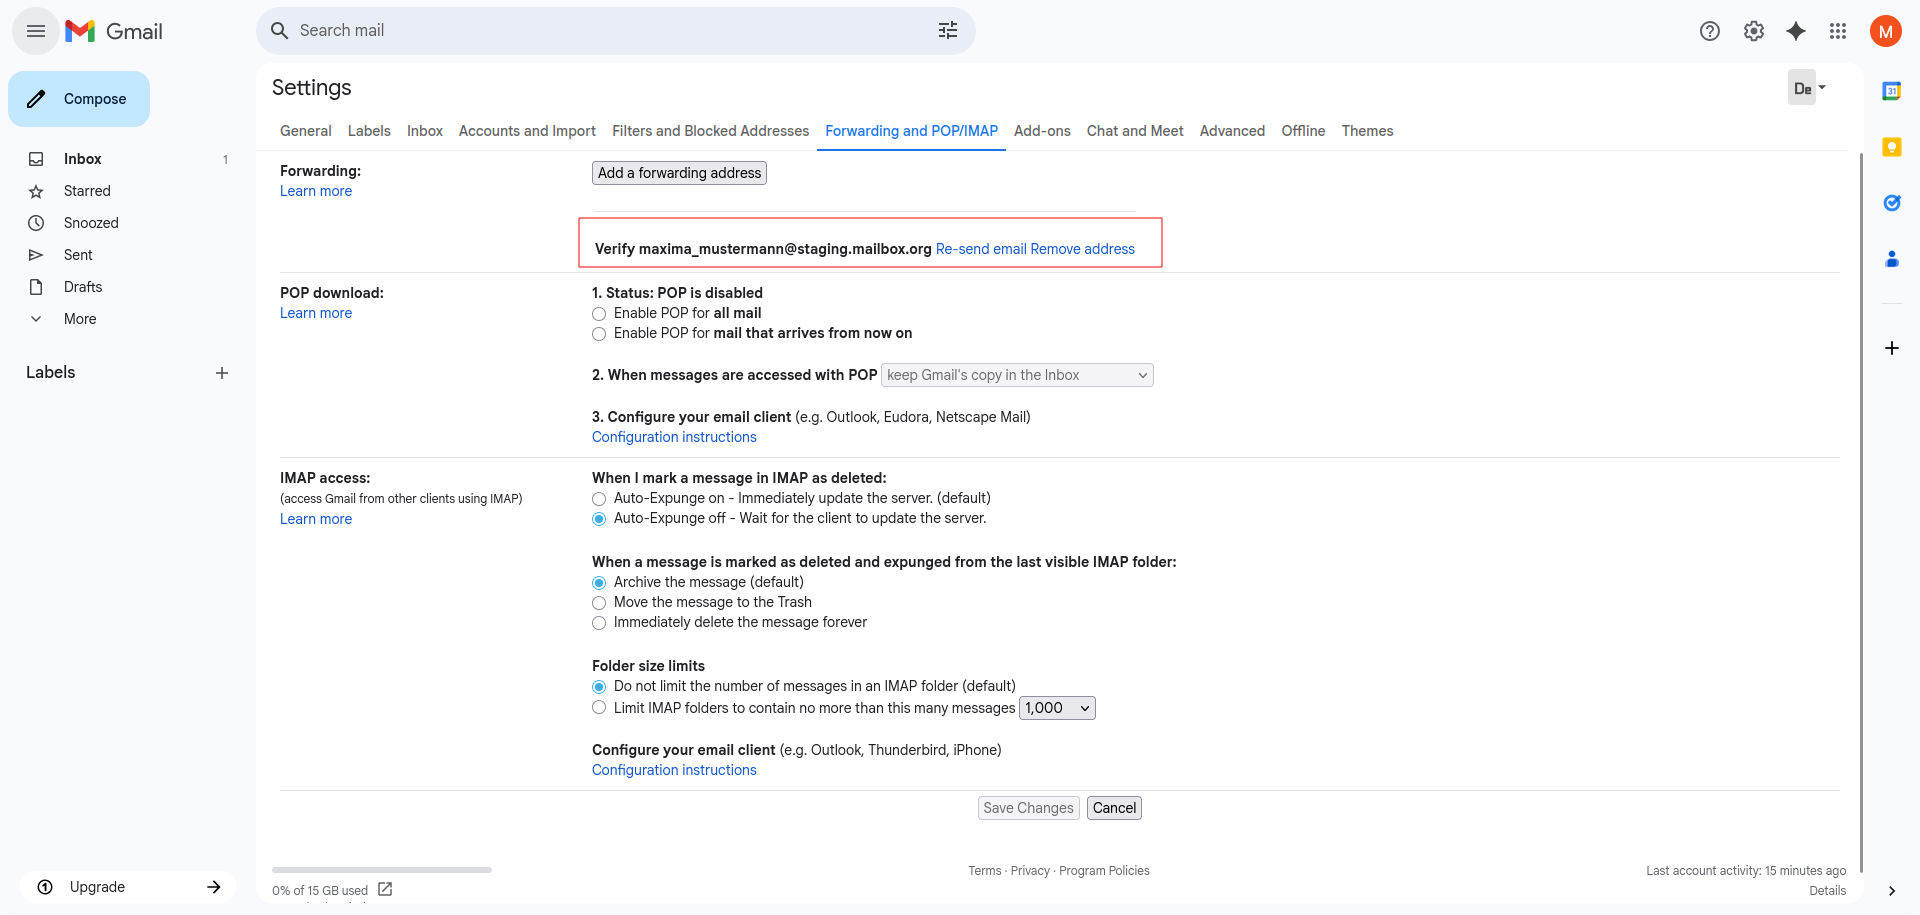
Figure 7: Please verify and confirm the account settings.
To activate forwarding: Select Forward incoming emails to your address and delete Gmail’s copy. Save your changes by clicking Save Changes.
Set up an automatic reply
Go back to Settings, tab General, and scroll all the way down.
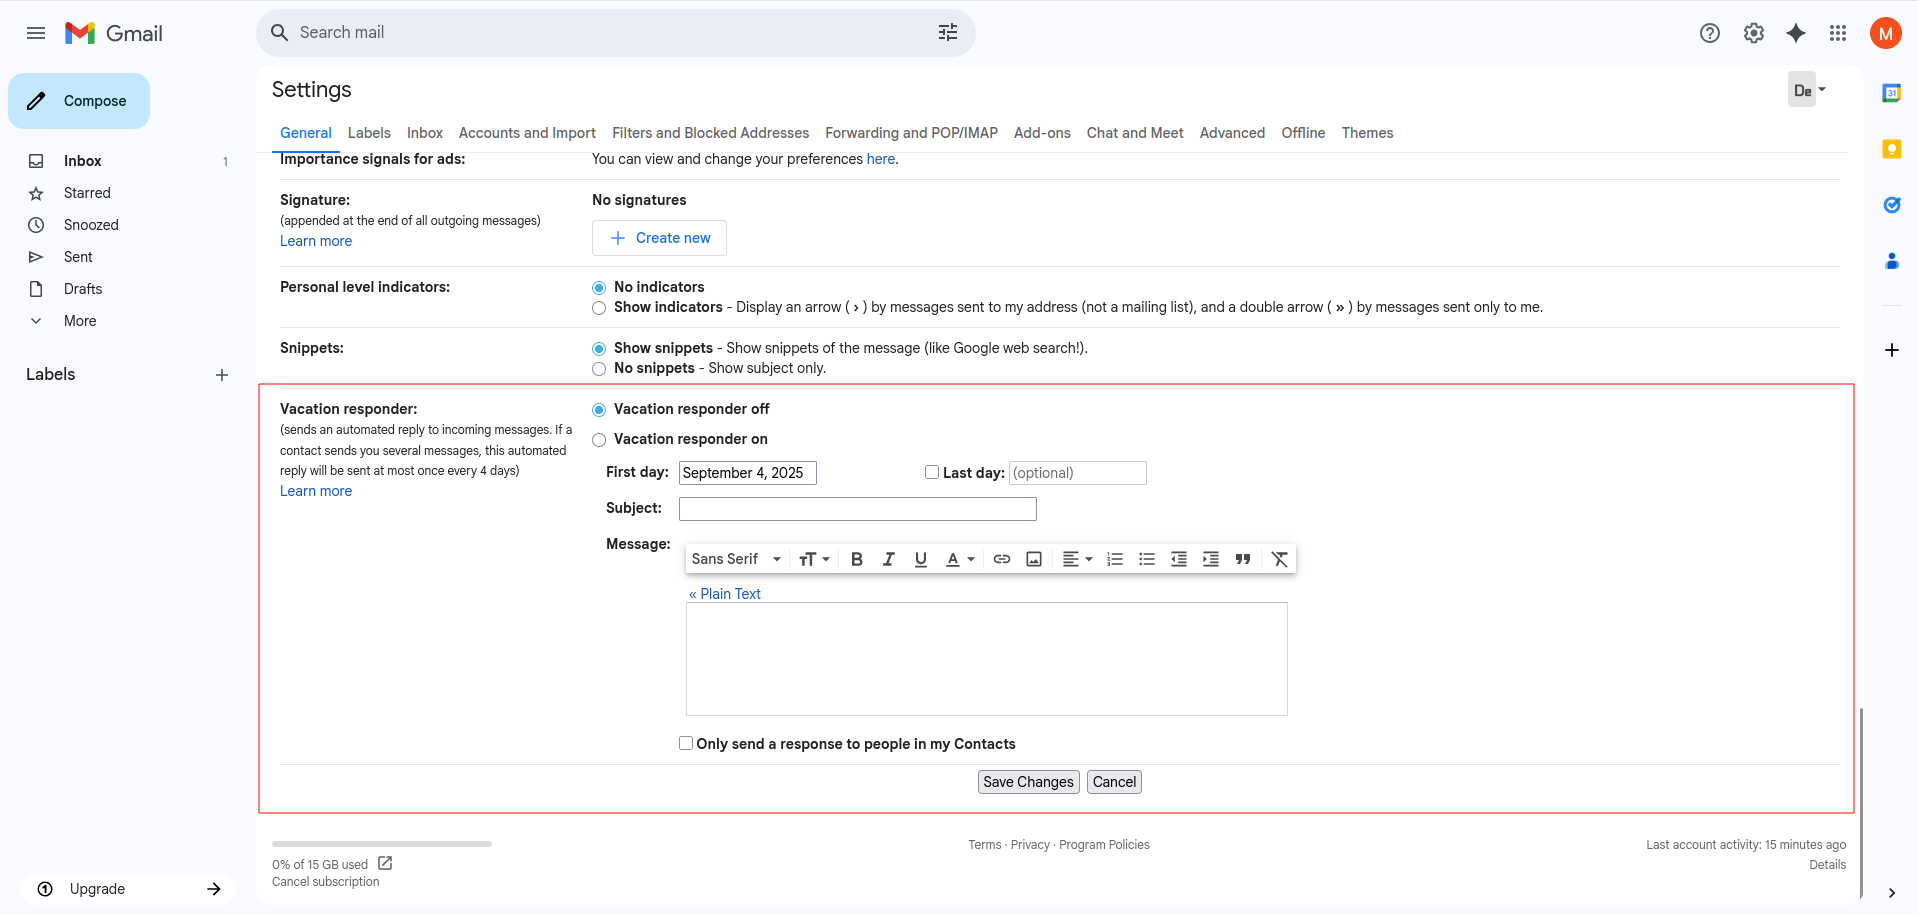
Figure 8: Set up automatic reply.
Enable the vacation responder and configure it as shown in the screenshot. Save with Save Changes.
Note for advanced users: Mike Kuketz describes in his blog how you can automatically notify Gmail senders about your new address:
Link: [https://www.kuketz-blog.de/mailbox-org-gmail-auto-responder/]
Import your data into mailbox
Email import
Use an email client like Thunderbird to transfer emails.
Download link: [https://www.thunderbird.net/en-US/]
Install Thunderbird and set up your mailbox account according to this guide:
[https://kb.mailbox.org/de/privat/e-mail/e-mail-einrichtung-mit-mozilla-thunderbird]
Afterwards, also add your Gmail account and confirm the connection via Google.
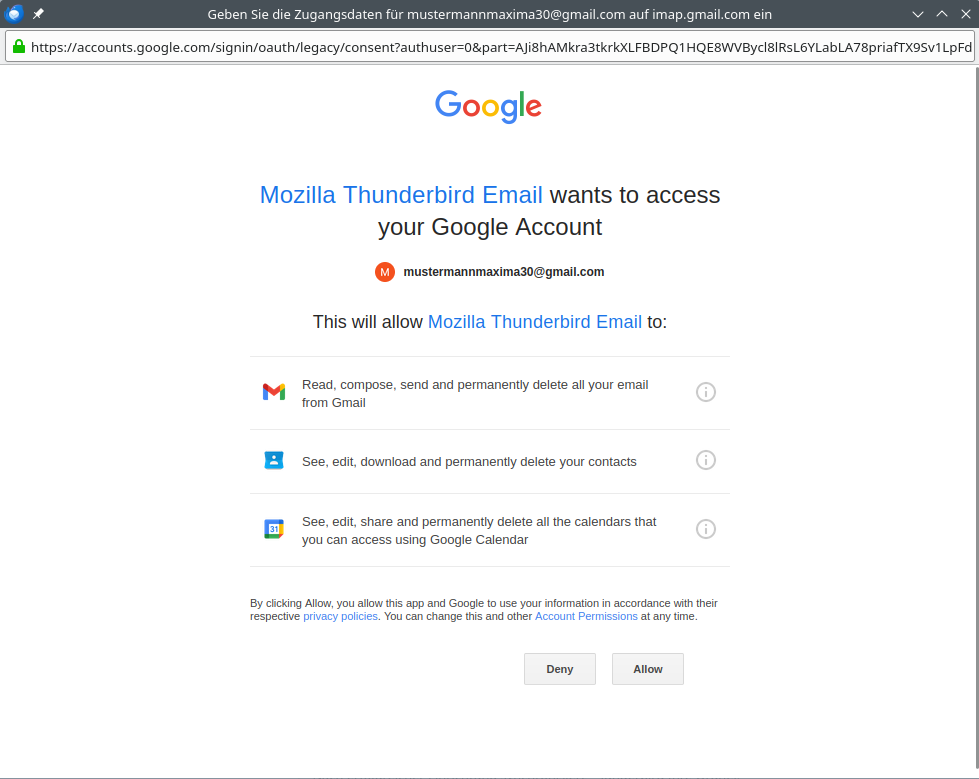
Figure 9: Set up automatic reply.
You have to confirm access to your Gmail Account for Thunderbird, as shown in the screenshot. In Thunderbird, select up to 300–500 emails at once, right-click on the selection and choose Copy to | target folder in your mailbox account (e.g., “Inbox”).
Note: Make sure IMAP is enabled in your Gmail settings. (Since January 2025, IMAP should be enabled automatically)
Repeat this process for all relevant folders.
Calendar import
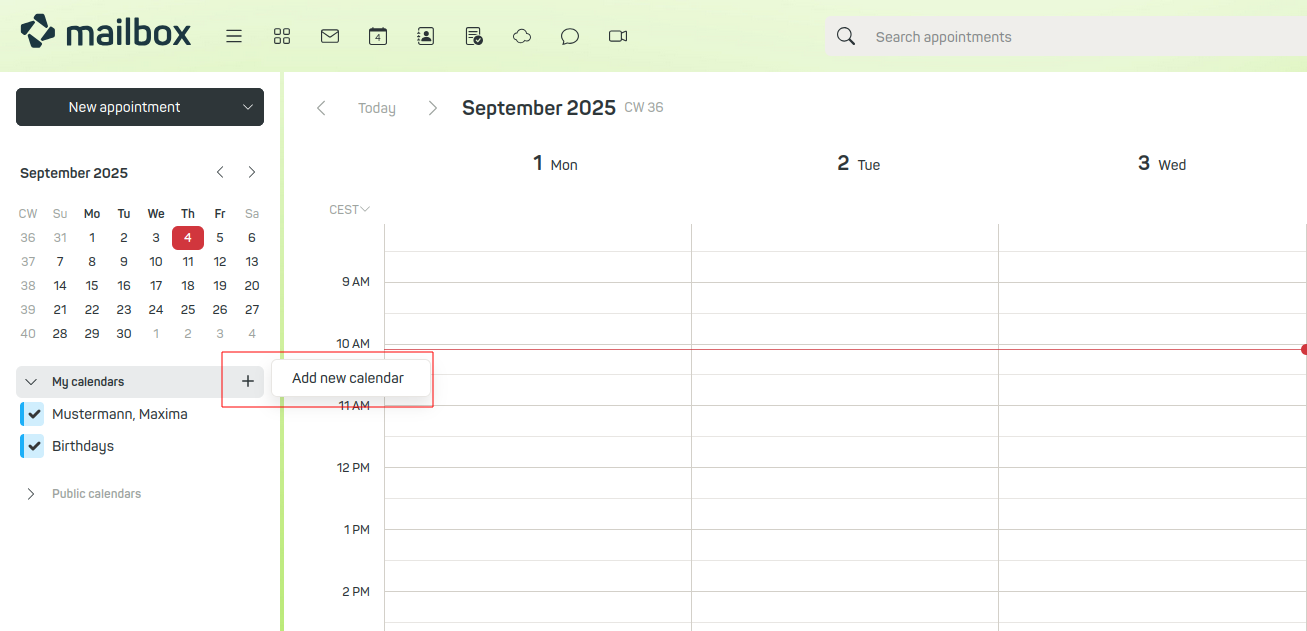
Figure 10: Add a new calender in mailbox.
Log in to your mailbox account and open the calendar view. Create a new calendar as shown in the screenshot.
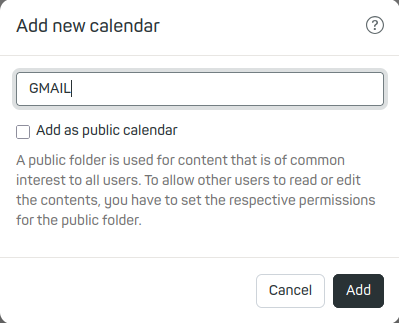
Figure 11: You can freely choose the name of the new calender.
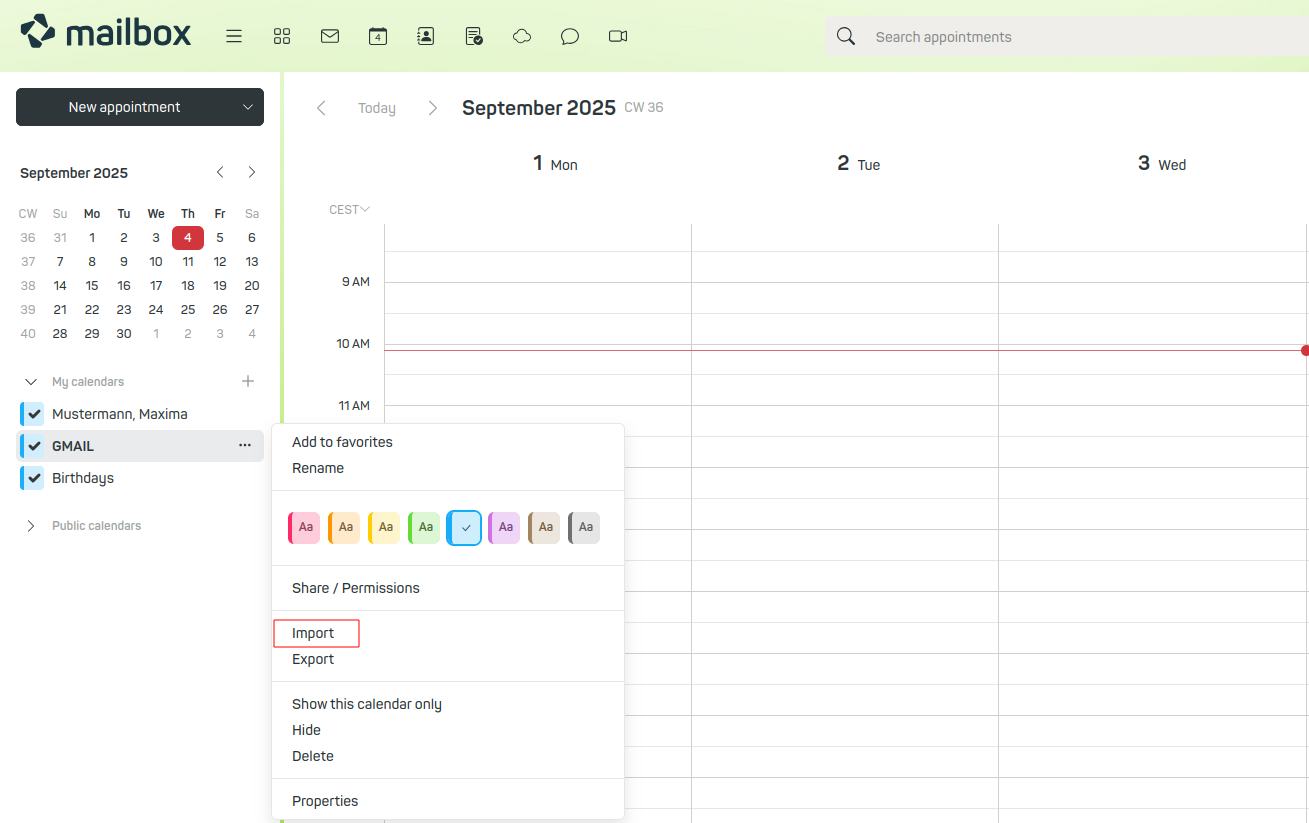
Figure 12: You can import your calender easily with mailbox.
Then click the three-dot menu next to the newly created calendar and select Import.
Specify the path to the Gmail calendar file. Enable the option Ignore existing events to avoid duplicates.
If you are unsure, leave the option unchecked. If duplicate entries occur, delete the calendar and re-import it.
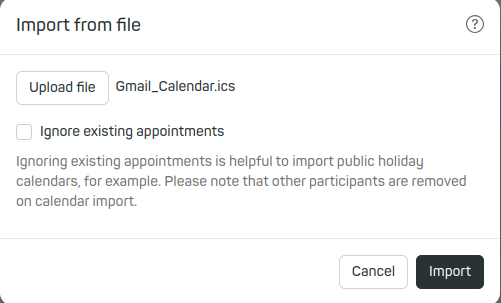
Figure 13: Please make sure the imported calender is .ics file.
The events will now be visible in the calendar. You can show or hide calendars via the left sidebar.
Note: The “Birthdays” calendar is virtual and refers to birthdays from your contacts. Changes can only be made via the address book.
Contacts import
Switch to the address book view and create a new address book.
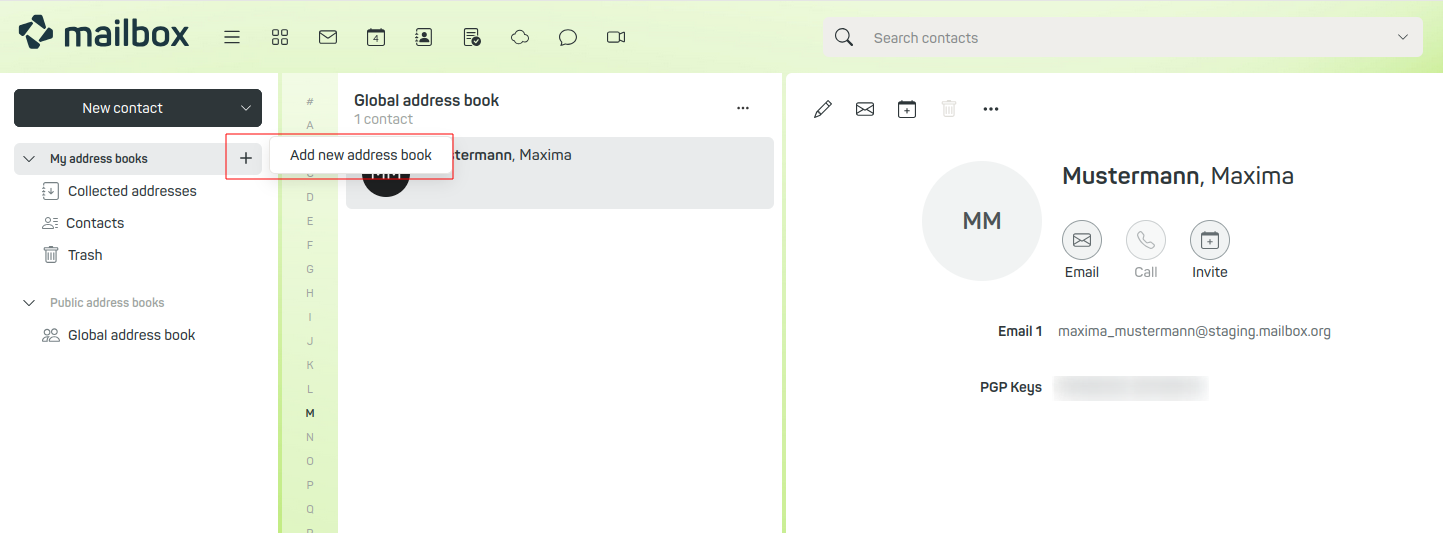
Figure 14: Import your contacts easily into mailbox.
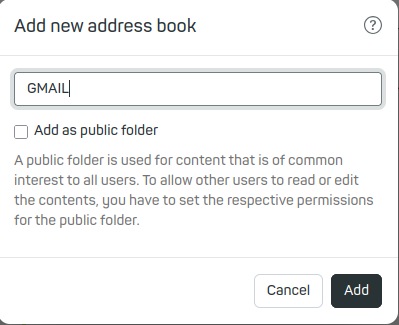
Figure 15: Create a new address book easily in mailbox.
Then click the three-dot menu next to the newly created calendar and select Import.
Select vCard as the format. Provide the path to the export file, click Upload file, and then Import.
If something does not work, delete the address book and repeat the process.
Special case: Google Two-Step Verification
Note: This section only applies if you use the Google feature Two-Step Verification.
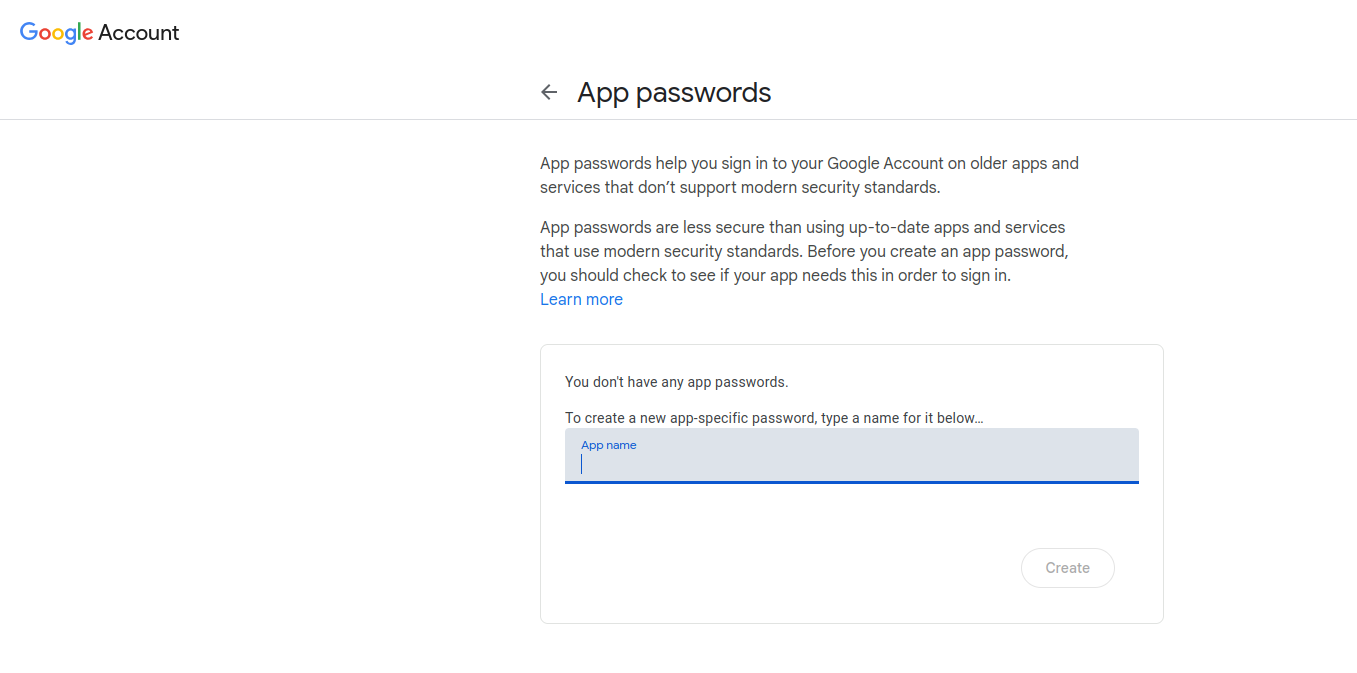
Figure 16: Set an application password for Gmail, when 2FA is active.
If you use this feature, you must create an app password for mailbox. If not, you are already done here. To set up an app password, go to Security and then under Sign in to Google select App passwords.
After the import: check data
Check randomly whether all data was transferred correctly.
In case of problems, you can always re-import because you still have the original files.
Inform about your new address
- Inform your contacts about your new mailbox address.
- Draft a message in the web client or in Thunderbird.
- Use the BCC field to protect privacy.
- Send in groups of 50–80 recipients, spaced out over time.
- Ask your contacts to remove your old address from their address book.
Reply only with mailbox
- Reply to forwarded messages only with your new mailbox address.
- Make sure all your devices are switched to mailbox.
- This way your Gmail address will gradually be replaced and no longer suggested.
Replace Gmail in online services
Replace your Gmail address in all online accounts (shops, networks, forums, etc.) with an alias. Many users create a separate alias for each account to make tracking more difficult.
Delete data at Google in compliance with GDPR
After a transition period, you can completely delete your Google account:
[https://security.google.com/settings/security/deleteaccount]
However, please note Google’s instructions regarding the deletion process.
We wish you lots of success with your new mailbox!
