Schedule an Event with Framadate
With Framadate you can easily coordinate appointments and schedule events.

Enter the Details and add additional Options
Enter your "Name" (1), "E-Mail" (2) as well as "Title" (3) and an optional "Description" (4).
Edit "Optional Parameters" (5) (Figure1):
- limit the "amount of voters per option" (6)
- "costumize the URL" (7),
- "use a password to restrict access" (8) schützen,
- "set permissions" (9)
- set the options for receiving an e-mail for each new "vote" (10) und "vomment" (11) konfigurieren
- "limit the access to the results to admin only" (12).
Confirm your input and "go to step 2" (13).
Figure 1: Configure the details and additional parameters.
Enter the dates available for selection
In the next area you can specify the available dates that should be published with the poll. Choose the desired "Date(s)" (14) and "Time(s)" (15). If necessary you can add or remove "additional time slots" (16) and also additional "entry slots for days" (17). If you are finished with your input proceed to the "Next" (18) step (Figure 2).
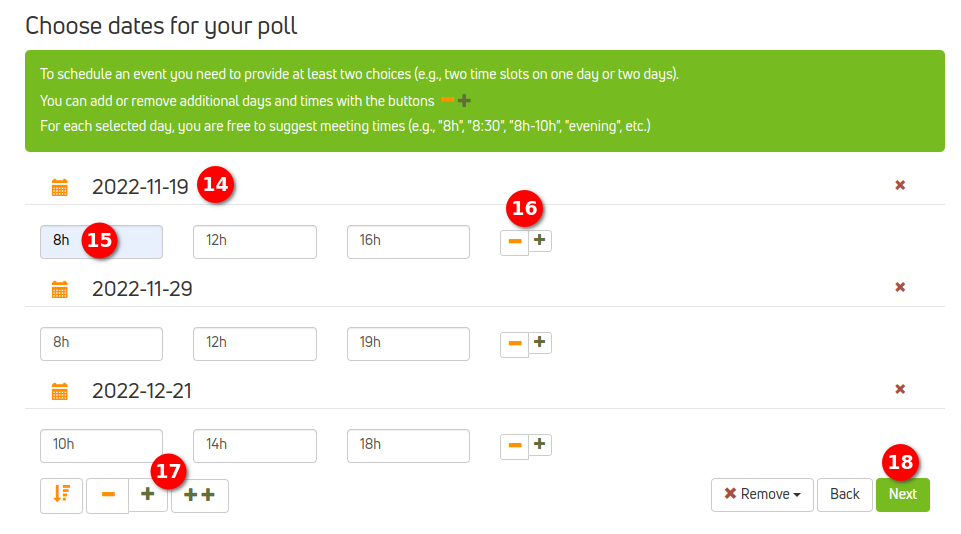
Abbildung 2: Specify the dates and times available for voting.
Expiry Date and Publishing
In the last step you will receive a summary of your appointments and the option to set an "Expiry Date" (19). In the final step you can "Create the Poll" (20) (Figure 3).
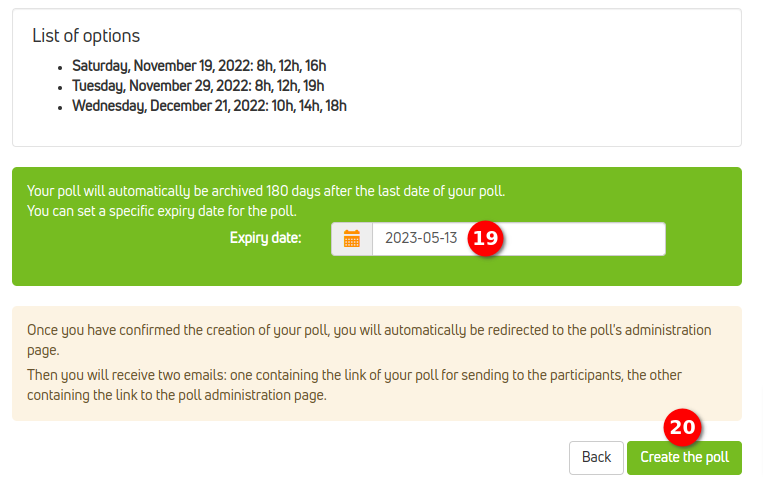
Figure 3: Verify your input, set an expiry date and publish the poll.
Share, Print and Export
The poll will now be published and you will be forwarded to the administration page. Here you can also change settings later and access voting results. If you want to share the survey, you have the choice between these two options (Abbildung 4):
- Share the "Admin link for the poll" (18).
- Share the "Public link to the poll" (19).
Here you also have the options to "Print" (20) your poll or "Export to CSV" (21). You can also "delete the poll" (22) and of course "cast your own vote" (23) (Figure 4).
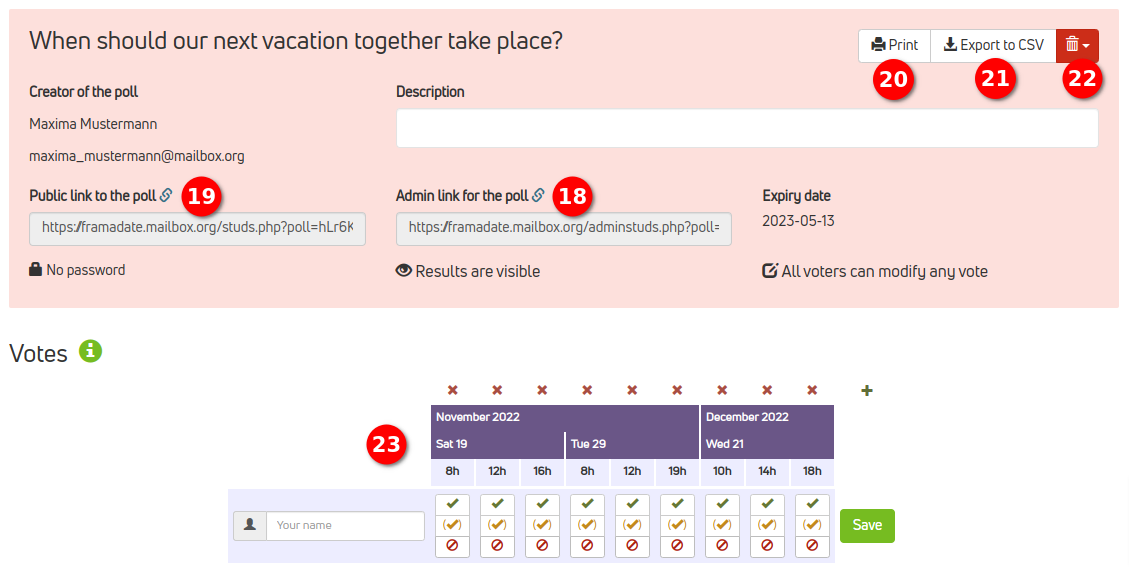
Figure 4: The administration page offers everything you need to share, edit and evaluate the poll.
Participation and Evaluation
Participation
Casting a vote is pretty straightforward. Just enter your "Name" (25) and set your preferred options below the available choices:
- Vote with "Yes" (26).
- Vote with "Yes, under reserve" (27).
- Vote with "No" (28).
To proceed and confirm your input you need to "Save" (29) (Figure 5).
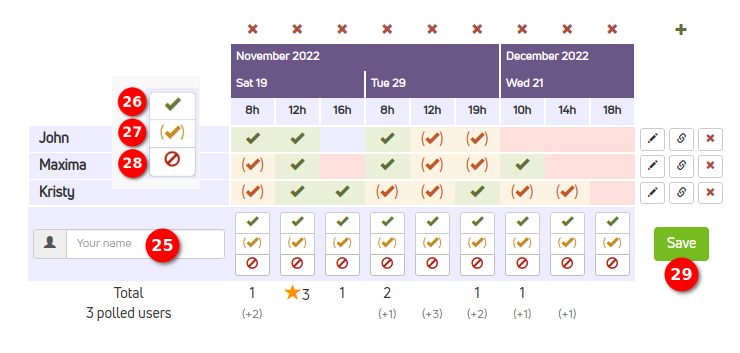
Figure 5: Casting a vote is pretty straightforward.
Evaluation of the Poll
The results of the poll will be displayed in the "Voting-Field" (30), below as "Chart" (31) and the most upvoted and therefore "Best Choice" (32) is being highlighted at the bottom of the page (Figure 6).
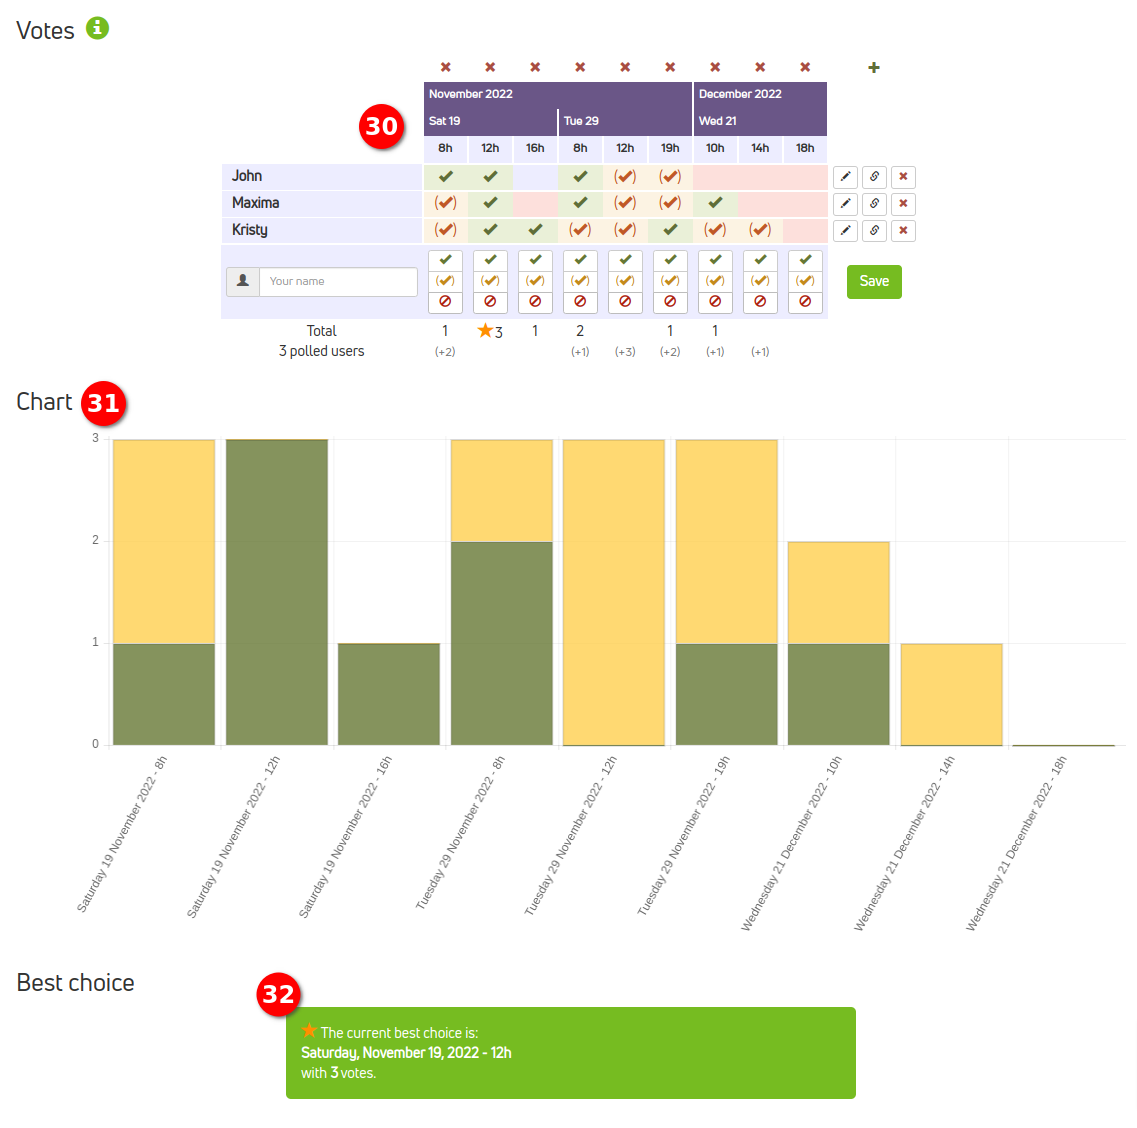
Figure 6: The results of the poll are being displayed in various formats.