Your encrypted mailbox
Activating Mailbox Encryption
To increase the security of your incoming mails, you can activate automatic encryption with PGP in your mailbox. This ensures that new messages in your inbox are encrypted so that only people with your private PGP key and the corresponding password can access them.
In order for the encrypted mailbox to also be decrypted online, you must activate the mailbox Guard and the automatic encryption of incoming mails. Mails in the Sent folder are currently not stored in encrypted form.
Steps to activation
-
Access the settings
Open the settings and click the gear icon in the top right corner to go to All settings.
-
Navigate to the inbox encryption section
Go to All settings | Read and write mail | Inbox encryption.
-
Enable PGP encryption for incoming mails
Check the box PGP encryption for incoming mails and then paste your public PGP key in ASCII format. Under Your keys | Upload public key you can store your PGP key.

Figure 1: Use the encrypted mailbox with your own keys.
Obtaining the PGP key
When you use the mailbox Guard, mailbox already provides you with a PGP key pair.
Here is how to get the public key:
-
Go to the mailbox Guard section in the menu.
-
View the keys
Click on Your keys, which can be found under the third menu item. -
Download the public key
In the key list, click on Download my public PGP key. -
Finish
Click Close and then Done.
You will usually find the downloaded public key as a file named public.asc in your browser’s download directory. Open the file with a text editor (most operating systems do this automatically on double-click) and copy the entire content including the first line.
Example:
-----BEGIN PGP PUBLIC KEY BLOCK-----
lFgEXEcE6RYJKwYBBAHaRw8BAQdArjWwk3FAqyiFbFBKT4TzXcVBqPTB3gmzlC/U
b7O1u10AAP9XBeW6lzGOLx7zHH9AsUDUTb2pggYGMzd0P3ulJ2AfvQ4RtCZBbGlj
ZSBMb3ZlbGFjZSA8YWxpY2VAb3BlbnBncC5leGFtcGxlPoiQBBMWCAA4AhsDBQsJ
CAcCBhUKCQgLAgQWAgMBAh4BAheAFiEE64W7X6M6deFelE5j8jFVDE9H444FAl2l
nzoACgkQ8jFVDE9H447pKwD6A5xwUasdfasrBzrHfahrImaYEZzncqb25vkLV2arYf
a78A/R3AwtLQvjxwLDuzk4dUtUwvUYibL2sAHwj2kGaHnfICnF0EXEcE6RIKKwYB
BAGXVQEFAQEHQEL/BiGtq0k84Km1wqQw2DIikVYrQrMttN8d7BPfnr4iAwEIBwAA
/3/xFPG6U17rhTuq+07gmEvaFYKfxRB6sgAYiW6TMTpQEK6IeAQYFggAIBYhBOuF
u1+jOnXhXpROY/IxVQxPR+OOBQJcRwTpAhsMAAoJEPIxVQxPR+OOWdABAMUdSzpM
hzGs1O0RkWNQWbUzQ8nUOeD9wNbjE3zR+yfRAQDbYqvtWQKN4AQLTxVJN5X5AWyb
Pnn+We1aTBhaGa86AQ==
=n8OM
-----END PGP PUBLIC KEY BLOCK-----
Next Steps
Adding the key
You can simply and conveniently add the key under the menu item Your keys | Upload public key.
The mailbox Guard processes the file and stores your public key in the Guard. Once the key has been uploaded successfully, you will find it again under Your key list.
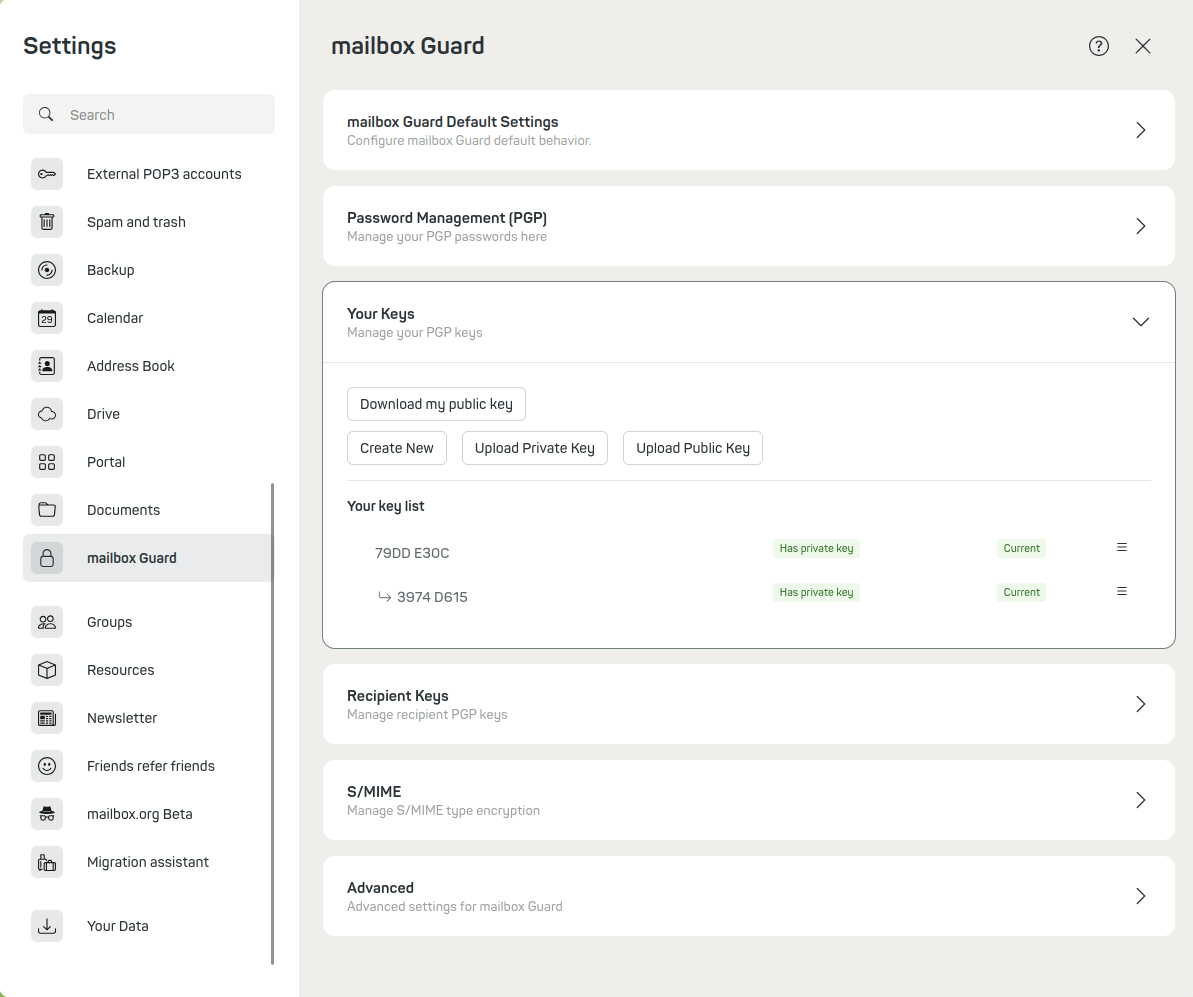
Figure 2: Processing a downloaded public key.
Error messages
If error messages occur, please first check whether the public key has been inserted correctly. It often happens that the key is altered when copying/pasting from the clipboard, making it unusable. No further action is required from you. From now on, all incoming and outgoing mails will be encrypted. Existing mails will remain unaffected.
Technical Notes
Filter rule for encryption
In the background, a Sieve mail filter on the mail server creates a rule that automatically encrypts incoming mails.
Order of filter rules
Make sure that the rule for the encrypted mailbox is at the top of the list of filter rules to ensure correct functionality.
You can always view the filter rules if you are unsure which rules are currently active. You can define new ones or view existing ones under Read and write mail | Rules. If no rules are defined, you should see a message that says No rules have been defined.
Using your own PGP keys
You can also use your own PGP keys, which you may have created with a mail client such as Thunderbird. In the following paragraph we will explain further, how to upload the keys.
Uploading the keys
- Click on Your keys or PGP-Keys in the Guard.
- Select Upload private key and follow the instructions.
- Repeat the process for the public key with Upload public key only.
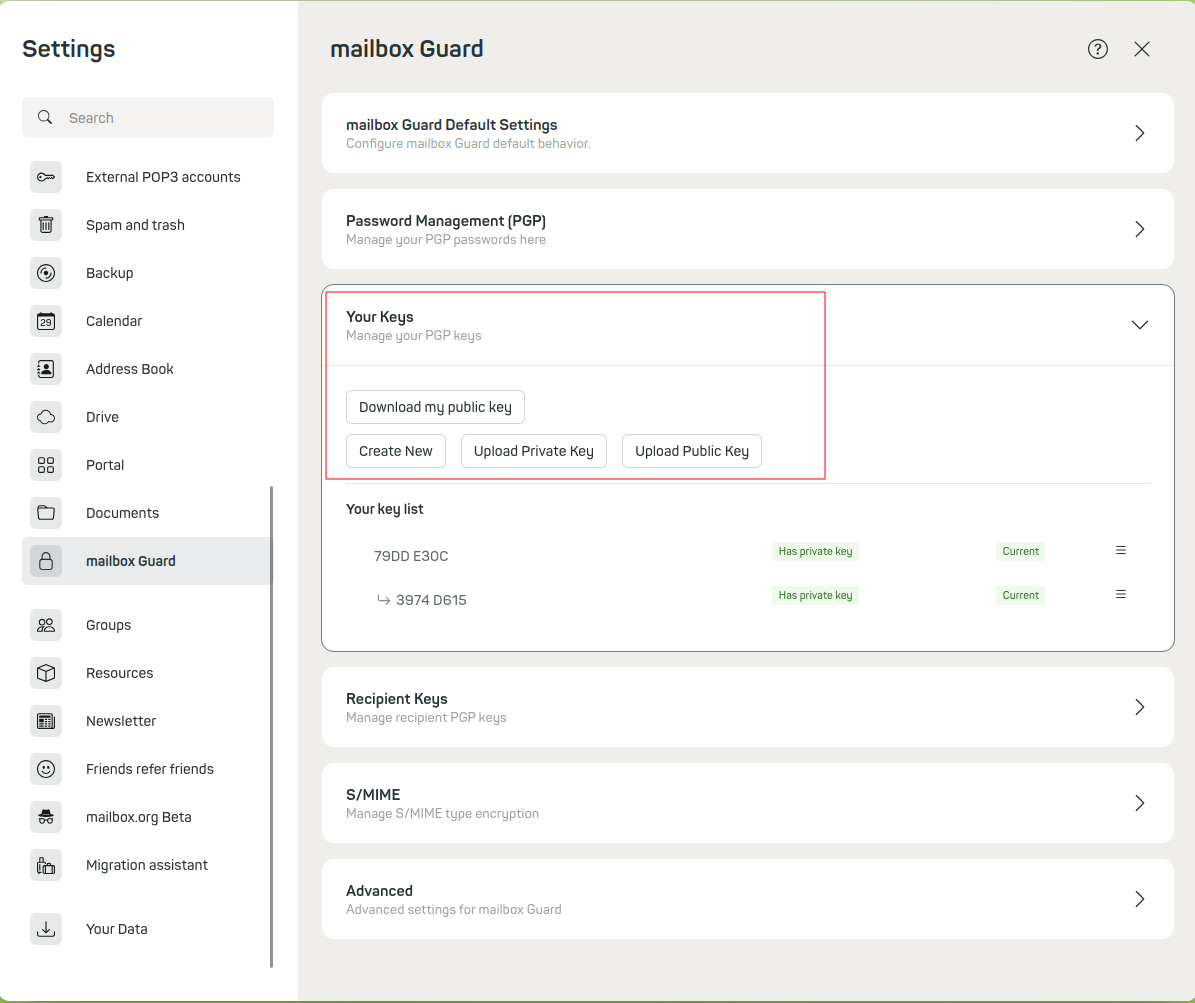
Figure 3: Uploading your own keys.
Password management
You will be prompted to enter the password of the private key and to set a new one.
Note: The use of multiple PGP keys is possible but can reduce clarity.
mailbox therefore recommends using the same key for both mails and the encrypted mailbox.
Important Notes
Expired PGP keys
When your PGP key expires, remove the corresponding rule from the filter rules and deactivate PGP encryption in the settings. After importing a new key, you can activate the function again.
Password prompt
In the security settings of the Guard you can determine how often you are prompted to enter your password. The options range from “Always ask” to specific time intervals.
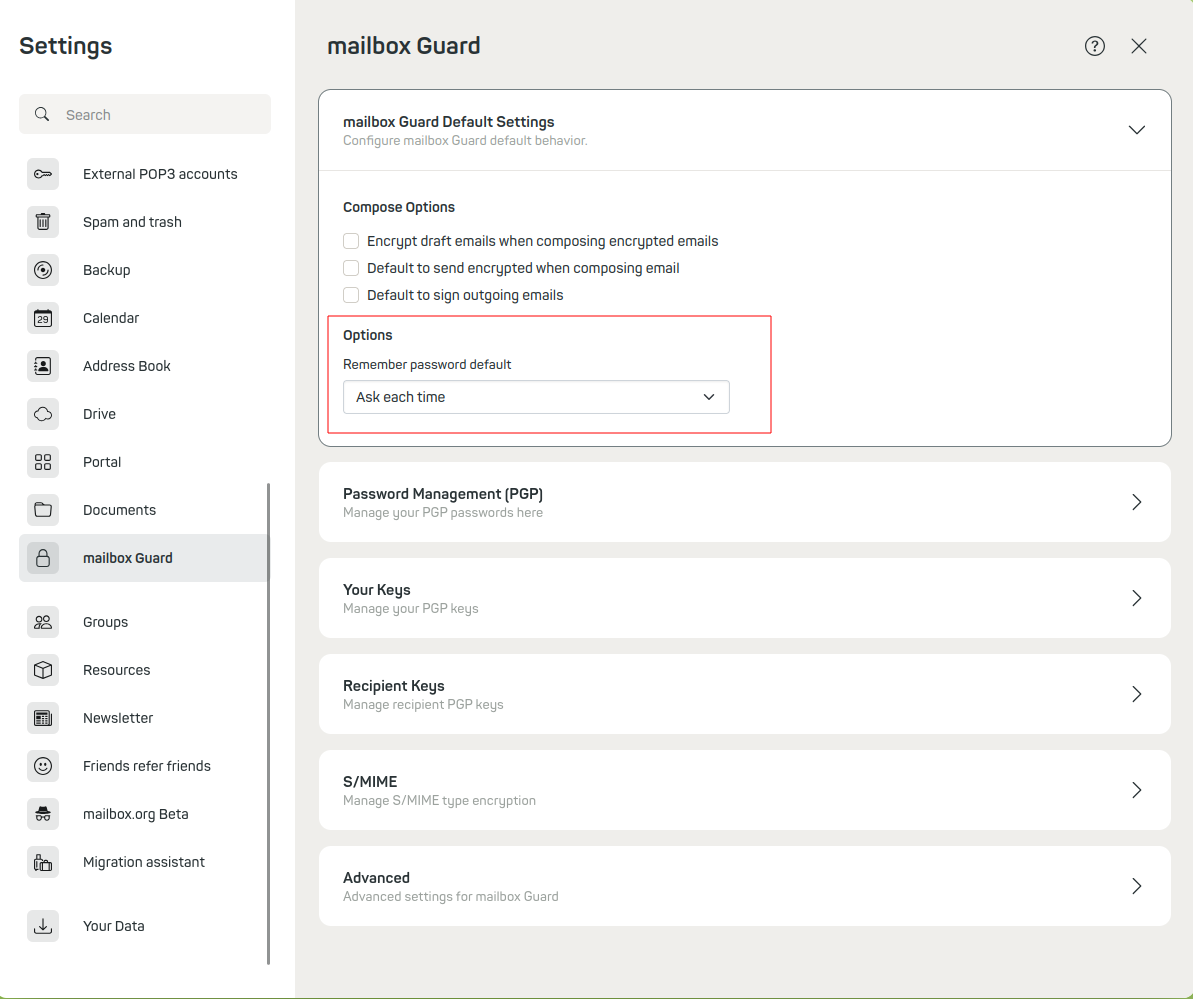
Figure 4: Individually define password settings and intervals.
Using the encrypted mailbox on other devices
To use the encrypted mailbox on different devices or with other mail clients, you can download your key pair and import it into the respective programs. However, please note the security notice in the following section.
Security notice
Handle your keys carefully.
A stolen private key can allow attackers to access your mails or send mails on your behalf.
Compatibility
Due to the large number of possible devices and software, mailbox cannot provide support for all clients and devices.
S/MIME with the encrypted mailbox
If you use your mailbox account with your local mail client, you can always use S/MIME for mail encryption there.
mailbox Guard | S/MIME | Activate S/MIME | Upload private certificate
Excluding mails from automatic encryption
In the mailbox web client, you can set up automatic inbox encryption under All settings | Mail encryption | PGP in the webmailer. Here you can choose whether to use mailbox Guard or Mailvelope.
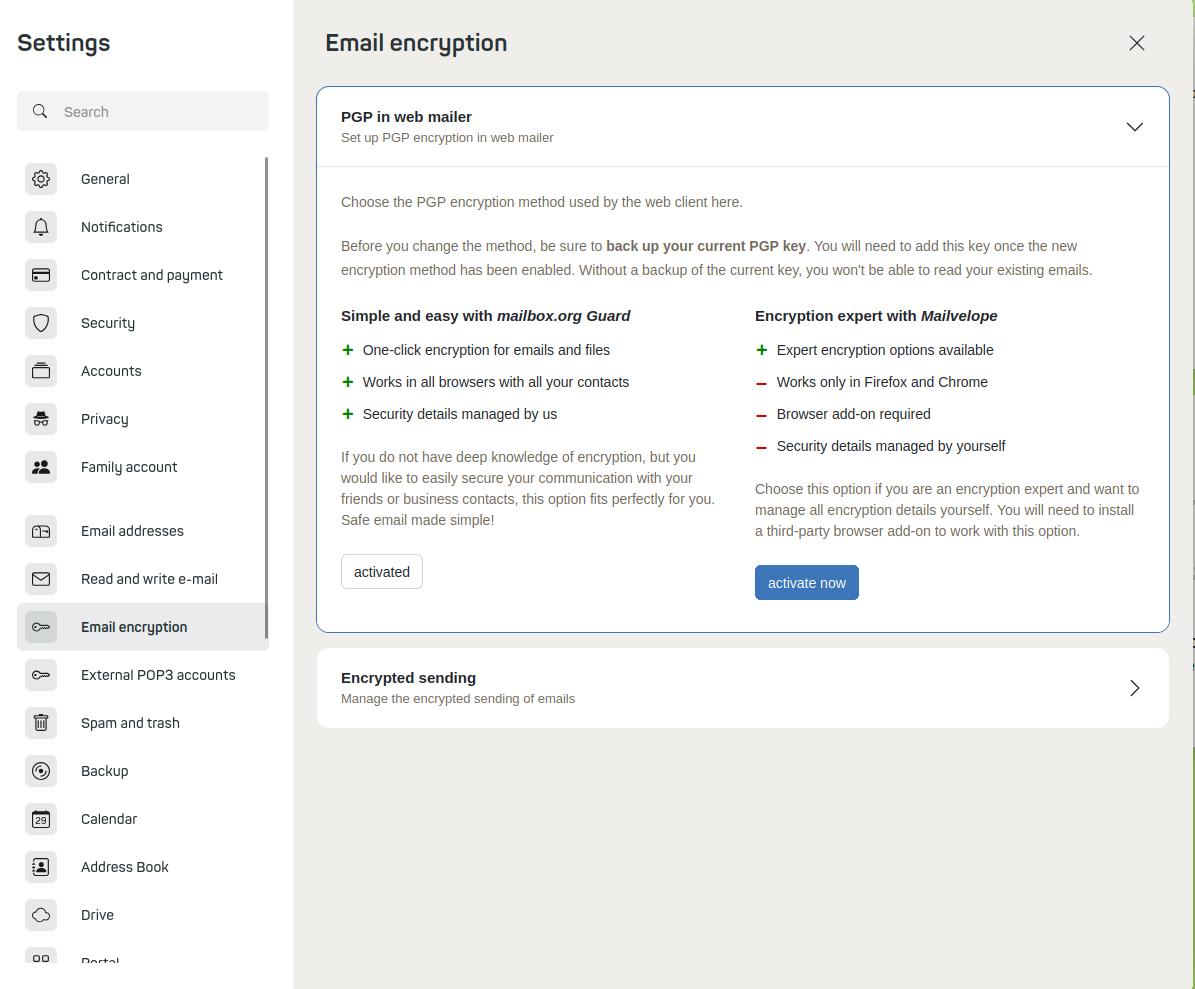
Figure 5: Mail encryption PGP in the webmailer and encrypted sending.
If you activate the encrypted mailbox, all incoming mails that are not already recognized as encrypted will automatically be encrypted for you. Once you have activated your encrypted mailbox, it will also be displayed in the filter rules under All settings | Read and write mail | Rules.
If you now want to prevent certain mails from being encrypted, simply create a new filter rule and specify senders, subjects, or other criteria by which the filter can identify mails that should not be encrypted. Simply choose Keep as the action or have the non-encrypted mails sorted directly into another folder. Finally, remove the check mark from Check against subsequent rules.
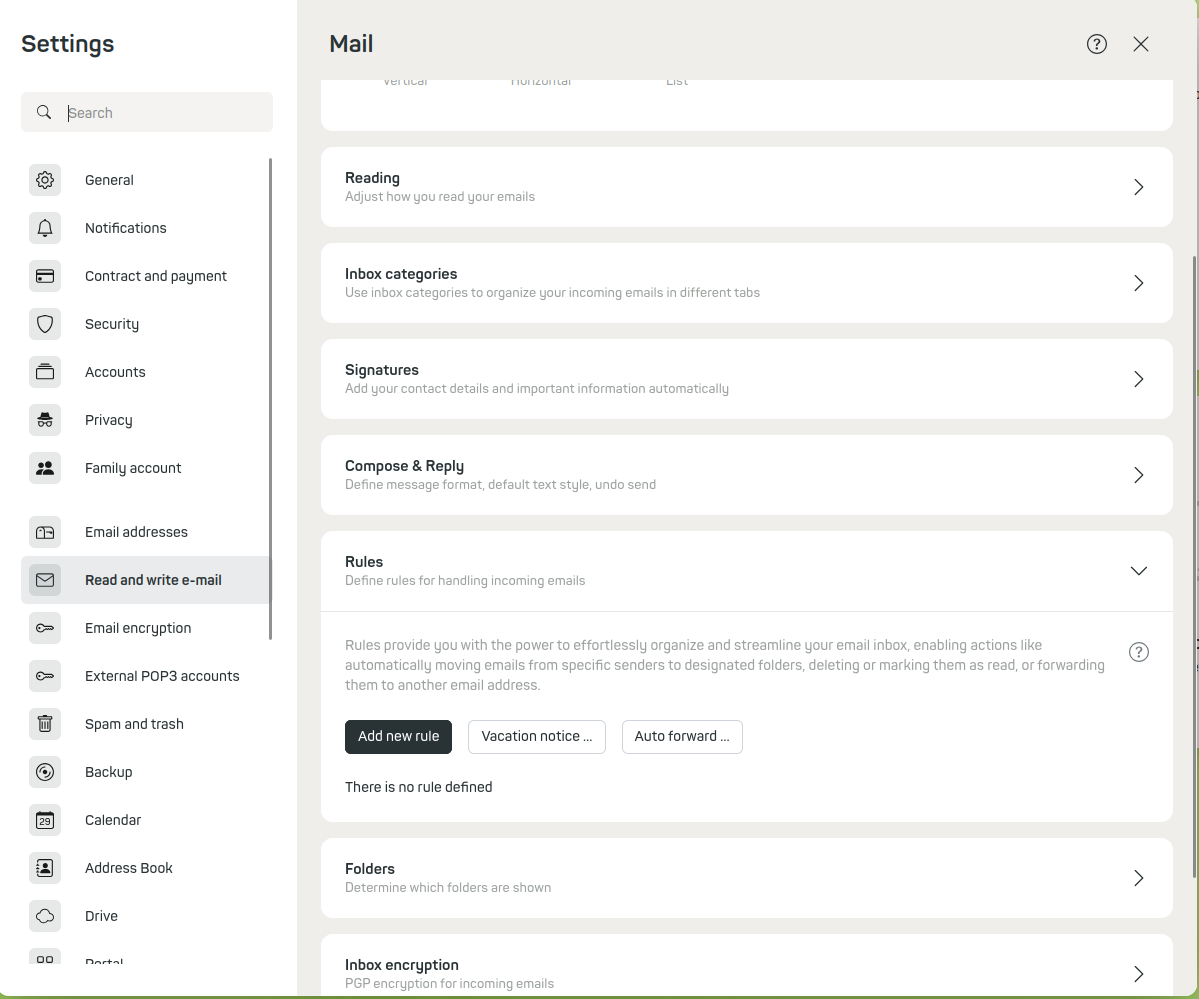
Figure 6: Add new rule.
