PGP Overview
Using your own PGP key pair with mailbox
If you already use a PGP key pair for your mailbox address, you can upload this key pair in the key management and replace the keys generated by the Guard during initialization. To do this, you must navigate to the menu item Your keys.
There are good reasons not to upload a private encryption key – for example for PGP – to a server. You should always handle these keys as carefully as possible. At mailbox, if you entrust the Guard with your private key, it will be backed up multiple times and stored on external data storage systems in our German data centers, protected with a password known only to you.
On your desktop PC or your smartphone, you must trust that the manufacturer of your operating system will fix security vulnerabilities as quickly as possible, especially those that allow third parties to access your data. Likewise, you must be able to rely on the software you use not to independently compromise your security – for example by collecting and passing on sensitive data.
Of course, you have the option not to upload your private key to our servers. You can then continue to retrieve your encrypted emails with IMAP or POP3 and read them locally with the mail client of your choice and the respective PGP program.
You can replace the PGP key pair automatically generated by the Guard during setup with a key pair you created yourself. The condition for this is that your current primary email address at mailbox is specified in the user ID.
Managing PGP keys
Working with the Guard
To use the functions described in this article, you must have the mailbox Guard activated. It is designed to work with your primary email address. Use in combination with alias addresses is not intended.
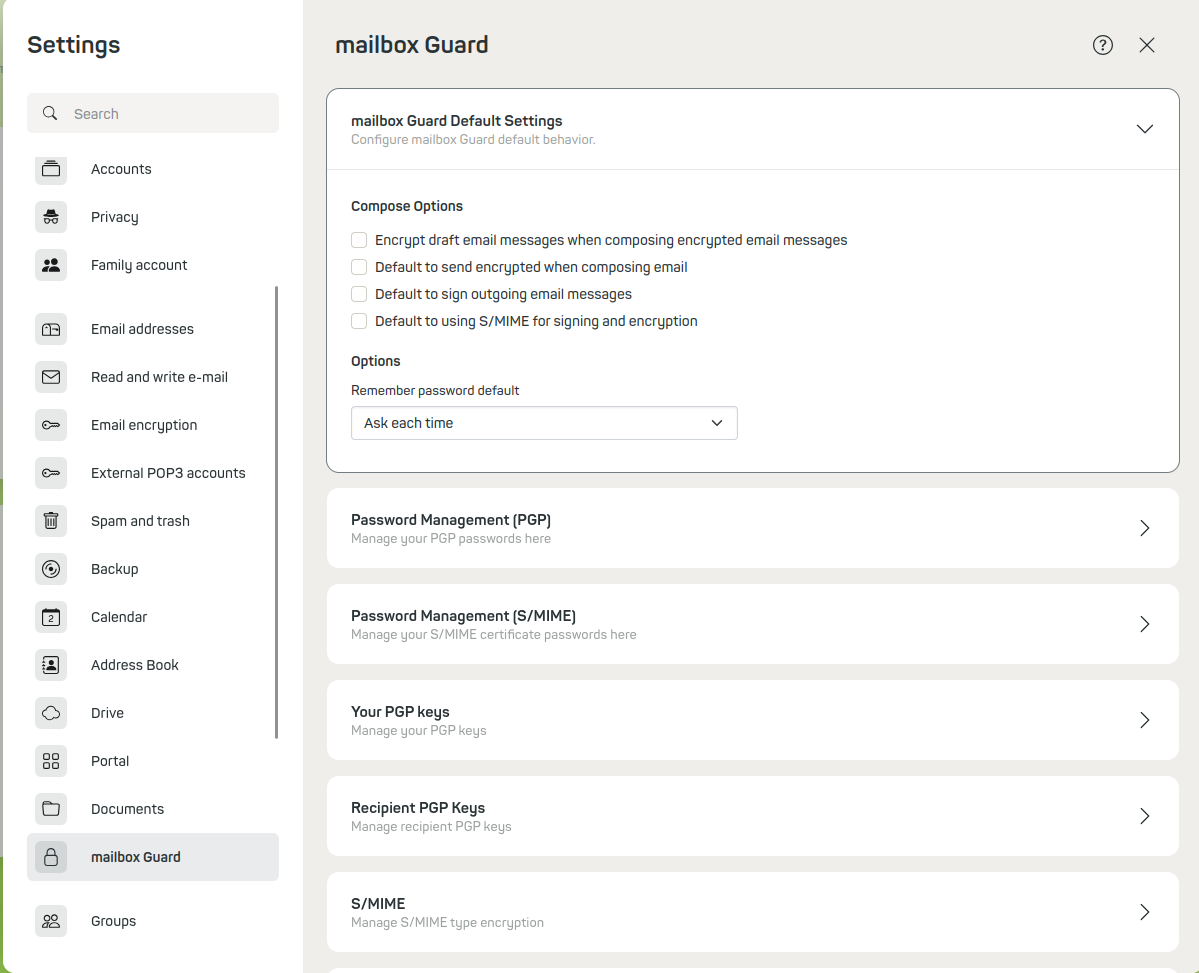
The mailbox Guard provides management for your own PGP keys as well as the public PGP keys of your communication partners. In your mailbox Office you will find this management under
All settings | mailbox Guard | mailbox Guard default settings (see Figure 1).

Figure 1: The mailbox Guard.
Key pairs in mailbox Guard
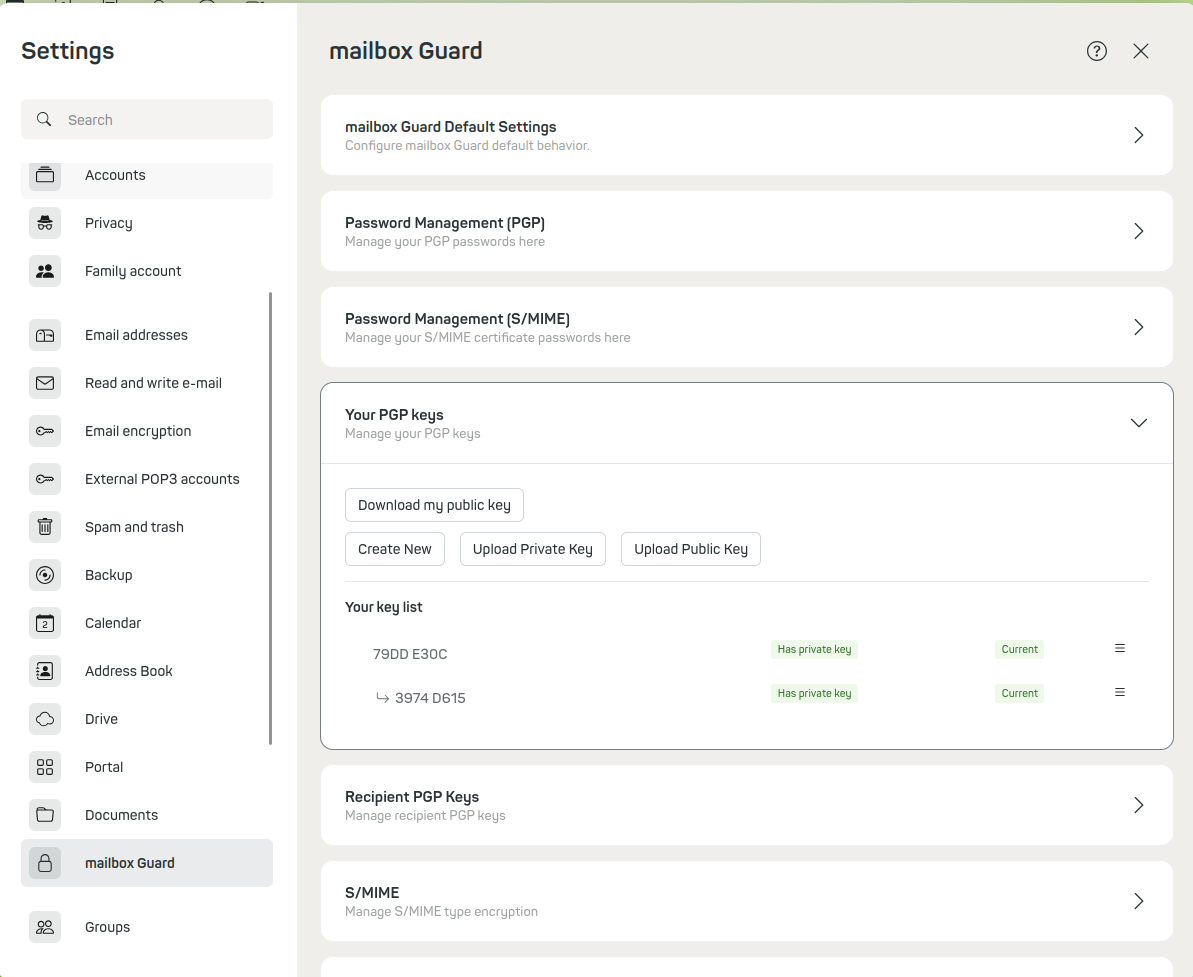
When the Guard is activated, two key pairs are automatically generated for your primary address. This makes the mailbox Guard fully functional from the start. If you are interested in details, you will find the automatically generated two key pairs in the key management:
Main key
The main key (the upper key in the Your key list section) is used to sign emails. It can also be used to certify or sign other PGP keys (Web of Trust) – but this function is not yet implemented in the mailbox Guard.
Subkey
The subkey is used to encrypt and decrypt email communication and files in the Drive.
Use in local programs
In the key management, you can download the keys (pairs) generated on our server and – if available – import them into your local PGP installation or your local mail client. This way you can access the encrypted emails both in the web client and in your local mail client.
Using your own keys
You can also replace the automatically generated keys with your own already existing key pair. This key pair must include at least your active mailbox email address as UID. You can decide for yourself whether you want to upload only a public key (to make it available to other Guard users) or also store the private key on our server in order to read encrypted content in the web client.
Key required on the server
Reading encrypted emails in the web client and opening encrypted files in the Drive is only possible if the corresponding valid private key is present on the server.
Uploading a new key
Open the key management (under All settings | mailbox Guard | Your keys). Always upload your new key file first. Delete the automatically generated old key only after successfully uploading your new key pair.
To upload the key pair you created yourself, simply click on the appropriate field under Your keys. The dialog shown in Figure 2 will then appear:

Figure 2: PGP key list.
Uploading only the public key
As a user with high security requirements, you can of course refrain from uploading your private key to our server. There is the option to upload only your public key, thereby giving other Guard users the option to communicate with you in encrypted form.
However, it is then understandably not possible to read encrypted emails in the web client, since the key for decryption is missing on the server. Instead, you can use your local mail client with the appropriate PGP installation.
Setting a new password
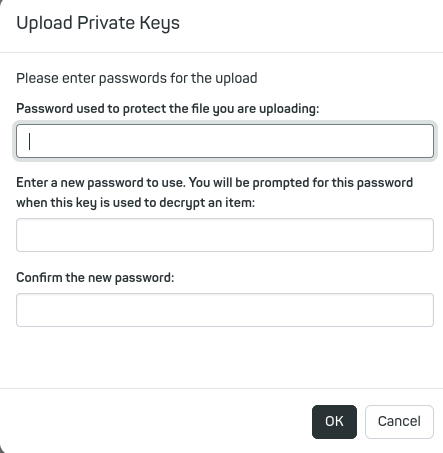
When you upload your private key or key pair (your private and your public key), you will be asked to enter two passwords (see Figure 3):
-
The current password of your private key
This is used to access the private key after uploading. -
A new password for this key
The new password should be identical to your previous Guard password. It is used to protect access to the private key in the Guard.
If you use a password that is not identical to the Guard password you have used so far, you will no longer have access to your old, already existing keys afterwards – and you will not be able to delete them anymore!

Figure 3: Uploading a private key.
Note: By uploading, the new keys are automatically marked as "Active". At the same time, your existing older keys are marked as "Inactive".
Expiration date of PGP keys
As a rule, PGP keys have an expiration date. If your PGP key has expired, it can no longer be used for mailbox encryption. This ensures that no old and potentially compromised keys remain in use. If you use a key with an expiration date, it is best to set a reminder to take action shortly before the key expires.
