Moving from Posteo to mailbox
If you want to move from Posteo to mailbox, it may be that you also want to take your calendar with you.
Here we show you a trick with which you can accomplish this.
Exporting the calendar from Posteo
Log in to Posteo and follow the steps in the screenshot to create an ICS link to share your calendar:
- Click on Settings
- Select Calendar
- Grant permission to share the calendar
- Copy the calendar URL in the last step.
Adding the shared calendar in mailbox
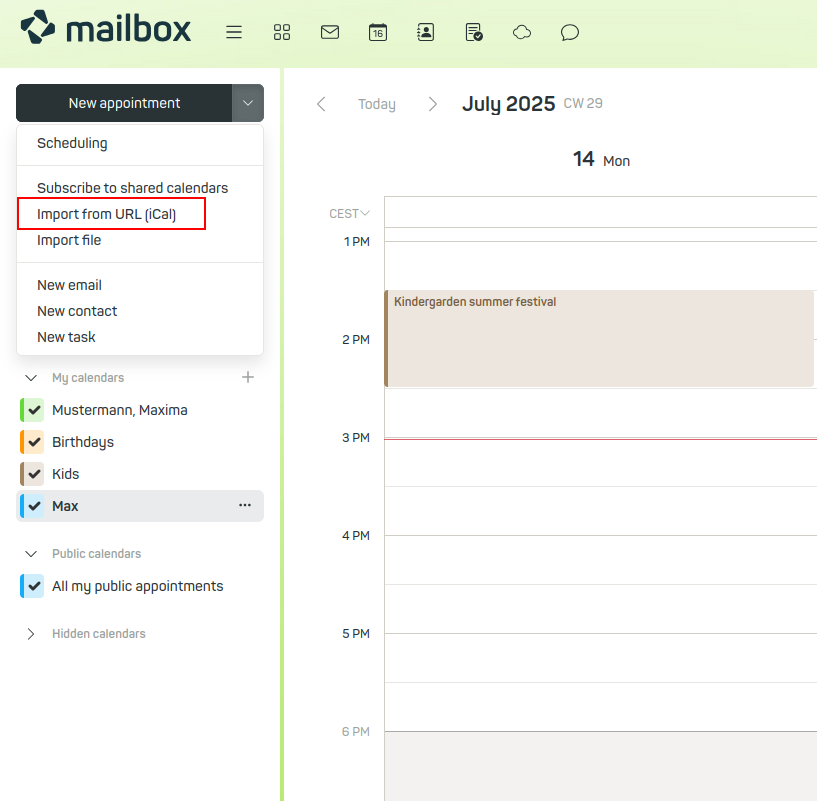
Now log in to mailbox and subscribe to the calendar as shown below.
Click on Add new calendar and then on Subscribe via URL (iCal). Now paste the URL copied from Posteo.

Figure 1: Adding the shared calendar in mailbox.
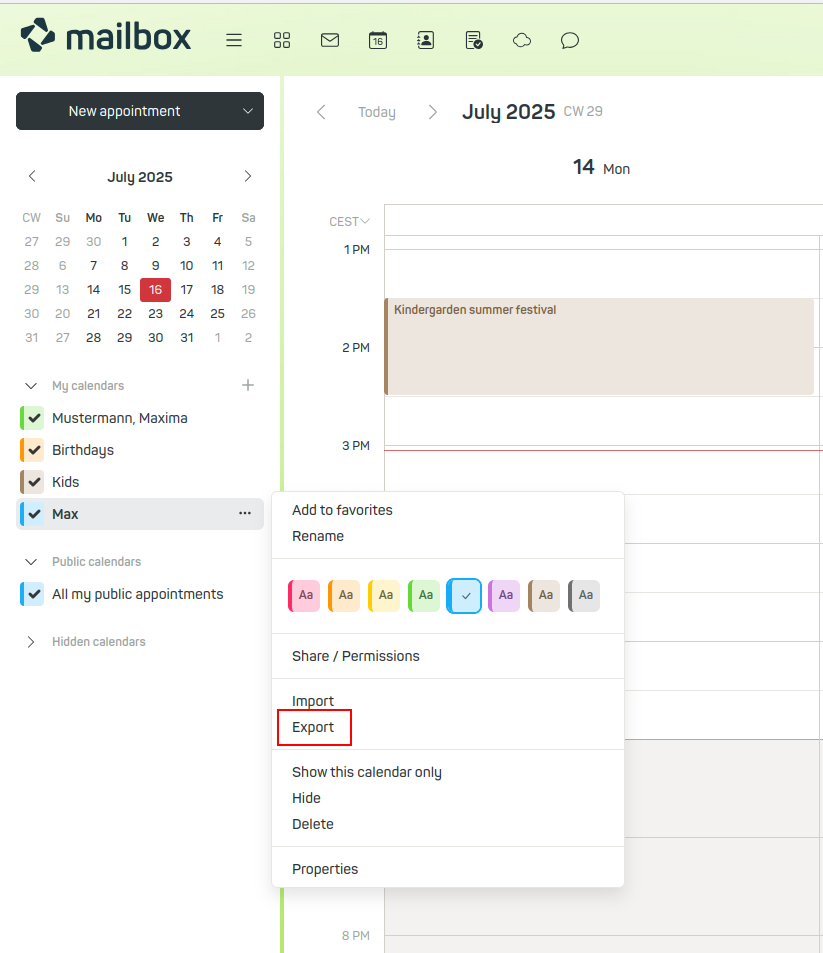
Export the subscribed calendar to a file now
To do this, click on the ☰ symbol of the calendar you just subscribed to and then select Export.
Choose a storage location.

Figure 2: The calendar can be exported anytime, mailbox gives you the choice between import and export.
Now import the calendar file you just created
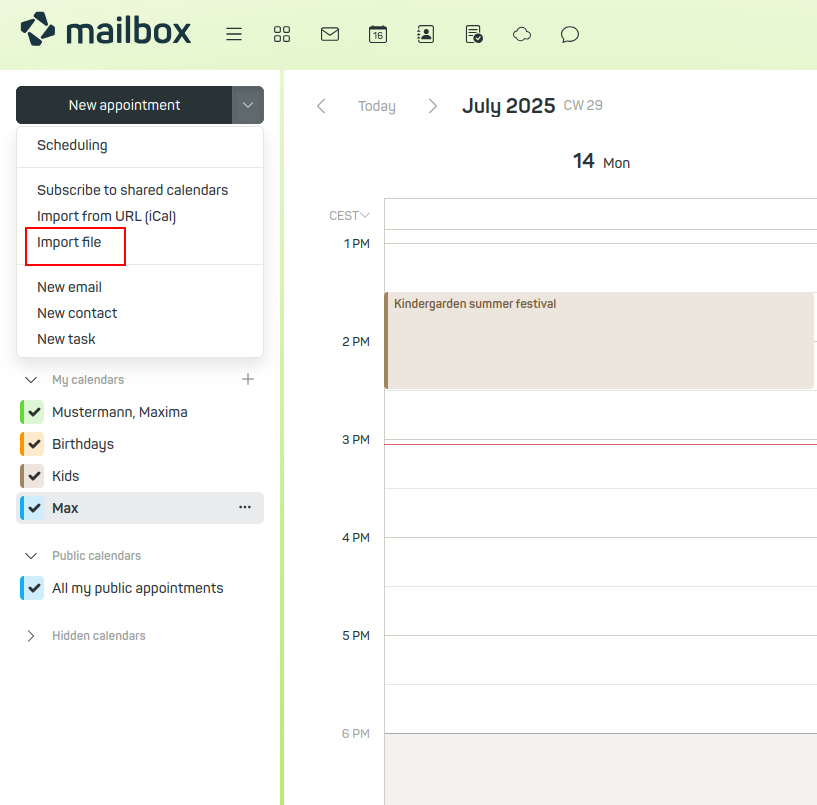
Click again on Add new calendar and then on Upload file.
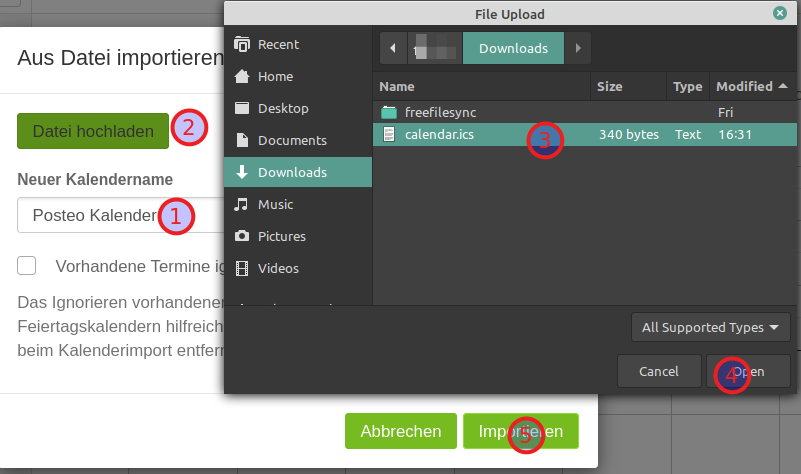
- Now choose a name for the calendar in the newly opened window, for example "Posteo Calendar".
- Click on Upload file and provide
- the path to the file saved in the previous step. Here it is called "calendar.ics"
- Confirm by clicking Open and
- Finally press Import.

Figure 3: Now click on import file.

Figure 4: Import ics file.
You have now imported the Posteo calendar. Verify whether everything is displayed correctly.
If not, you can repeat the process. In the last step before clicking the Import button (step 5 in the screenshot), check the box Ignore existing events.
This works analogously for moving from GMX to mailbox.
