
mailbox Business - Getting started
Welcome to mailbox
After registering your mailbox Business account, there are a few steps required before you can fully use your account. This article guides you step by step through the basic setup.
Basic setup
After creating your account, log in at the console.
Your dashboard will initially look quite empty:
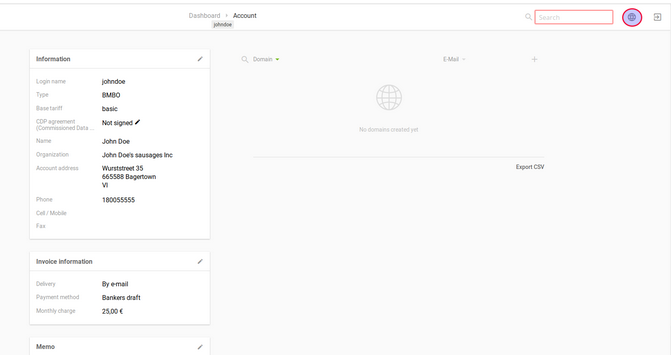
Initial dashboard after login
Adding your domain
First, add your domain in the console:
-
Click the plus icon in the Domain section.
You will then see the following screen:
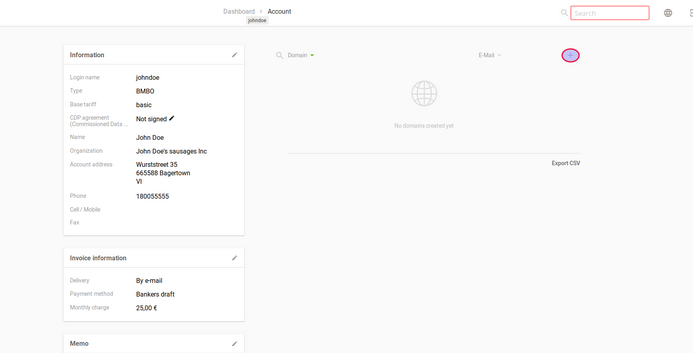
Add your domain -
Enter your domain into the form.
After entering your domain, click the reload icon to the right and wait a moment. Your security key will now be displayed:
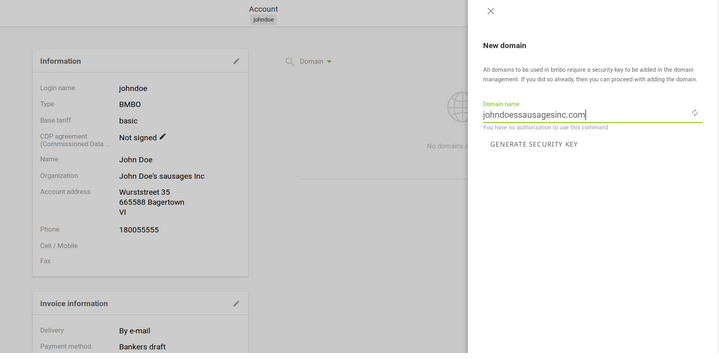
Security key is displayed -
Add the displayed security key as a
TXTrecord. Keep in mind that domain management may vary depending on the provider. If you have problems setting theTXTrecord, your provider's support team can help you.Here is an example of a
TXTrecord at a domain provider:
Example TXT record at a providerAttentionFor technical reasons, it may take up to 48 hours for the DNS entry to synchronise.
-
Return to the mailbox Business console and click Validate.
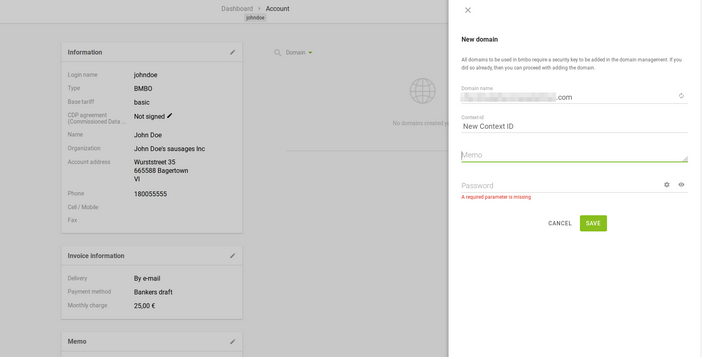
Display in the console after domain validationIf you receive an error message or nothing happens, repeat the validation at a later time. The
TXTrecord set in the DNS remains valid. -
Enter a password for the domain and then click Save.
Your domain has now been added to mailbox Business. Continue by creating an email account.
Adding email accounts
Set up your email accounts before you change the MX records in your DNS settings. As soon as your MX records point to our servers (see instructions), our systems will receive all emails for your domain. If the respective destination email accounts have not been created with us beforehand, these emails will be rejected as undeliverable (“User unkown”).
-
To create an email account, click on the name of your registered domain.
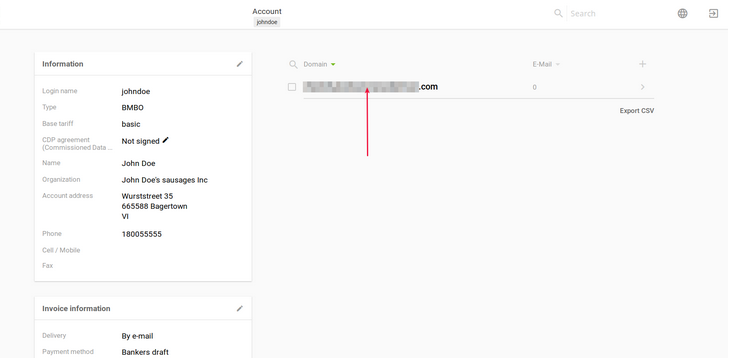
Domain overview in the console -
In the email account overview, click on the plus icon in the upper right corner:
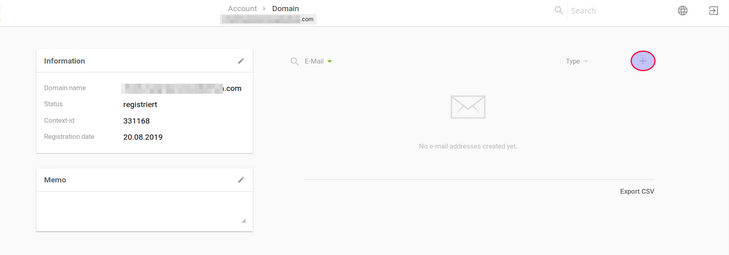
Create a new email account -
Enter the desired email address as well as the first and last name of the mailbox user:
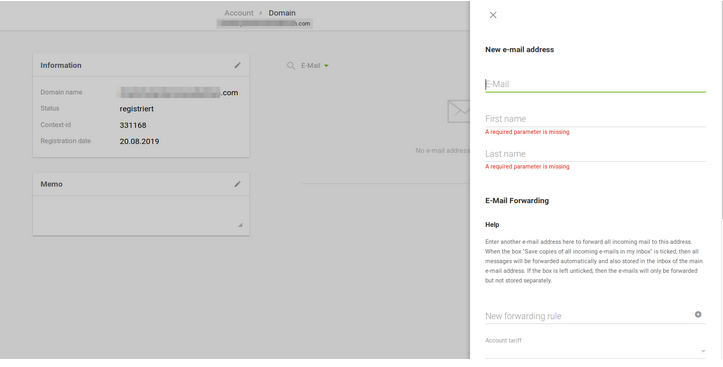
Enter the account details -
Select the desired plan for the mailbox.
The Drive storage space for all members of a domain is added together. This does not apply to email storage, nor does it apply to the Light plan, as this does not include any Drive storage. -
Set the password for the mailbox.
-
Click Save.
You will now see the created email account in the overview:
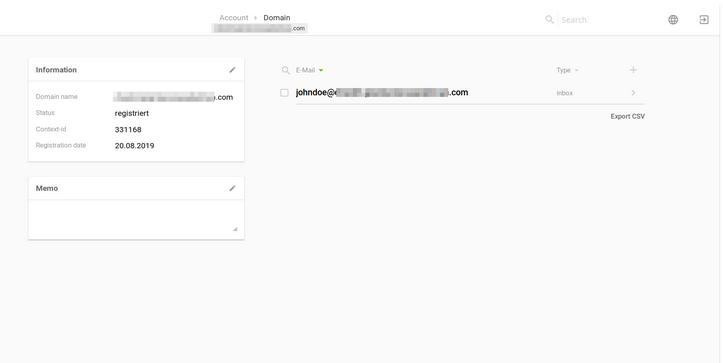
Overview of the created mailbox
API documentation
Of course, our API is also available to you. You can find the documentation at https://api.mailbox.org.
Adjusting MX records
Change the MX records in your domain provider’s DNS settings so that you can receive emails from external sources.
You can find instructions in the following article: Using your custom domain with mailbox Business
We strongly advise against maintaining a parallel operation with existing email accounts. Once internal emails are correctly delivered to the new mailbox, they will no longer be forwarded to the old one. Internal emails are those sent from other mailbox addresses, including all Business and private customers, as well as our Support (Helpdesk system).
Setting up email forwarding
Email forwarding can only be set up by the Business account administrator via the console.
- In the console, click on your domain.
- Click the plus icon to create a new email account, or click on the pencil button next to an existing email account to add forwarding to it.
- In the New forwarding rule field, enter a different email address to which all messages should be forwarded.
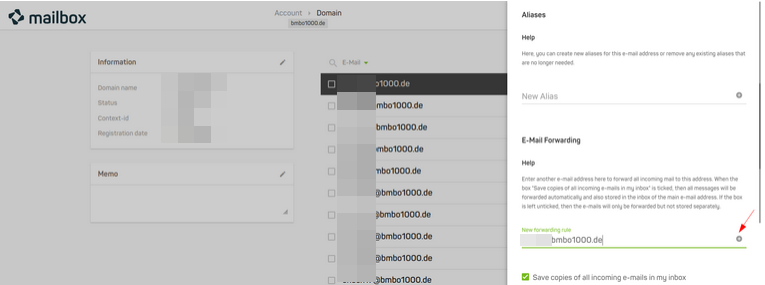
Enter an email address for forwarding - Click the plus icon to add the email address.
- Click Save.
Setting up free forwarding
With mailbox, you can also set up a free forwarding service. This forwarding service does not have an inbox. Emails sent to an address are forwarded directly to the specified addresses. This allows you, for example, to set up an automatic distribution list.
- In the console, click on your domain.
- Click the plus icon to create a new email account, or click on the pencil button next to an existing email account to add forwarding to it.
- In the New forwarding rule field, enter a different email address to which all messages should be forwarded.
- Untick the box next to Save copies of all incoming e-mails in my inbox.
- From the Inbox plan drop-down menu, select Just forward (free of charge).
- Click Save.
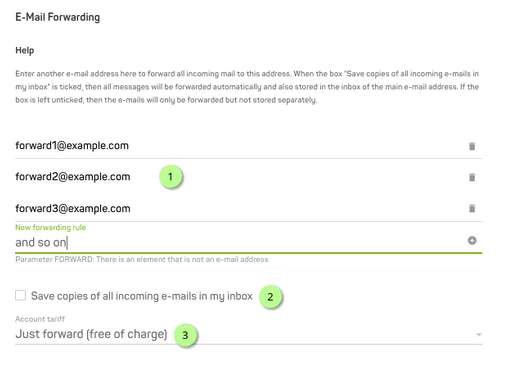
Enable free forwarding
Additional settings
There are further optional settings for your domain or for individual email accounts which are not enabled by default:
- Email backup: Our servers automatically create backups of each email account. This service is available for free for all users in the Standard and Premium plans. Backups are retained for a maximum of six days and then replaced with new ones.
- Blacklist: Each mailbox user can individually block senders. Messages from blocked addresses will be rejected.
- Spam & virus protection: The behaviour of our spam filters can be individually configured. We also recommend reading the related article in the Knowledge Base.
- Password reset via SMS: This function allows you to enable password resets for mailbox users via a previously registered mobile number.
You can enable these functions either globally for a domain or for individual email accounts.
Enabling features globally for a domain
- In the console, tick the box next to the desired domain. If you wish to change the settings for several domains at once, select all the desired domains.
- Click Features.
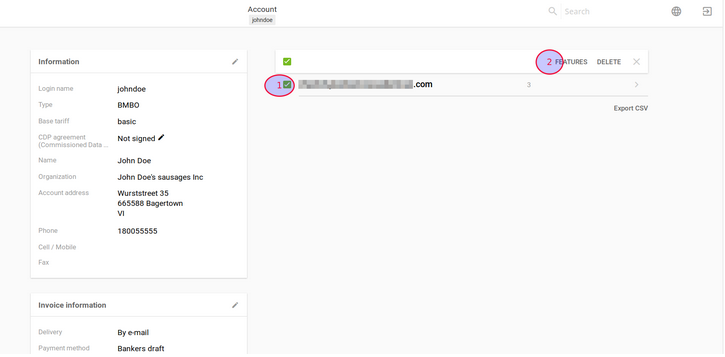
Activate features for a domain - In the dialogue box, tick the boxes next to the options you want.
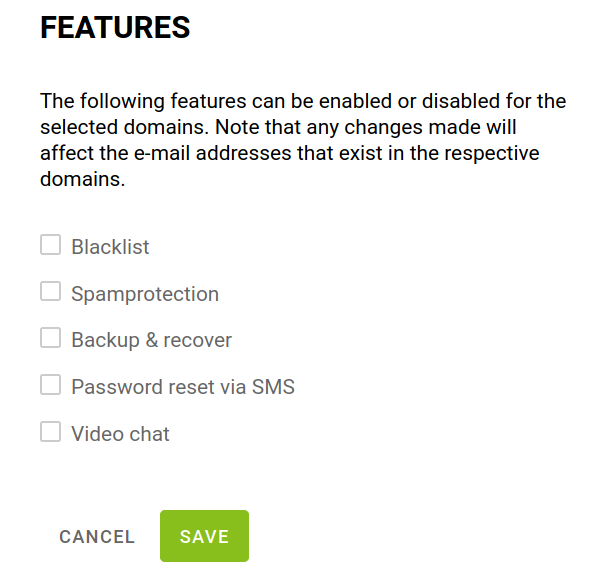
List of features for a domain - Click Save.
If you wish to disable features again, untick the boxes next to the options you do not want and click Save.
Enabling features for individual email accounts
- In the console, tick the box next to the desired email account. If you wish to change the settings for several email accounts at once, select all the desired email accounts.
- Click Features.
- In the dialogue box, tick the boxes next to the options you want.
- Click Save.
Editing master data and booked plans/packages
If your service and support package no longer meets your requirements, you can adjust it yourself at any time – just as you can with your master data.
To do this, after logging in to the console, click on the pencil icon in the Information box.
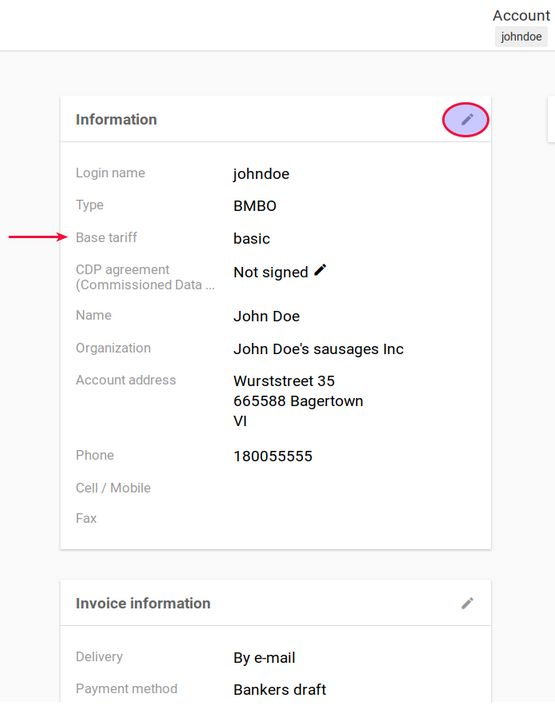
Edit master data and service package
Price list
You can find an up-to-date overview of our plans and packages on our website.


