
Using your custom domain with mailbox Business
Prerequisites
To use mailbox Business, you need:
- A mailbox Business account. To find out how to register, follow the steps in this article: Register mailbox Business
- A domain that you have registered with a provider of your choice. In this article, we will use the domain
example.comas an example. - The login details for your domain's administration interface, which are provided to you by your provider (or host). Providers such as Hetzner, Netcup, or INWX are common options for hosting your domain.
Step by step
After creating your account, login at the console.
Your dashboard will initially appear quite empty:
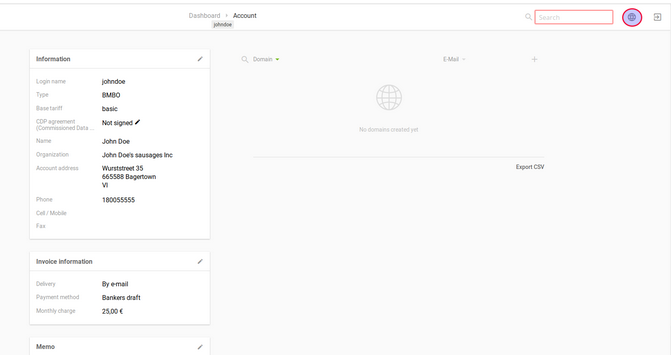
Initial dashboard after login
Step 1: Add and validate your domain
-
Click the plus icon in the Domain section.
You will then see the following screen:
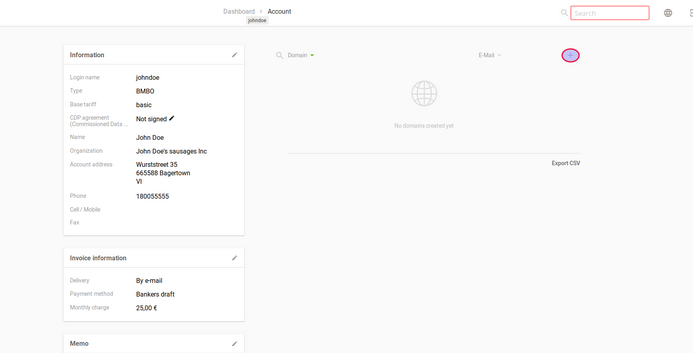
Add your domain -
Enter your domain into the form.
After entering your domain, click the reload icon to the right and wait a moment. Your security key will now be displayed:
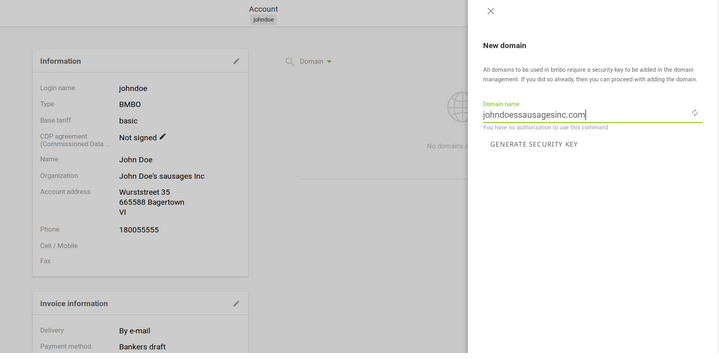
Security key is displayed -
Save the security key displayed here with your domain provider as a
TXTrecord. Please note that the syntax for DNS records may vary depending on the provider. If you encounter any problems setting theTXTrecord, please contact your provider’s support team.Common ways of writing the hostname (the first part of the security key) are as follows:
p30oe995fc9105322345b6277ac3b1i2eb45106j5j7.example.com.(with a period at the end)p30oe995fc9105322345b6277ac3b1i2eb45106j5j7.example.com(without a trailing period)p30oe995fc9105322345b6277ac3b1i2eb45106j5j7(only the first part without period and domain)
Here is an example of a
TXTrecord at a domain provider:
Example TXT record at a providerNoteWhen copying the mailbox security key, ensure that you copy the entire key correctly and that no changes are made by the clipboard.
-
Return to the mailbox Business console and click Validate.
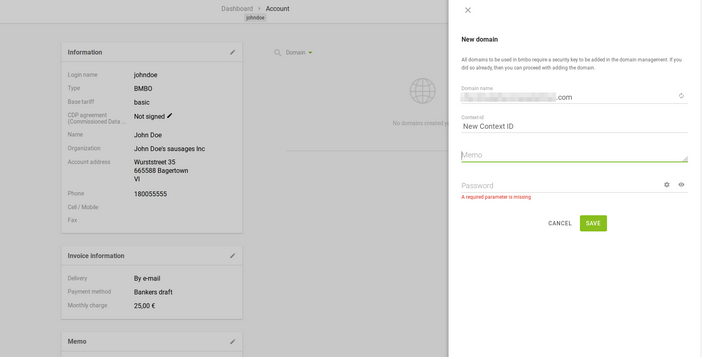
Display in the console after domain validationIf you receive an error message or nothing happens, repeat the validation at a later time. The
TXTrecord set in the DNS remains valid. -
Enter a password for the domain and then click Save.
Your domain has now been added to mailbox Business. Continue by creating an email account.
For technical reasons, it may take up to 48 hours for the DNS entry to synchronise.
Step 2: Set up email accounts
Set up your email accounts before you change the MX records in your DNS settings. As soon as your MX records point to our servers (see instructions), our systems will receive all emails for your domain. If the respective destination email accounts have not been created with us beforehand, these emails will be rejected as undeliverable (“User unkown”).
-
To create an email account, click on the name of your registered domain.
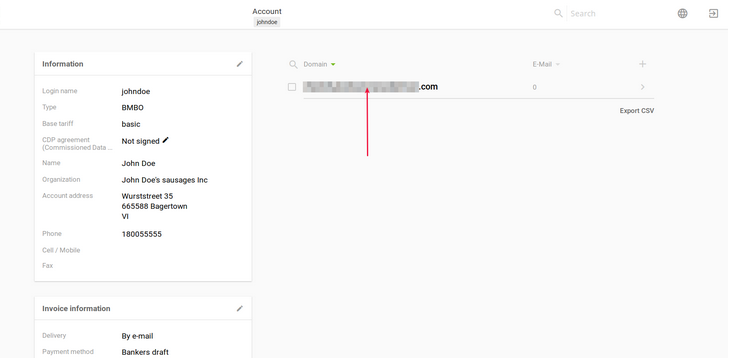
Domain overview in the console -
In the email account overview, click on the plus icon in the upper right corner:
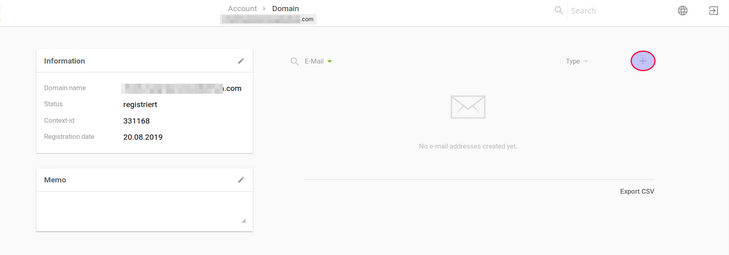
Create a new email account -
Enter the desired email address as well as the first and last name of the mailbox user:
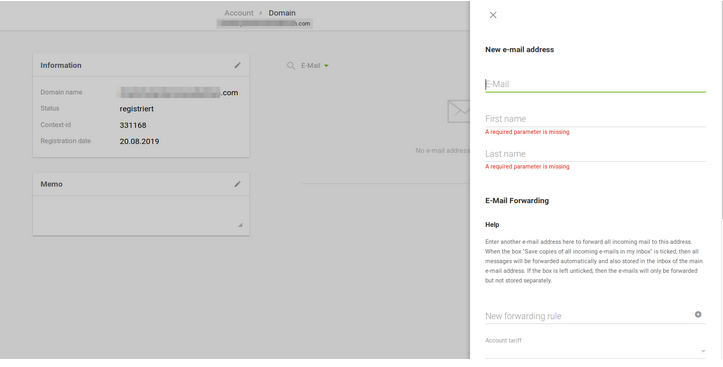
Enter the account details -
Select the desired plan for the mailbox.
The Drive storage space for all members of a domain is added together. This does not apply to email storage, nor does it apply to the Light plan, as this does not include any Drive storage. -
Set the password for the mailbox.
-
Click Save.
You will now see the created email account in the overview:
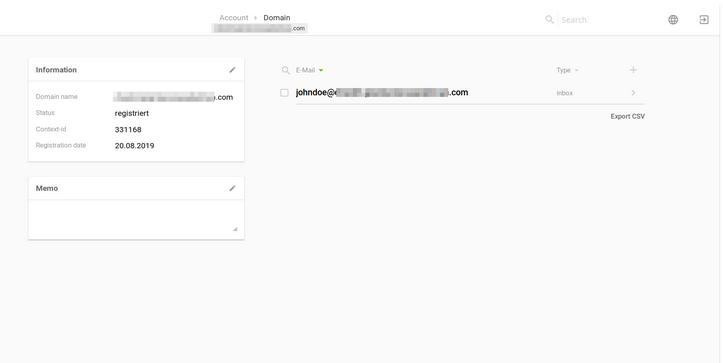
Overview of the created mailbox
By setting up a catch-all mailbox, you will receive all emails sent to your domain that are not assigned to a specific email address. To learn how to set up a catch-all mailbox, refer to the following article: Set up a catch-all mailbox
Step 3: Configure MX records
Configure the MX records for your domain. These ensure that emails sent to your domain are forwarded to our mailbox servers.
You will need the following information for the configuration at your domain provider:
- Your domain name, e.g.,
example.com - Priority of the forwarding
- Destination of the forwarding, i.e., the email servers at
mailbox.orgthat will be responsible from now on
| Domain | Type | Priority | Destination |
|---|---|---|---|
| example.com | MX | 10 | mxext1.mailbox.org. |
| example.com | MX | 10 | mxext2.mailbox.org. |
| example.com | MX | 10 | mxext3.mailbox.org. |
| example.com | MX | 10 | mxext4.mailbox.org. |
Enter all four DNS records and remove all MX records that do not point to the mailbox servers. This ensures that your emails are reliably delivered via mailbox – even if a single server fails.
Optimise deliverability
To optimise the deliverability of your emails, add further DNS records (SPF, DKIM, DMARC). This will help prevent emails from your domain from being flagged as spam or rejected. You can find best practices on this in the following article: SPF, DKIM, and DMARC - How to improve spam reputation and avoid bounces
When can I start using my new email inbox?
If you have used the email addresses for your domain before, please check your old email inbox, as emails may still be arriving there until the DNS synchronisation has been successfully completed. You should therefore only transfer the data from the old inbox to the new one once the new MX records have taken effect.


