
Setting up Drive as a folder in Linux with WebDAV – Easy
In this guide, you will learn how to set up your mailbox Drive as a folder in Linux. Once you have done this, you will be able to access the contents of your mailbox Drive just like a regular folder on your computer.
To configure this, the WebDAV protocol is used. WebDAV allows direct access to files on a server or in cloud storage via the Internet. This enables you to copy, save, rename, or delete files in your “mailbox Drive” without having to download them completely first.
If two-factor authentication is enabled, you must use an application password to connect to your “mailbox Drive” via WebDAV. The regular password for your mailbox account will not work in this case.
For more information, see the article Application passwords for external programs.
No additional software is required for the following steps.
Step 1: Preparation
You will need the first and last name you have saved in your mailbox account. Here is how to find it: Click your profile icon (the circle with your initials) in the top-right corner of the mailbox Suite to view it.
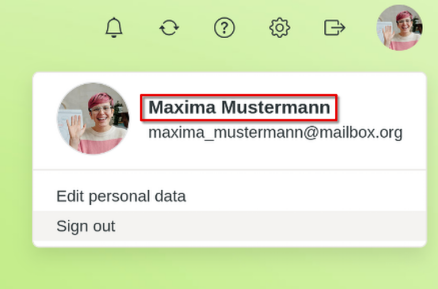
First and last name in your mailbox account
Step 2: Open your file manager
Open your file manager. This may vary depending on the Linux distribution you are using. This guide uses “Dolphin.”
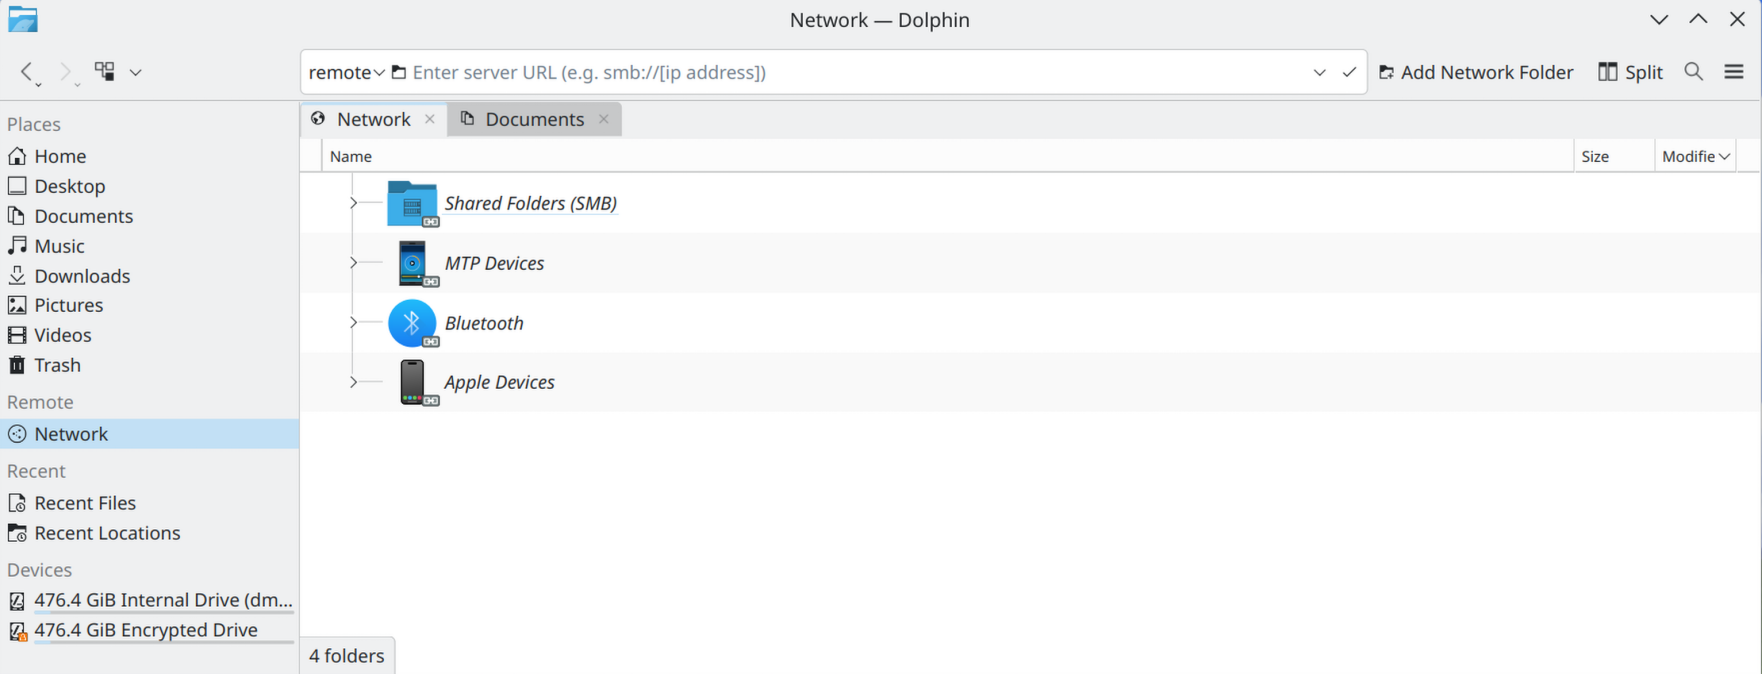
Open your file manager
Step 3: Enter WebDAV link
Enter the WebDAV link into your file manager. Be sure to use the correct uppercase and lowercase letters for your first and last name. Use the following link and replace “Maxima Mustermann” with your first and last name:
davs://dav.mailbox.org/servlet/webdav.infostore/Userstore/Maxima Mustermann/
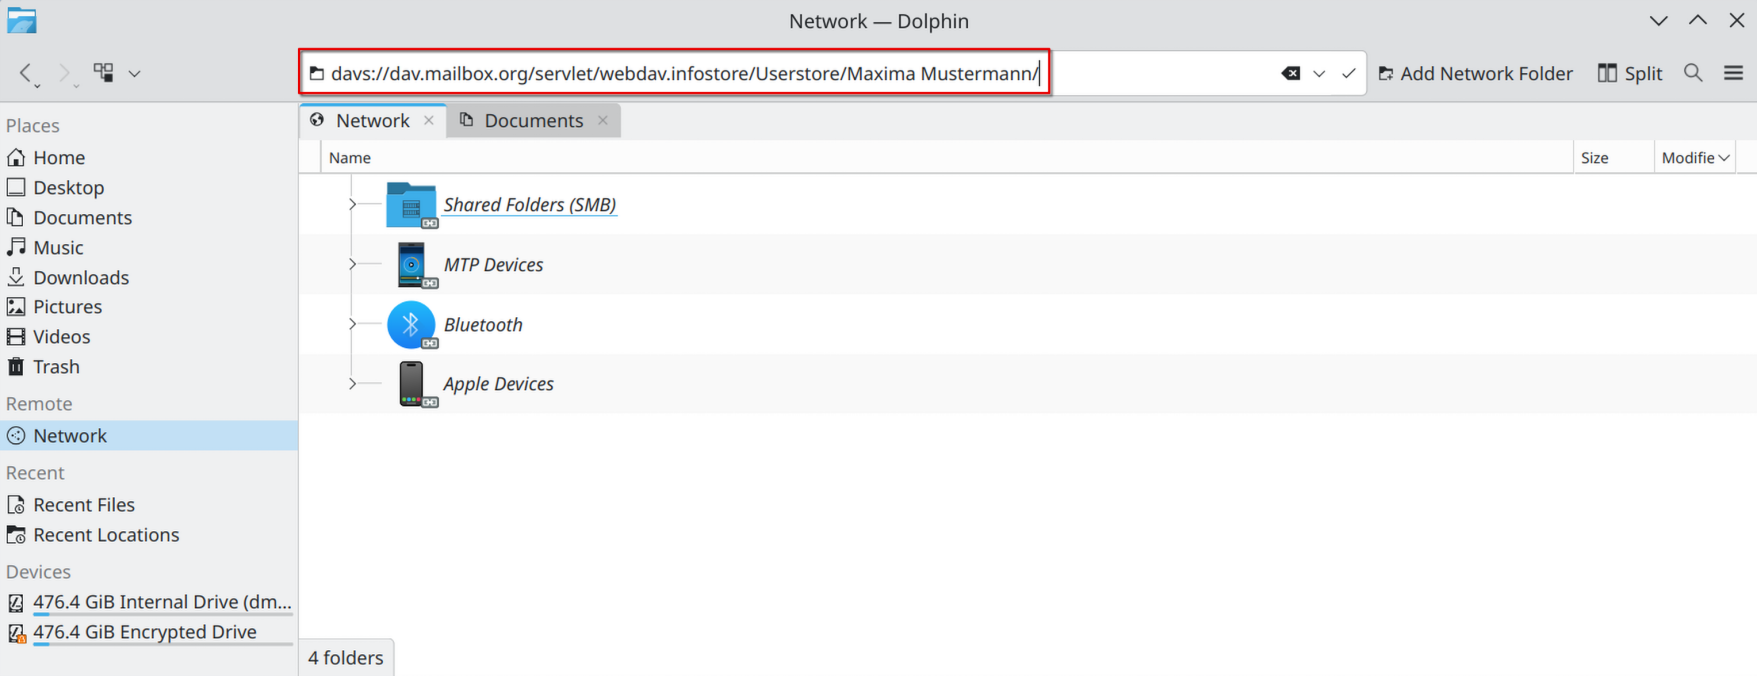
Enter WebDAV link
If an error message appears, replace the space in the WebDAV link between your first and last name with %20, e.g., “Maxima%20Mustermann”. This also applies to other special characters in your name, which must be replaced with their UTF-8 equivalents.
Step 4: Connect your mailbox account
Connect your mailbox account to your file manager. To do this, enter the email address and password for your mailbox account. If two-factor authentication is enabled, use your Application passwords for external programs.
Check the Remember password box.
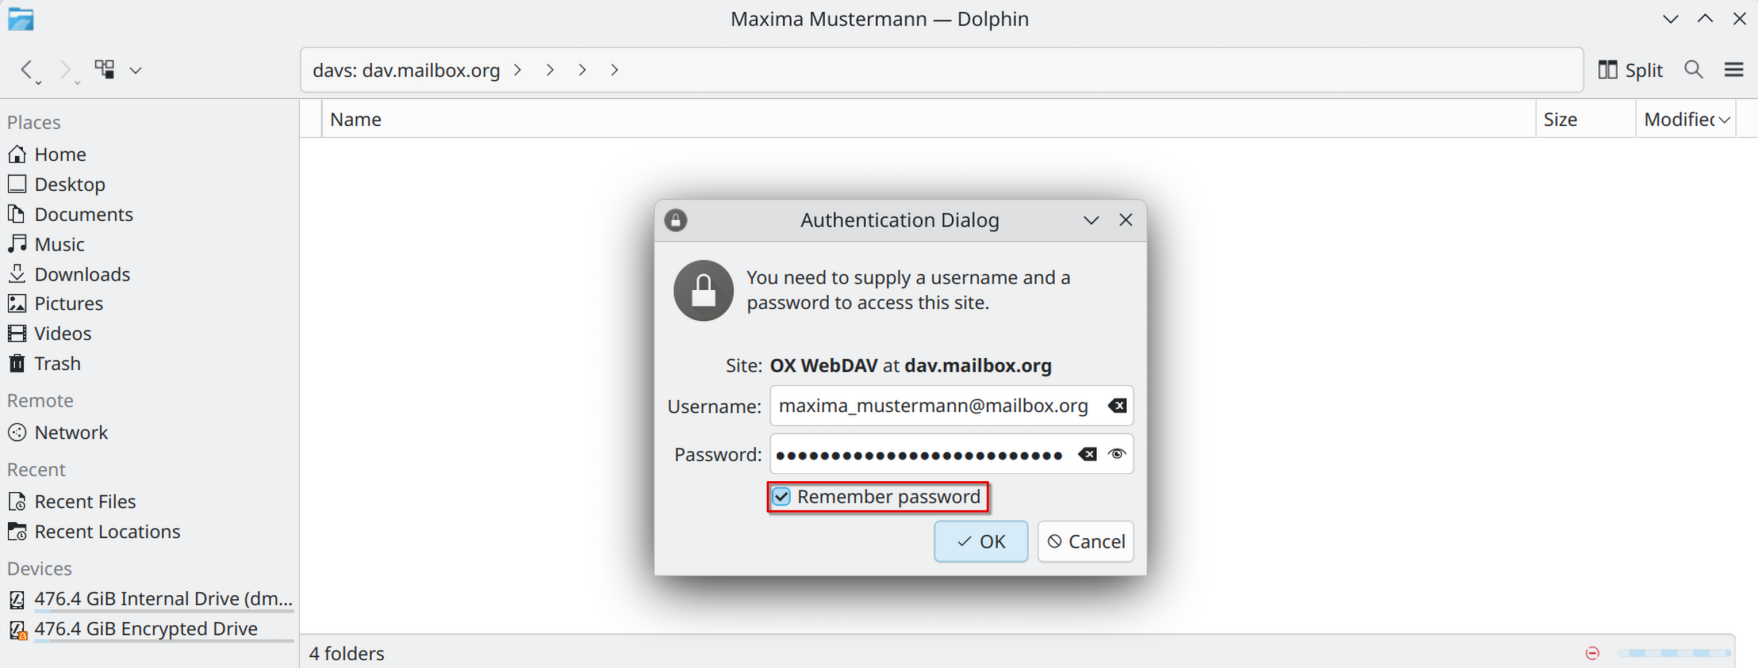
Connect your account
Step 5: Bookmark your mailbox Drive
To bookmark your mailbox Drive in your file manager:
-
In the address bar of your file manager, click Userstore.
-
Right-click the folder you previously connected—in this example, “Maxima Mustermann.”
-
Click Add to Places.
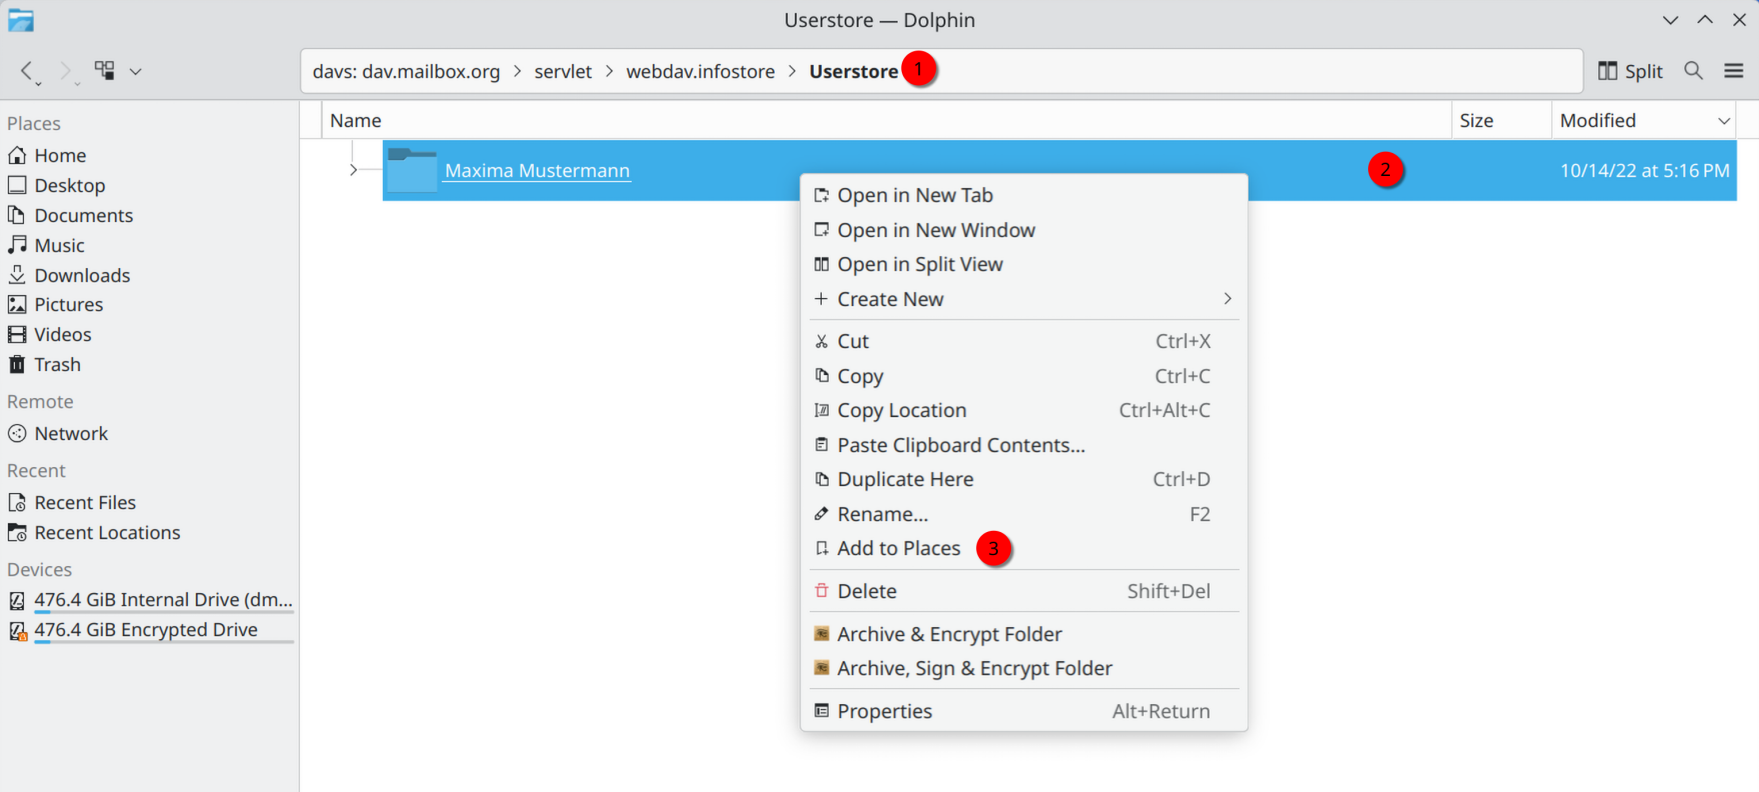
Bookmark your mailbox Drive -
You can rename the folder. To do so, right-click on your connected folder under Remote.
-
Enter any name you like, such as “mailbox Drive.”
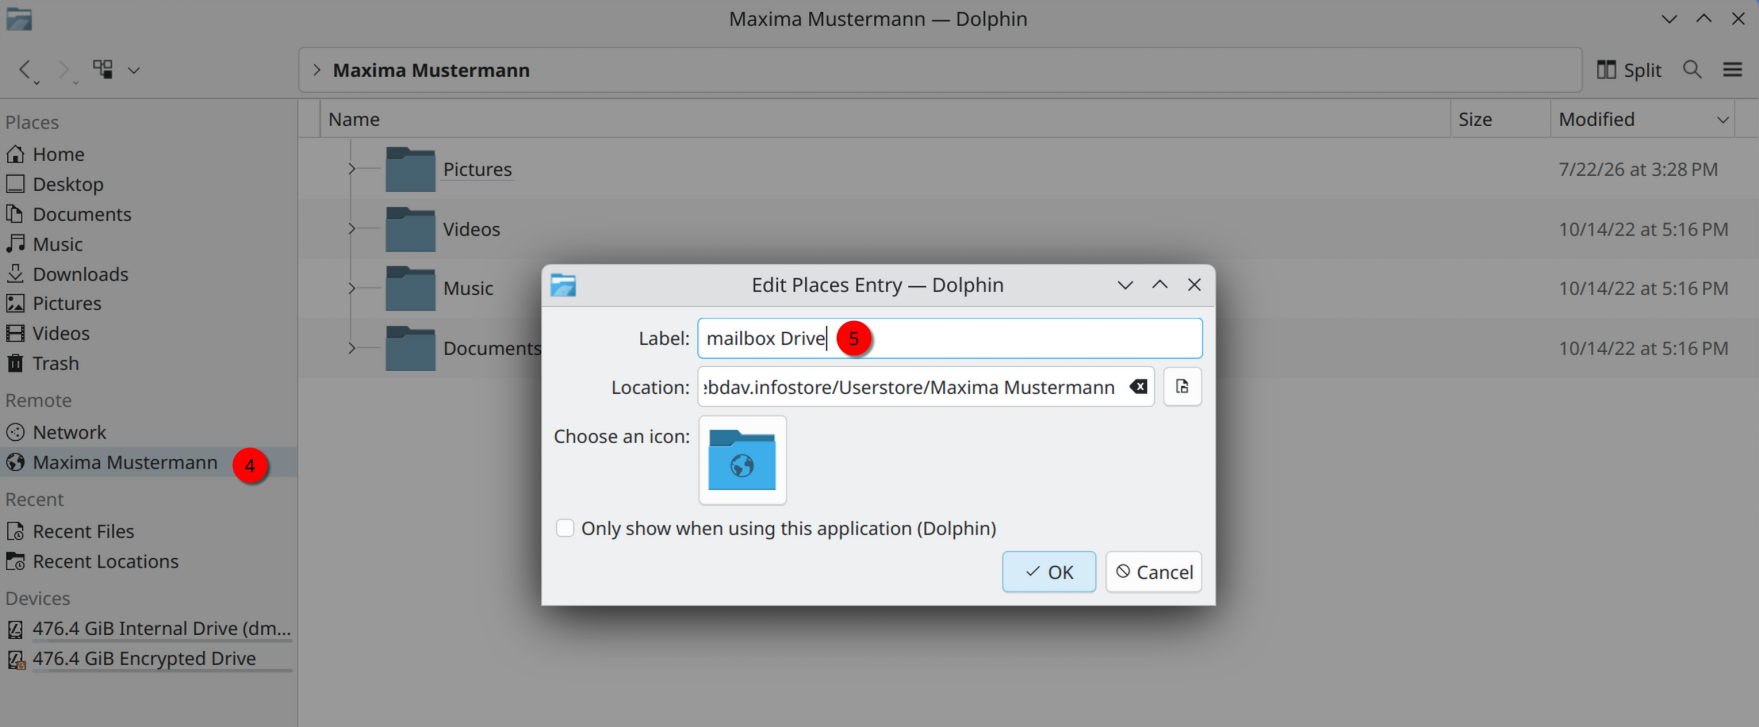
Rename bookmark
Done!
If your file manager looks like the image below, the WebDAV connection has been successfully established. You can now edit the files in your mailbox Drive using the file manager.
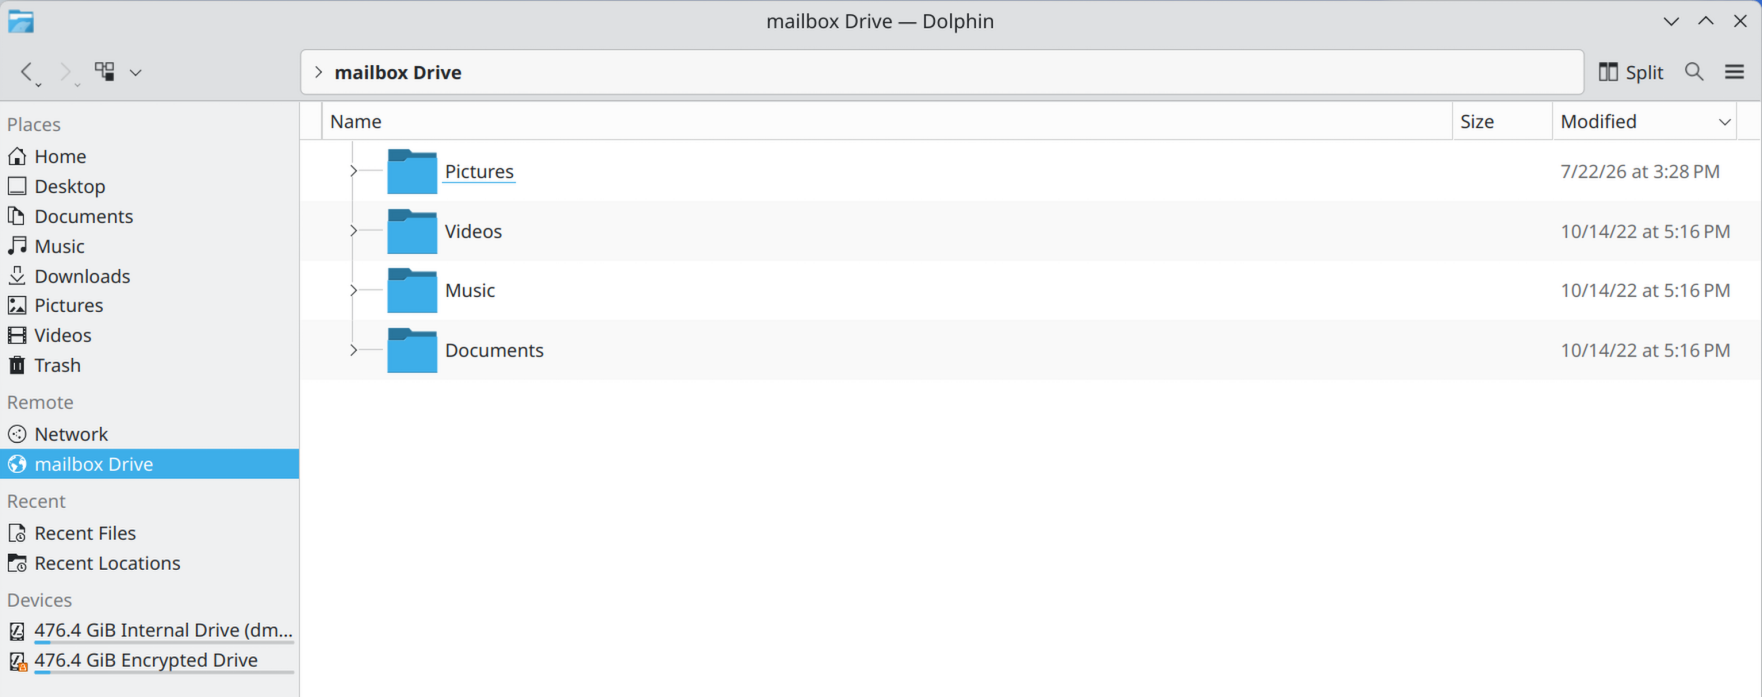
mailbox Drive successfully connected


