Setup CalDAV and CardDAV with DAVx⁵ on Android
Once you have enabled two-factor authentication, external applications such as Outlook, Thunderbird, DAVx⁵, or mobile calendar and contact apps can no longer access mailbox using your regular password.
To do so, you need to create an application password. Without enabled two-factor authentication (2FA), the use of application passwords is optional.
Sync your contacts, calendars and tasks with DAVx⁵ for Android
This guide explains how to set up your mailbox account in the DAVx⁵ app on an Android device. DAVx⁵ can help you synchronise your contacts, calendars and tasks between your mailbox account and your Android device. We cover both automatic and manual configuration.
Note: To synchronize your mailbox drive with your Android device, we also recommend using DAVx⁵. A future article, which will be linked here, will explain how to connect your mailbox drive to your Android file system via DAVx⁵ and WebDAV.
Prerequisites
Before starting the setup, ensure you meet the following requirements:
- An active mailbox account.
- The DAVx⁵ app installed on your Android device. You can download and purchase it from the Google Play Store to support future development, or install it via F-Droid (free off charge).
1. Automatic Account Setup
Automatic setup in DAVx⁵ is the fastest way to configure your mailbox account. The app automatically applies all necessary server settings for you.
Step by step
- Open DAVx⁵ on your Android device
- Tap + on the bottom-right to add a new account
- Choose
Login with email addressand then select continue on the bottom-left - Enter your email address and password
- Tap Login to start the automatic configuration process
- Choose "groups are per-contact categories" to minimize problems
- Choose what to synchronize
Note: If you are using your own domain with your mailbox account (e.g.
mail@my.own.domain.com) or the automatic setup fails, then you can manually set up DAVx⁵. Please enter the the URLhttps://dav.mailbox.orgwhile following the steps below:
2. Manual Setup
-
Tap
+on the bottom-right to add a new account -
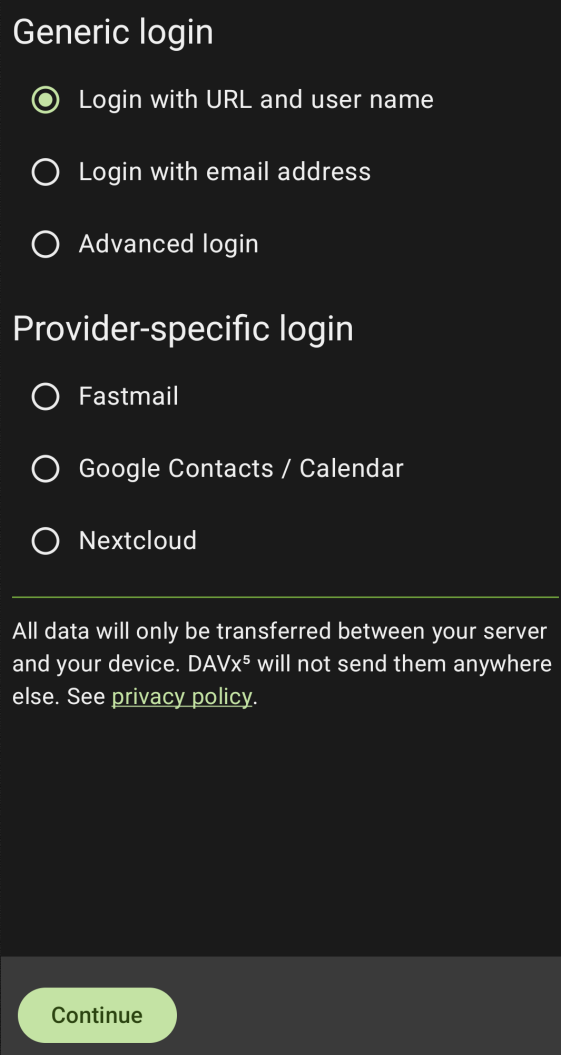
Choose
Login with URL and usernameand then select continue on the bottom-left

Figure 1: Choose `Login with URL and username`
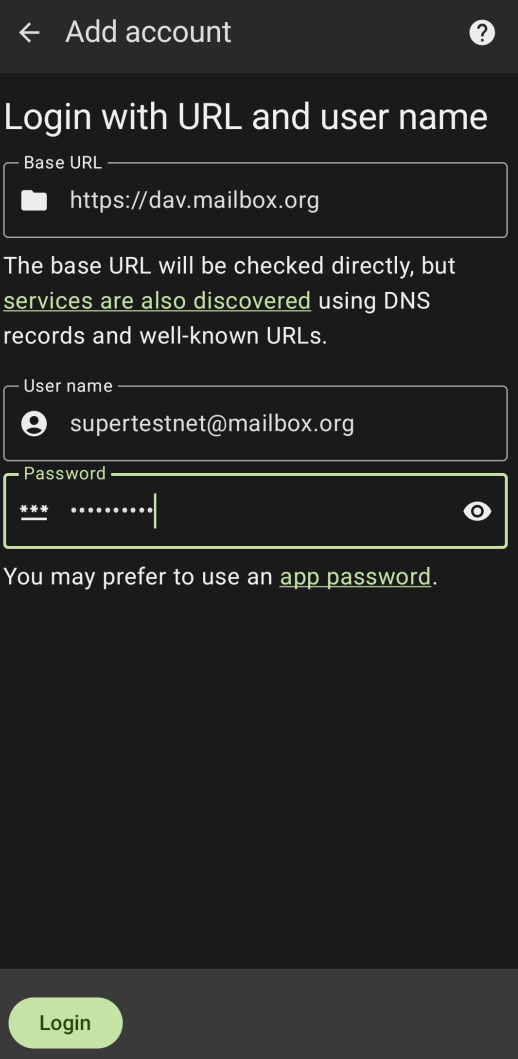
- Enter the URL
https://dav.mailbox.organd your email address and password

Figure 2: Enter the URL `https://dav.mailbox.org`
-
Tap Login to start the configuration process
-
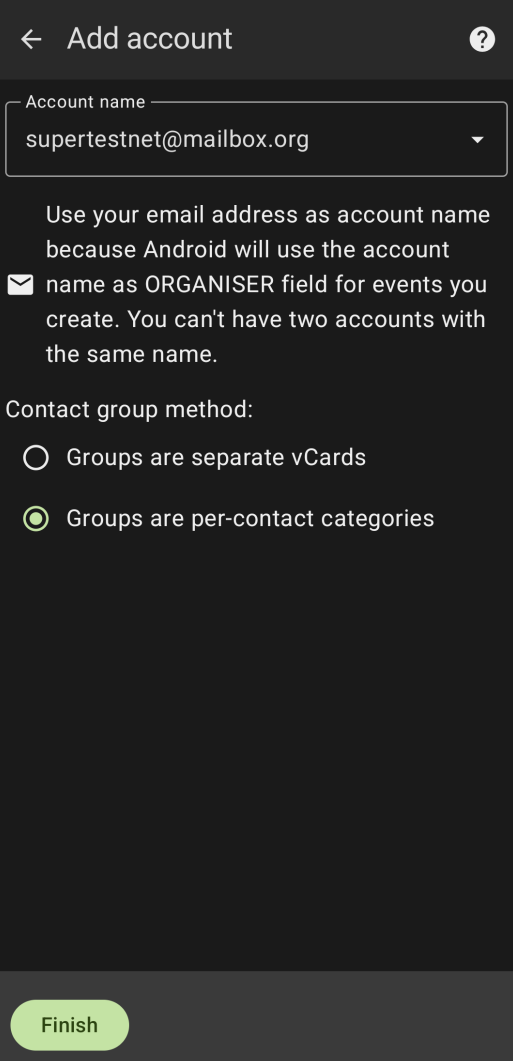
Choose "groups are per-contact categories" to minimize problems

Figure 3: Choose `groups are per-contact categories`
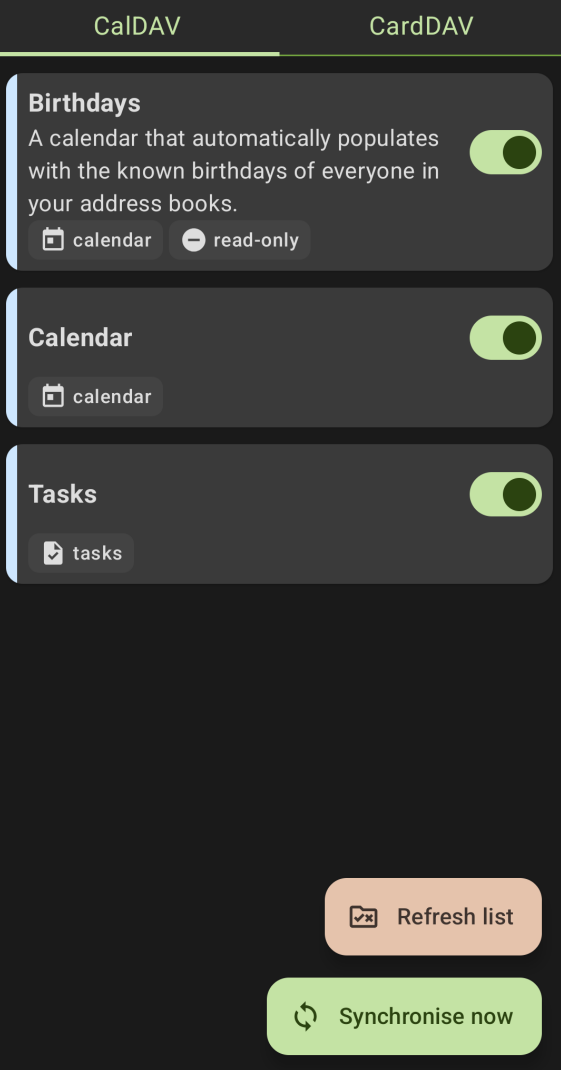
- Choose what to synchronize

Figure 4: Choose what to synchronize
Note: DAVx⁵ needs access to your calendar and contacts to sync with your email account.
