mailbox Business - getting started
Welcome to mailbox
After registering, there are a few steps required before you can fully use your account.
This article guides you step by step through the basic setup.
Basic setup
After creating your account, log in at https://setup.mailbox.org.
Your dashboard will initially look quite empty:
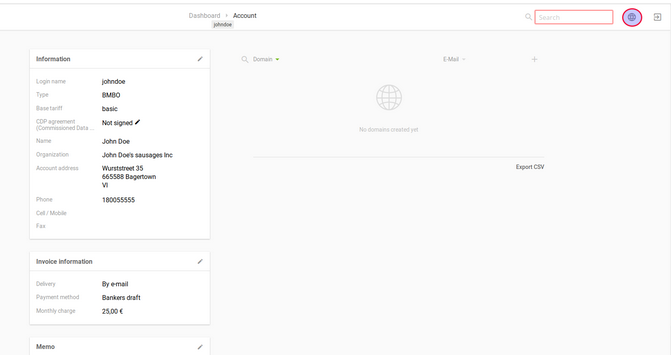
Figure 1: Initial dashboard after login.
1. First, your domain must be added and verified by mailbox-Business.
Click on the plus icon in the top right corner. You will then see the following screen:
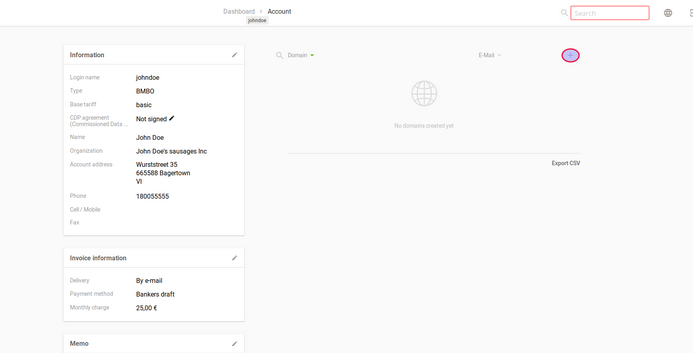
Figure 2: Add your domain.
2. Enter your domain on the righthand side.
After entering your domain, click on the Reload icon to the right of it and wait a moment. Your security key will now be displayed:
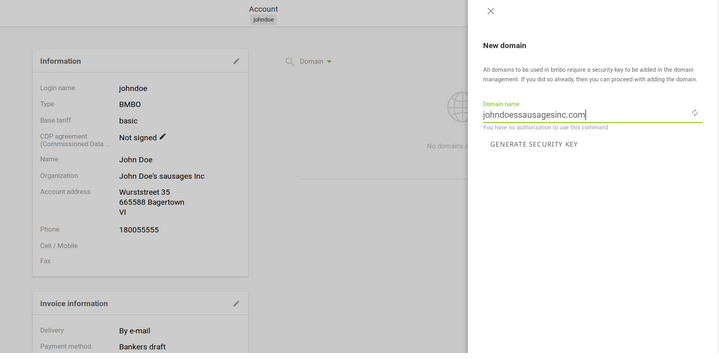
Figure 3: Security key is displayed
3. Add this security key as a TXT record. Keep in mind that domain management may vary depending on the provider. If you have problems setting the TXT record, your registrar's support team can help you.
Here is an example of how this looks with a Berlin-based domain registrar:

Figure 4: Example TXT record at a registrar.
Changes to DNS servers can take up to 48 hours to propagate worldwide. Further down in this article, you will find troubleshooting tips for storing the security key with your domain registrar.
4. Then return to mailbox-Business again and click Validate.
If everything went well, you should now see something like this:
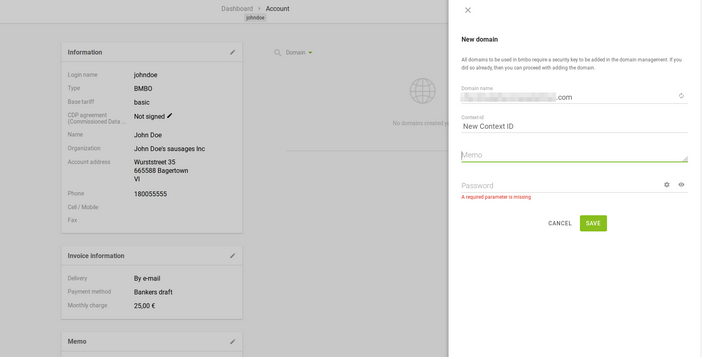
Figure 5: You will receive confirmation of validation.
If you receive an error message or nothing happens, repeat the validation at a later time (the TXT record set in the DNS remains valid).
5. Enter a password for the domain and then click Save. Your domain has now been added to mailbox-Business. Continue by creating an email account.
As soon as your MX records point to our servers Step 3, our systems will receive all emails for your domain. If the respective destination mail accounts have not been created with us beforehand, these emails will be rejected as undeliverable (User unknown).
Therefore: First create mail accounts, then change MX records!
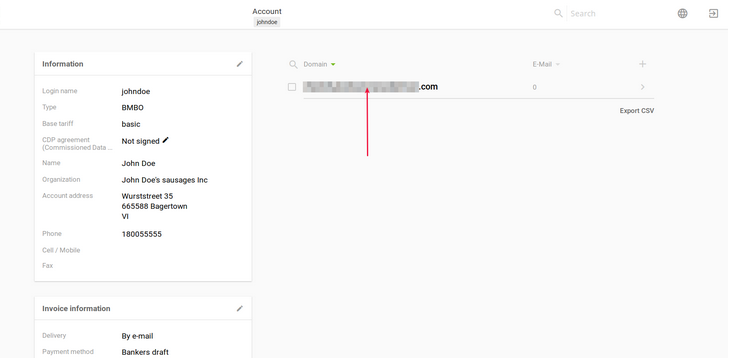
Figure 6: Domain overview with mail accounts.
Next, proceed in a similar way.
Click on the plus icon in the upper right corner:
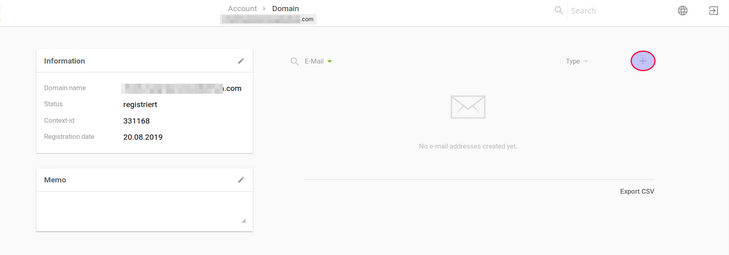
Figure 7: Create a new mail account.
Now enter the desired mail address as well as the first and last name of the mailbox user:
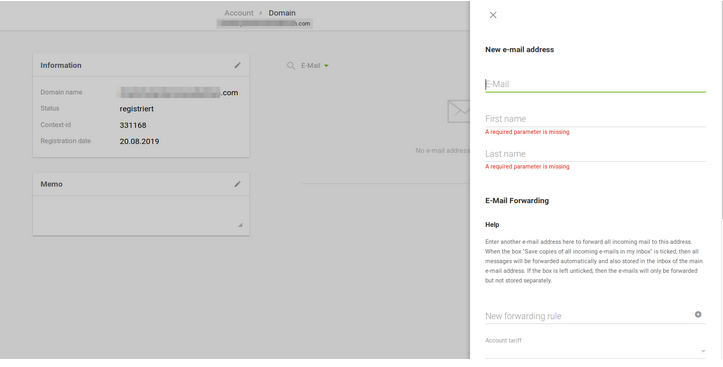
Figure 8: Enter the account details.
Select the desired plan for the mailbox.
The Drive storage of all members of a domain or groupware group is aggregated.
Each family member therefore benefits from unused storage space from others.
Note: This does not apply to mail storage or to the Light plan, since it does not include Drive storage.
Finally, set the password for the mailbox (scroll down if necessary) and click Save.
If everything worked correctly, you should now see the following:
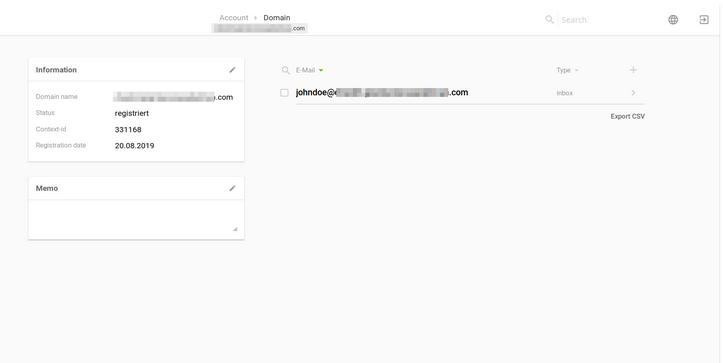
Figure 9: Overview of the created mailbox.
Of course, our API is also available to you.
You can find the documentation at https://api.mailbox.org.
Please also adjust the MX records in the DNS settings of your domain provider so that you can receive mails from outside sources.
You can find instructions here:
https://kb.mailbox.org/en/business/your-account-at-mailbox-org/how-to-register-a-domain
Note: We strongly advise against maintaining a long parallel operation with existing mail accounts.
Once internal mails are correctly delivered to the new mailbox, they will no longer be forwarded to the old one.
Internal mails are those sent from other mailbox addresses, including all Business and Private customers as well as our Support (Helpdesk system).
Create mail forwarding
Note: The option to set up forwarding only appears after you have started creating a mailbox. When you first click the plus icon, the “Forwarding” option will not be displayed. You must set up the forwarding via the admin account.
To create forwarding for a mailbox, proceed as follows:
- Open Admin Console | Mail | Mailboxes.
- Click the plus icon to create a new mailbox.
- In the form that opens, you will see in the Plan field the option to activate Forwarding.
- Enter the desired target address there and save the changes by clicking the plus icon.

Figure 11: Activate forwarding in the Plan field.
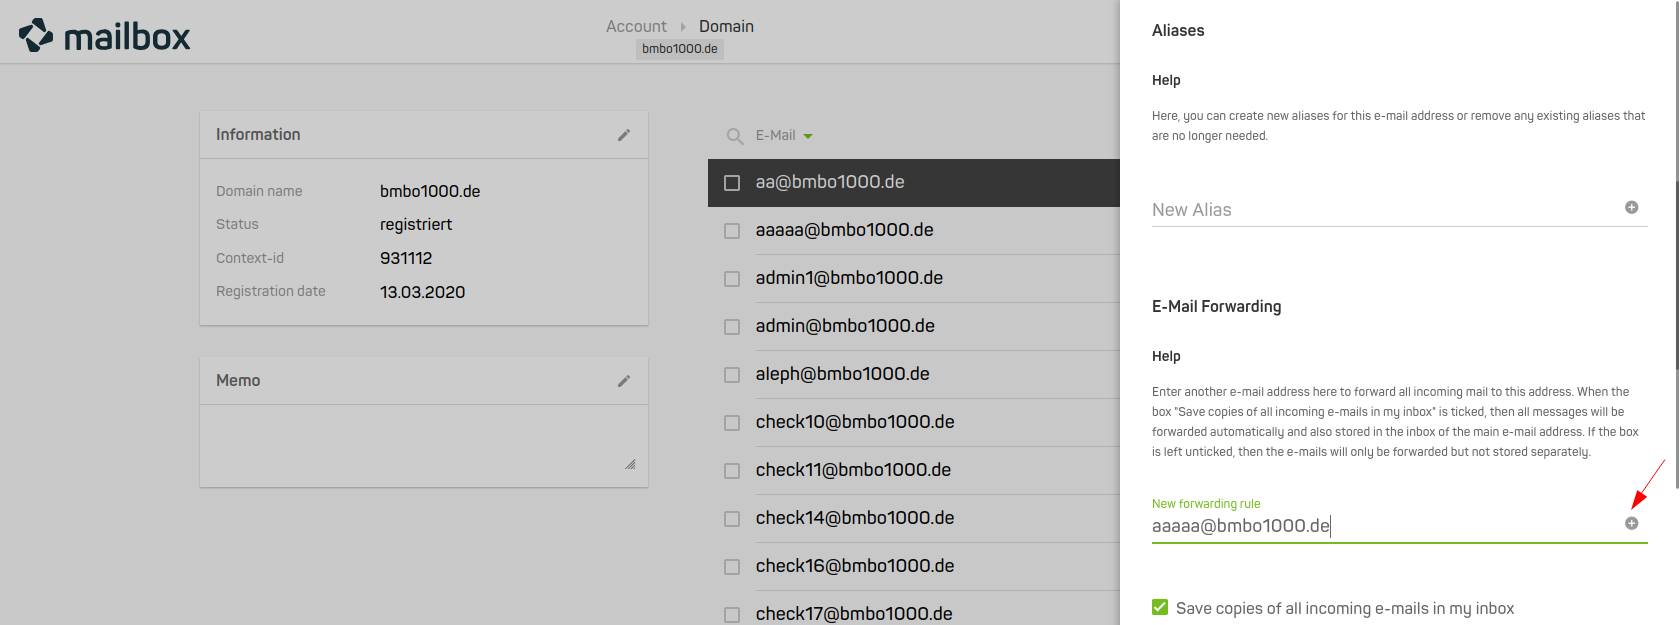
Figure 12: Activate forwarding in the Plan field.
Tip: You can edit forwarding at any time by opening the corresponding mailbox and adjusting or removing the option in the Plan field.
Additional settings
There are several additional settings specifically related to mailboxes that may be useful:
- Mail backup (disabled by default): Our servers automatically create backups of each mailbox. This service is free and available for all users in the Standard and Premium plans. Backups are retained for a maximum of six days and then replaced with newer ones.
- Blacklist (disabled by default): Each mailbox user can individually block senders. Messages from blocked addresses will be rejected.
- Spam & virus protection (disabled by default): The behavior of our spam filters can be individually configured. We also recommend reading the related article in the Knowledge Base.
- Password reset via SMS (disabled by default): This function allows you to enable password resets for mailbox users via a previously registered mobile number.
You can enable or disable these features either for an entire domain or for individual mailboxes.
The overall domain management view does not show the current feature status, but it is visible for individual mailboxes.
Domain-wide feature activation
To activate or deactivate one or more of the above features for an entire domain (or multiple domains), follow these steps:
- Select the domain for which you want to modify the settings.
If you want to apply the same settings to multiple domains, select all the desired domains. - Click Features.
On the next screen, select the desired options and click Save:
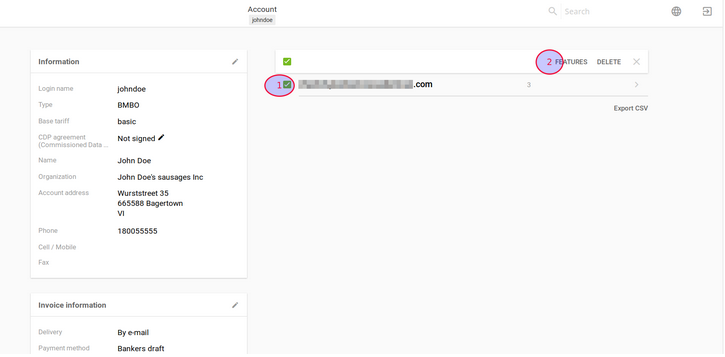
Figure 13: Activate features for a domain.
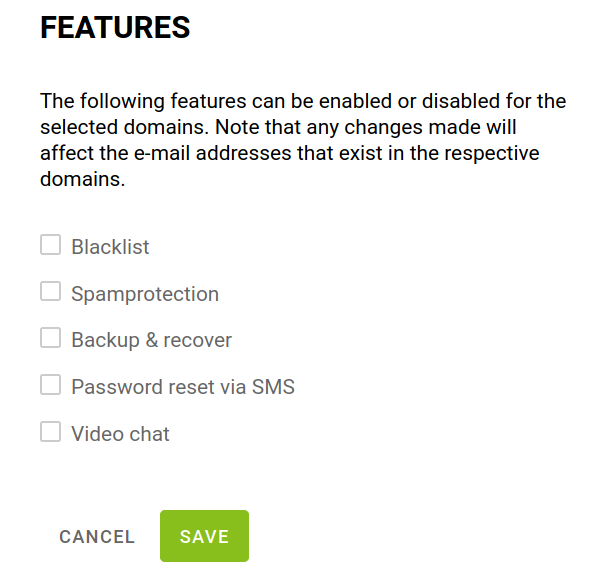
Figure 14: Activate features for a domain.
To deactivate features, simply uncheck the corresponding boxes and click Save again.
If you want to disable all features, click Save without selecting any checkboxes.
Feature activation for individual mailboxes
The process is the same, with one small difference:
Instead of selecting the domain checkbox, click directly on the domain name.
On the next screen, you will see all mailboxes of that domain.
Set the checkboxes for the desired mailboxes and proceed as described above.
Master data, service and support package
If you notice that your service and support package does not fit your needs, you can adjust it—along with your master data—at any time.
After logging in, click the pencil icon in the Information box:
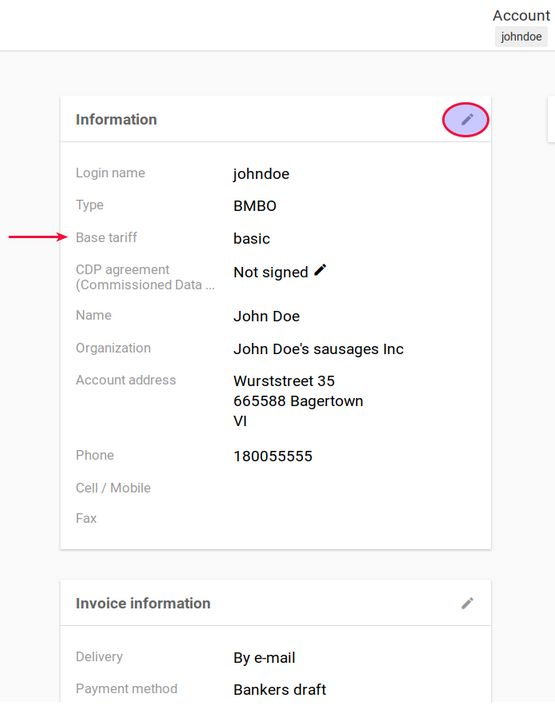
Figure 15: Edit master data and service package.
Price list
| Plan / Package | Price per month | Mail storage | Drive storage | Additional features |
|---|---|---|---|---|
| Light plan | €1.00 per user | 2 GB | – | Calendar & address book |
| Standard plan | €3.00 per user | 10 GB | 5 GB (extendable) | Calendar & address book, mailbox Office, mailbox Meet |
| Premium plan | €9.00 per user | 25 GB | 50 GB (extendable) | Calendar & address book, mailbox Office, mailbox Meet, extended support |
| Silver Package (Business) | €25 per month (up to 50 mailboxes) | – | – | Up to 50 mailboxes, 25 forwarding rules, Console, standard support |
| Gold Package (Business) | €75 per month (up to 250 mailboxes) | – | – | Up to 250 mailboxes, 75 forwarding rules, dedicated contact person |
| Platinum Package (Business) | €250 per month (unlimited mailboxes) | – | – | Unlimited mailboxes, 1000 forwarding rules, 24/7 emergency support |
